
FO Friday and New Pattern Release: Oscillation Scarf
I have a new FO to show off, and a new pattern!
And it’s (gasp) not a baby knit.
The scarf is part of the awesome Malabrigo Quickies program (small designs that take 1-2 skeins of Malabrigo yarn). You can check out the rest of the Quickies here on the Malabrigo website. There are some ridiculously cute patterns there.
We had fun trying to pretend I wasn’t 36 weeks pregnant in the photoshoot. I think we pulled it off rather well. The bump is kiiinnnd of present in the full body shots:
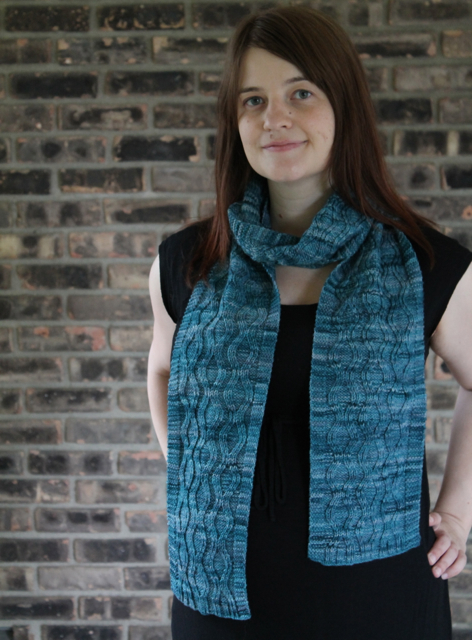 But I think you still see the scarf first and not just OMG baby!
The FO specs:
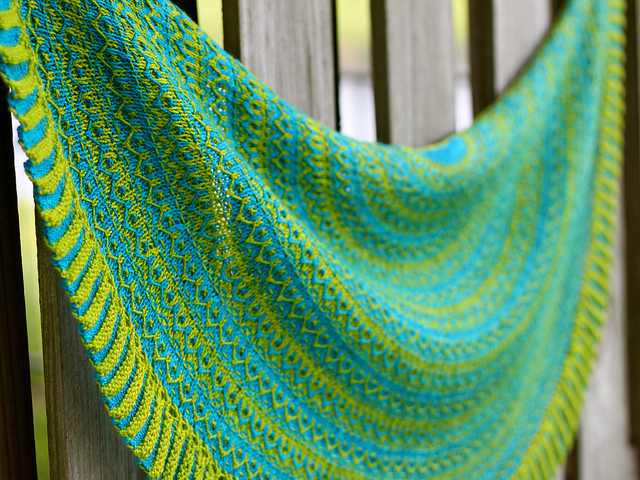
Pattern: my own Oscillation Scarf (Ravelry link), available to purchase for $4 US.
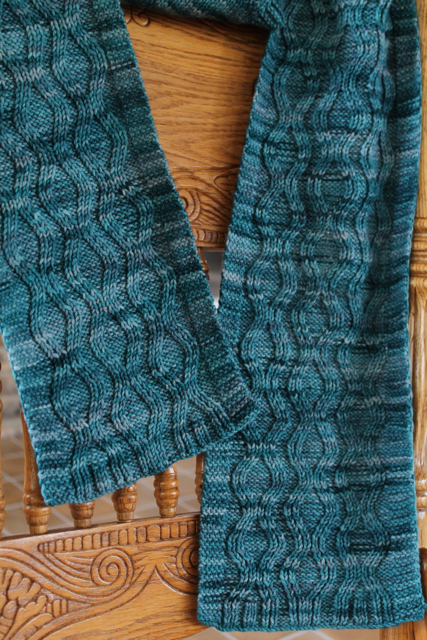
Yarn: Malabrigo Arroyo, two skeins in Reflecting Pool. Blue-green yarns are my Kryptonite, so I loooovee this colorway. My skeins were very different from each other, so I alternated every other row and twisted the yarns up the side. It looks neat and tidy in person, and you can barely see it in the photos, even the closeups:
 The combo of the winding cables and alternating skeins broke up the pooling you sometimes get with hand-dyed yarns quite nicely. I’m really happy with the way the colorway looks with the pattern!
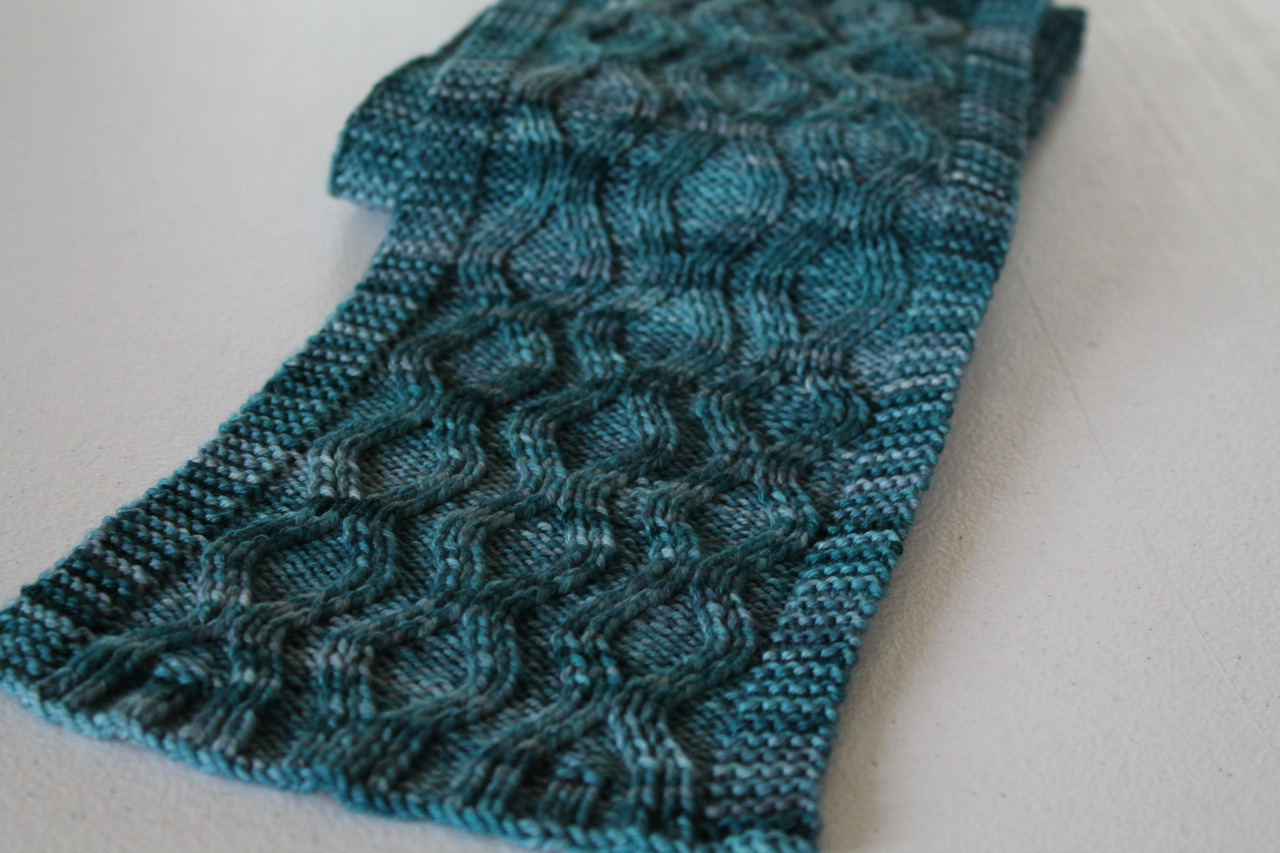
Notes: This is one of those sweet spot patterns: just interesting enough to keep your attention, but easily memorized so it makes great TV or travel knitting. A good chunk of this scarf was knit at the TNNA tradeshow while manning my booth or chatting (oops, still need to do a TNNA recap post!).
And now, of course, I’m back to baby knits. My little one is due in three weeks, so not too much longer until you get to see some modeled shots!
FO Friday: Baby Put Together
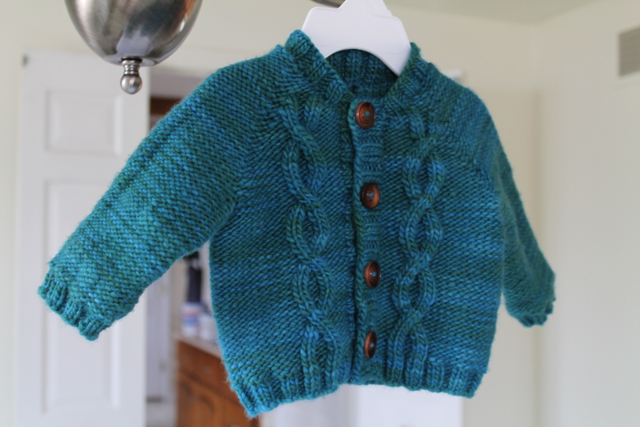
Continuing with the theme of baby obsession, here’s my newest FO:
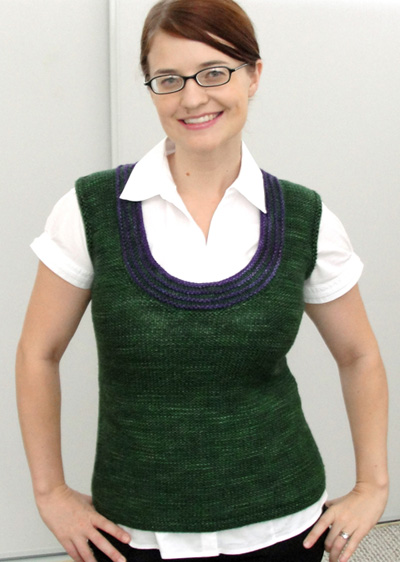
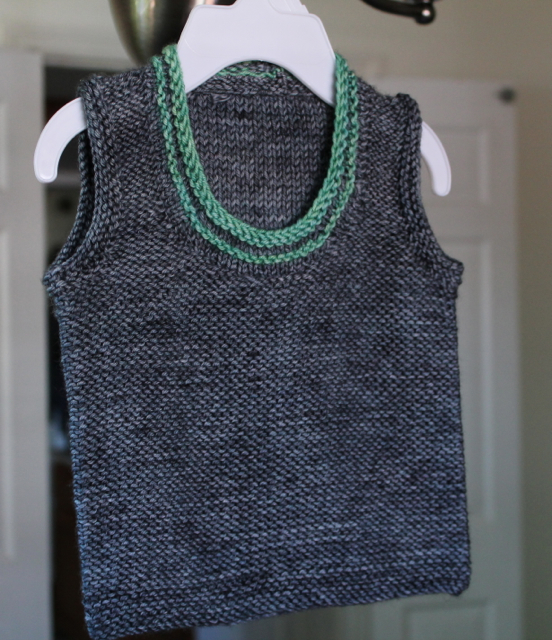 It’s a baby version of one of my first garment patterns, the Put Together vest:
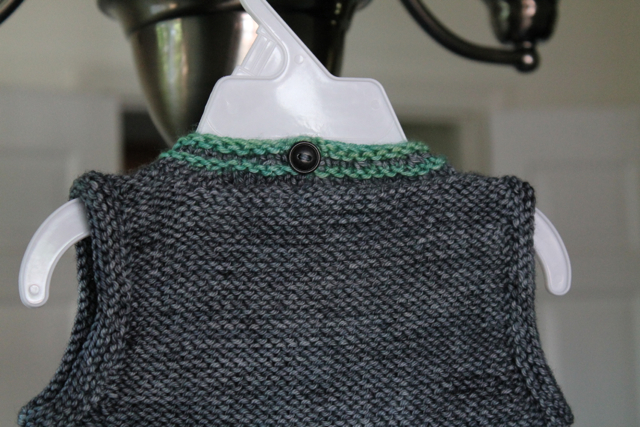
 The downsizing added some challenges, especially on the neck/neckband section. I had to rip out and re-knit the neckband five times to get the decreases right so it wouldn’t ruffle.

After all those decreases, I was a little worried about a giant baby head being able to fit through there, so I changed the neckband from worked in the round (as it was in the original) to worked flat with a button. I think it came out cute:
 The specs:
Pattern: my own, based on my Put Together adult vest.
Yarn: Madelinetosh Tosh DK in Dr. Zhivago’s Sky for the MC. I used less than one skein for a 3-6 month size! The contrasting color is some Tosh DK Twist I had left over from my Creme de Menthe vest.
As usual, working with Tosh was fantastic. It was nice to not have to worry about alternating multiple skeins, though. And I bought two skeins, so I have one left to play with!
Notes: I was aiming for unisex colors, and I think it worked out pretty well (okay, maybe it’s a little on the boyish side, but close). I can’t wait to see my little one in this!
Blog Week Day 7: Looking Back, Looking Forward 5KCBDAY7
Look back on last year’s Day Seven post. Did any of the techniques, ideas and hopes for the last 12 months that you wrote about ever make it onto the hook or needles?
One year from now, where do you hope your crafting will have taken you to? What new skills, projects and experiences do you hope you might have conquered or tried?
In my Day 7 post from last year , I was hoping to incorporate short rows, steeking, and the contiguous sleeve method into my designs by Blog Week 2014.
Well, I got one out of three. No steeking or contiguous sleeves, but I used short rows in three sweater designs last year.
They’re used to form the cap sleeves in Roanoke:
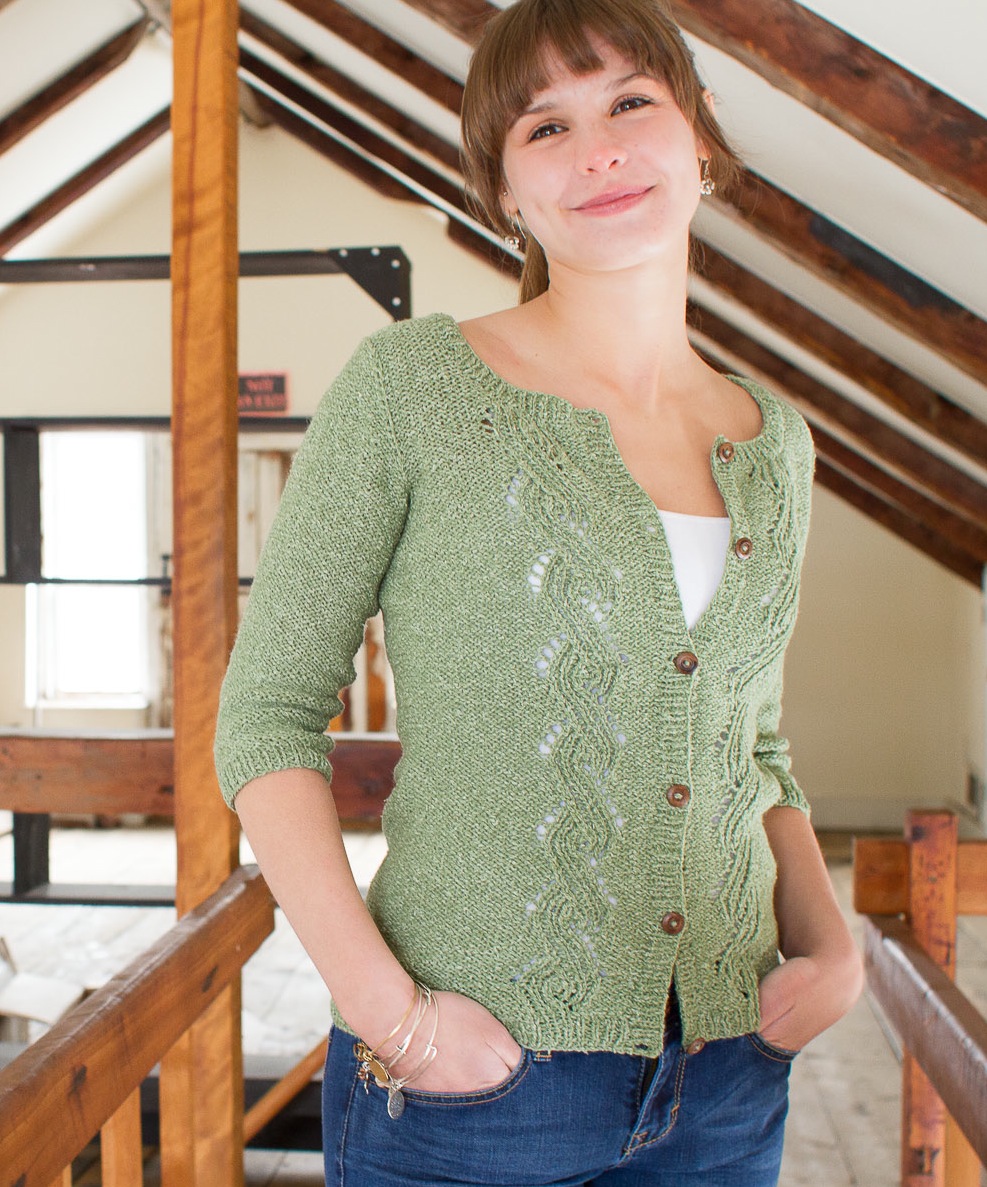
 And again for the sleeve caps on Basia (Ravelry link), a newly-released cardigan from Harrisville Designs (stay tuned for more about Basia later!):
 I also used short rows to form a snuggly shawl collar on a cozy long cardigan, but its release got delayed until this fall, so you’ll have to wait a while to see that one.
I do have an idea brewing for a steeked vest, so that may be coming up soon. I’m not sure about the contiguous sleeves, though… looking at them again, I’m not quite as much in love with this method as I was at this time last year.
As for goals, I’d like to release my first collection of baby/child garments and accessories this fall. I’ve got a good start on it already:
Here’s to another successful Knitting and Crochet Blog Week! Like the past two I’ve done, it’s been a little challenging to blog every day, but also fun to think outside my usual blogging box. It’s also fascinating to look back on the posts from previous years and see how far I’ve come as a crafter and a designer. I’m interested to see where the next year takes me!
Blog Week Day 6: Views of Others, Views of Yourself 5KCBWDAY6
Write about another knitter or crocheter that you admire.
After TNNA a few weeks ago, I was overflowing with admiration for my fellow knitting and crochet designers. Most have families, many have day jobs, and all have obligations, but they still manage to produce beautiful, quality patterns for others to enjoy. It takes a lot of dedication and love of the craft!
I was at the show exhibiting through my print pattern distributor, Stitch Sprouts, so I got to chat and hang out with several other Stitch Sprouts designers. Since I can’t pick just one, I’m going to show you my favorite designs from a few of them.
First up, Corrina Ferguson of PicnicKnits. She designs, among other things, stupendous lace shawls. I’m in awe of this one in particular, which I got to see in person at the show:
This is Biellese (Ravelry link):
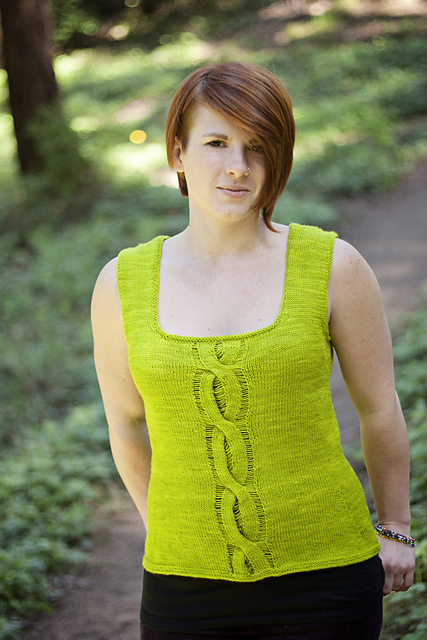
 Next there’s Katherine Vaughan. She has a great mix of accessories, baby knits, and garments in her portfolio. I got to see this lovely tank top design at the show before its official release (it’s since gone live on Ravelry–check out May Dance!):
 Heather Zoppetti, the creative wizard behind Stitch Sprouts, is also highly talented designer (although I honestly don’t know how she finds any time to do it–I think maybe she’s figured out how to clone herself).
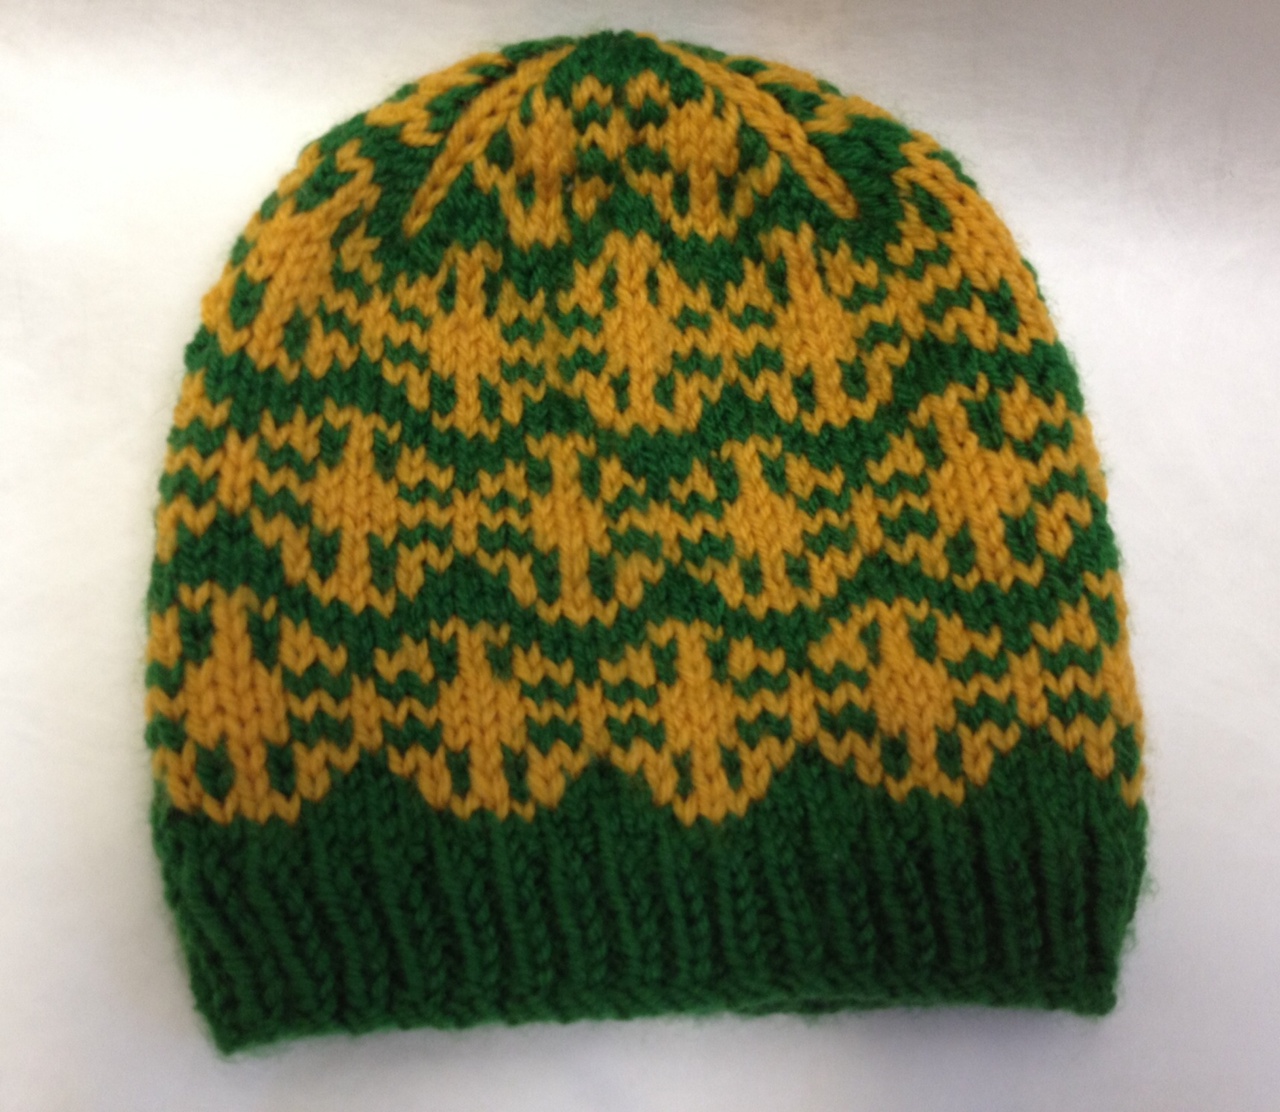
Here’s one of her new designs, Tulsi. I love the colorwork:
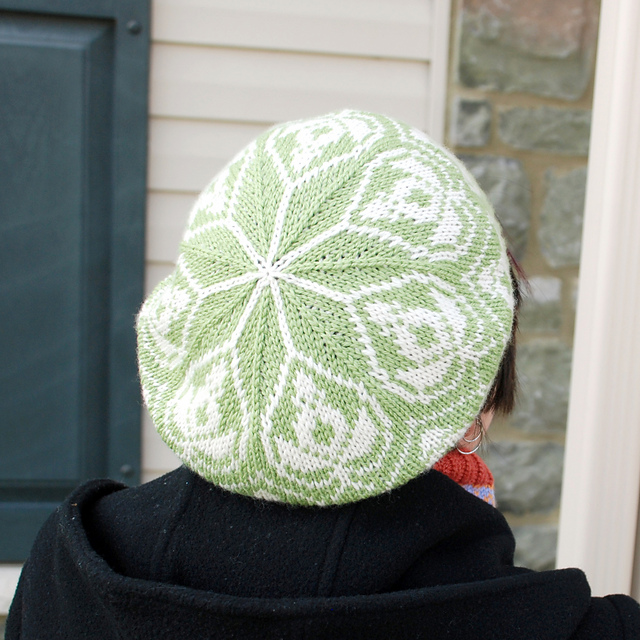 The other cool thing is that this hat is knit in a brand-new yarn, Stitch Sprouts Yellowstone (DK weight, 80% wool, 20% silk). I got to fondle it at the show and let me tell you, it’s dreaaammmy. I may, without admitting anything, have picked up a few skeins for a colorwork hat/mitt design of my own.
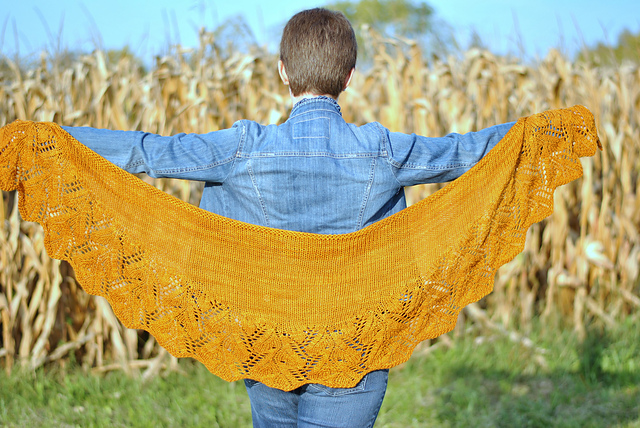
Finally, there’s Mindy Wilkes. Mindy specializes in clever lace shawls, and I love that she doesn’t just stick to one weight of yarn. Harvest Moon, one of my favorites, is knit with a worsted weight yarn, Tosh Vintage (which, if you’ve been following this blog for a while, you know is probably my favorite yarn ever):
 In the interest of space, I won’t gush about all of the Stitch Sprouts designers (although I will mention that Andrea Rangel, Stephannie Tallent, and Lindsey Stephens of Poetry in Yarn all have some awesome designs I got to ogle at the show too). But let me just say that I left the show feeling inspired (and frankly, a bit humbled) by all the talent.
Blog Week Day 5: Something a Bit Different 5kcbwday5
You know what I’ve never done? A knitting photo tutorial. I use them all the time, and I love blogs that have them, but I’ve never taken the time to do a clear sequence of photos that show a technique.
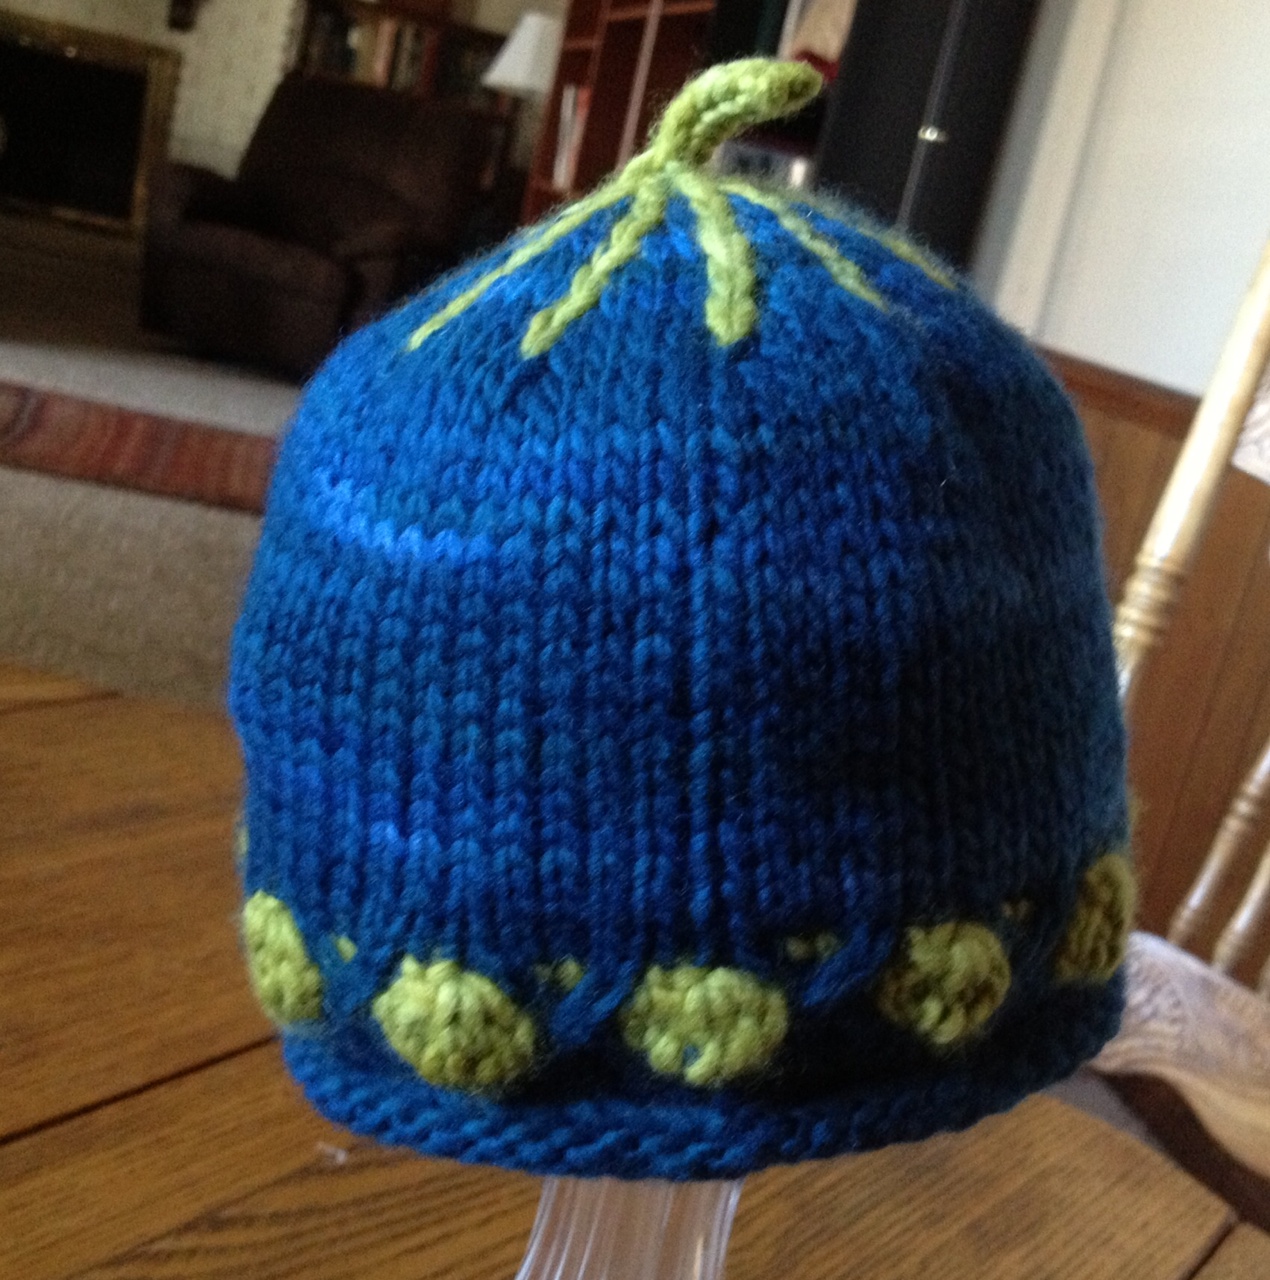
Below is my first-ever knitting photo tutorial. It’s the Daisy Pattern I used in my Daisy Cloche and Daisy Mittens. It can be a little tricky to work, and I’ve had a few questions about it, so I thought it would be perfect for a tutorial.
Warning: photo heavy post ahead (but I bet you guessed that!).
DAISY STITCH TUTORIAL
Round 1: To begin, I cast on a number of stitches for a swatch and purled the first row as it states in the pattern (note: the Daisy Cloche and Mittens are worked in the round, but I worked my swatch flat. The technique is the same–just ignore the extra strands behind the swatch).
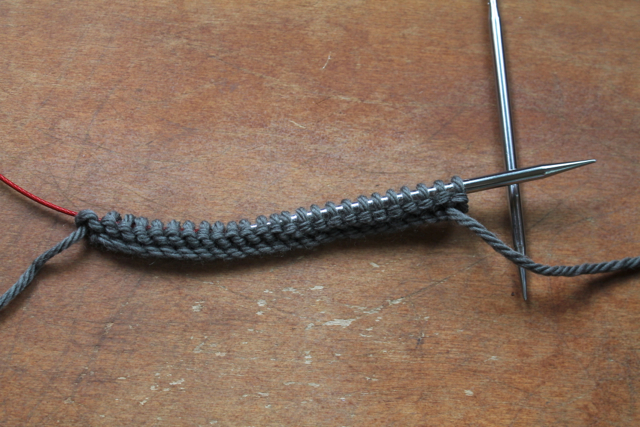 Round 2: The next step says to k1, then k the next stitch, wrapping yarn three times around the needle instead of one.

 See the three wraps around the right-hand needle where you would usually have only one? Don’t worry if it looks messy–that will be fixed later.
Work four more stitches like this: Continue along the rest of the stitches in this manner, working a knit stitch between each group of five triple-wrapped stitches. Here’s what it should look like when you’re done:
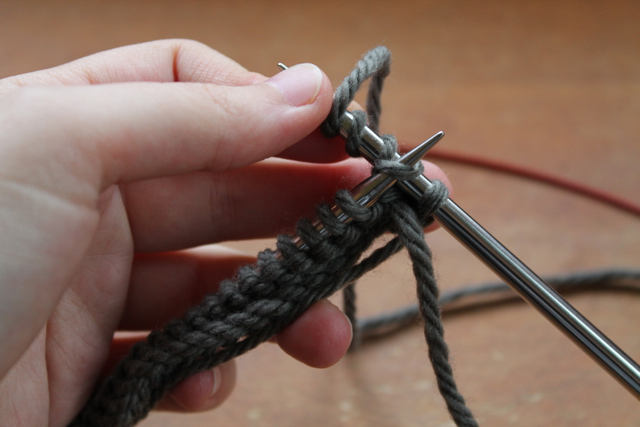
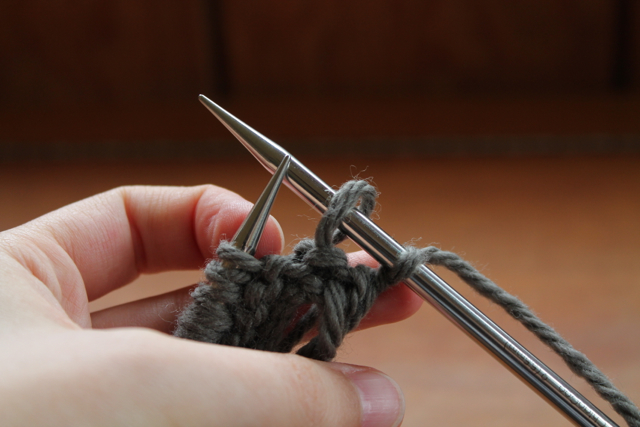
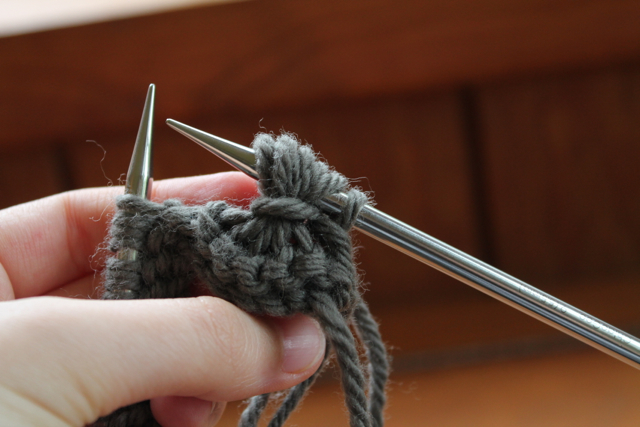
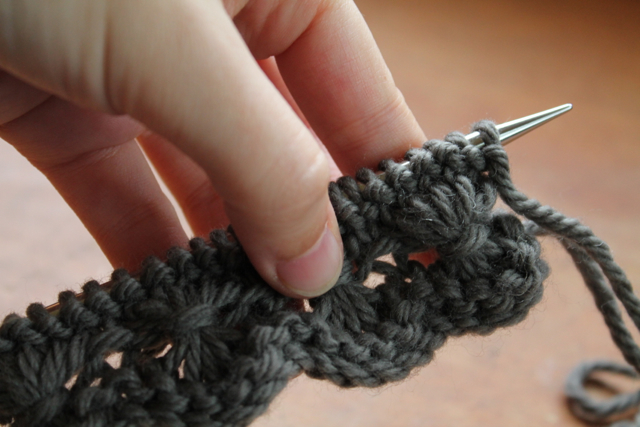
 Round 3: Now the fun begins! Start by purling the first stitch:
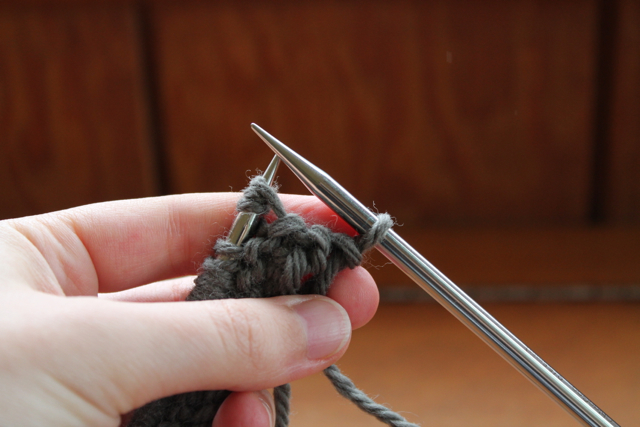 Now slip the first triple-wrapped stitch from the left hand needle to the right hand needle, letting the extra loops drop off so the stitch gets elongated. It should look like this:
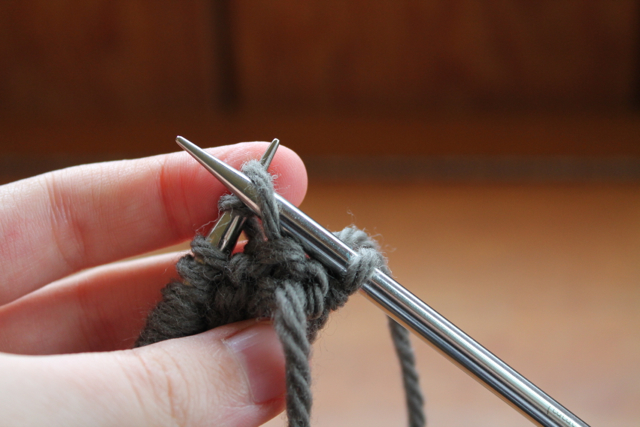
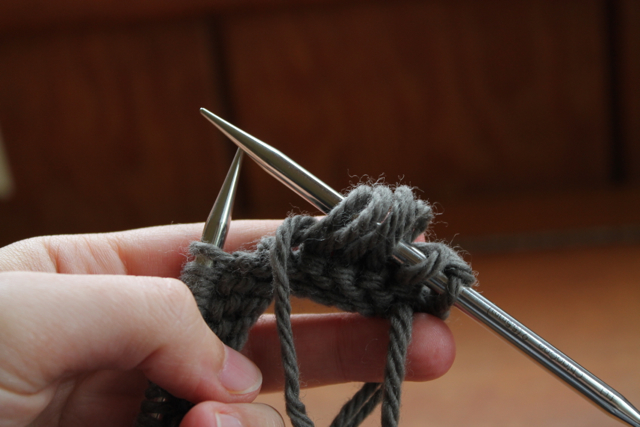
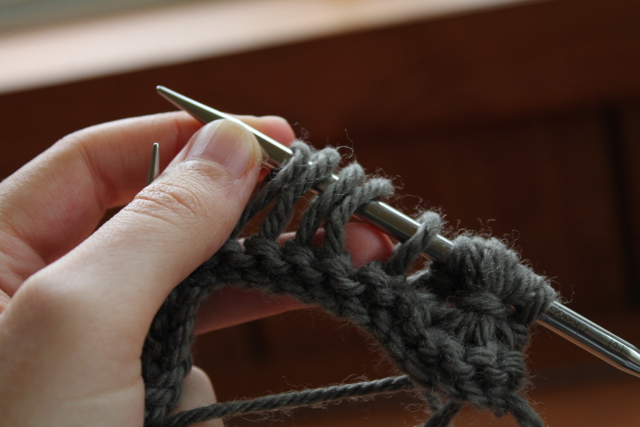
 Repeat for the next four stitches. Here’s what it should look like when you’re done with all five:
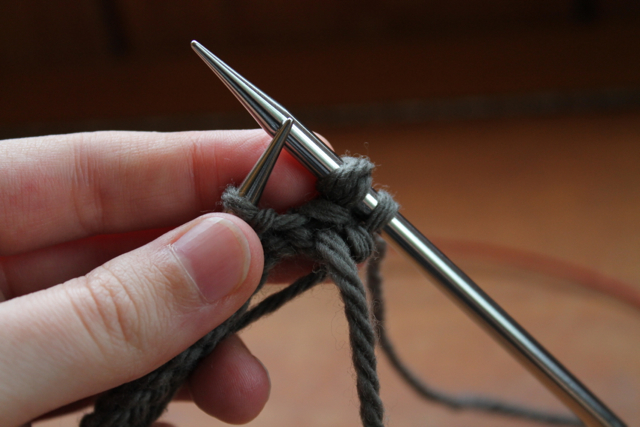
 Now we’re going to begin the wrap. First, take the working yarn and move it behind the elongated stitches, through the middle of the needles:
 Then slip the five elongated stitches back to the left hand needle, bringing the yarn around the front and through the middle of the two needles again:
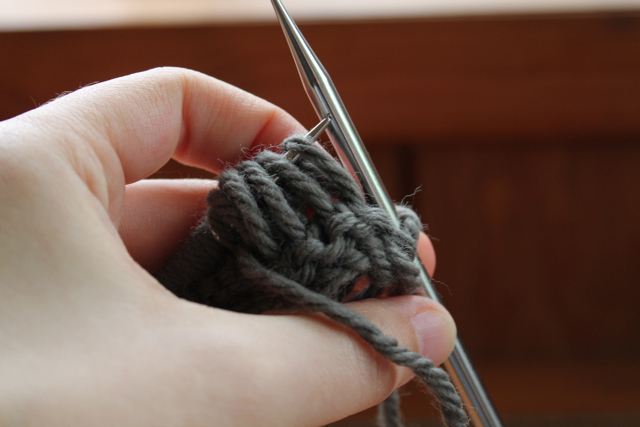
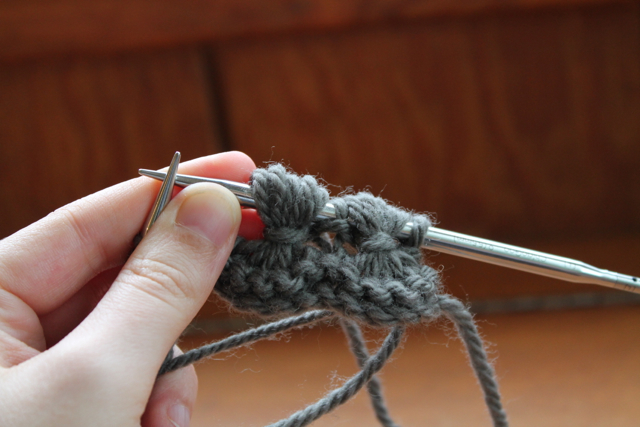
 Repeat these steps by slipping the yarn back to the right hand needle, wrapping the yarn around a second time, and slipping them back to the left hand needle again. When you’re done, you should have two wraps of yarn around the bundle of elongated stitches and it should look like this (pull the wraps snugly so they cinch the sts together):
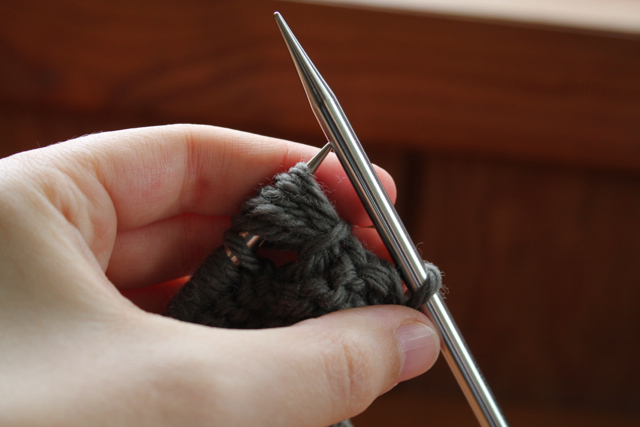
 Repeat these steps (including the purl stitch between bundles) the whole way across your stitches.
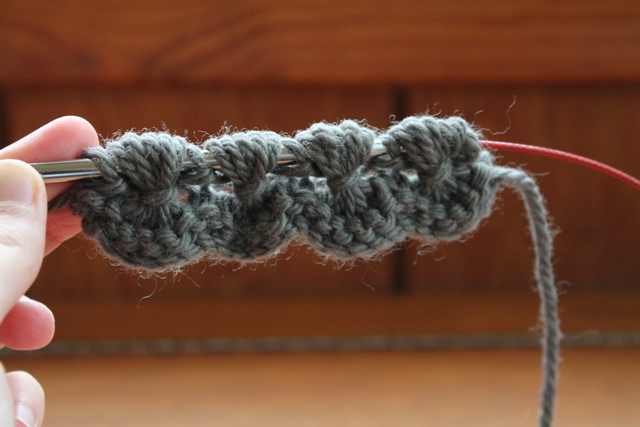
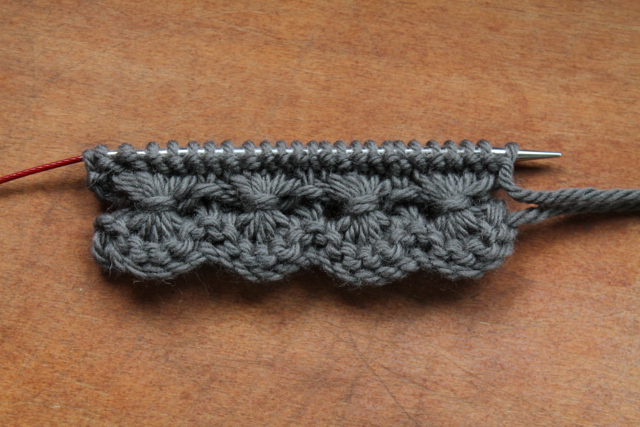
Here’s what the row should look like when you’re done. See how the pattern creates the nice scalloped edge?
 Rounds 4 and 5: These are simple enough: knit one round, then purl one round. Here’s what it looks like when you’re done:
 Notice that the wraps are a little off-center. That’s okay–all you have to do is push them up with your finger (they’ll stay where you put them):
 Voilà: the finished Daisy Pattern!
Blog Week Day 4: Conversations Between Workers 5KCBWDAY4
Write a few short paragraphs from the point of view of one of the tools you use for your craft. Then, write a dialogue between yourself and this item.
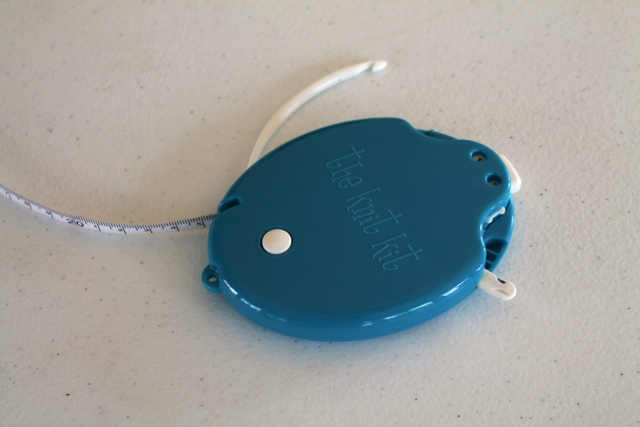
I may look unassuming, but I’m actually the most vital and important item in Triona’s knitting arsenal.
 Before I came along a few years ago, this is what her notions bag looked like:
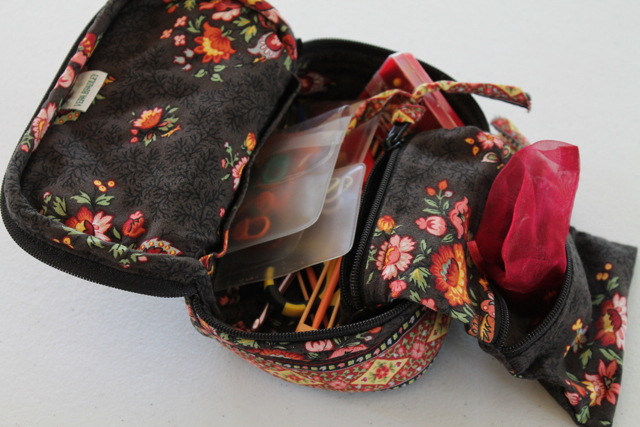 Pretty horrific, huh? You should have seen her root through there every time she needed a stitch marker, yarn needle, or tape measure.
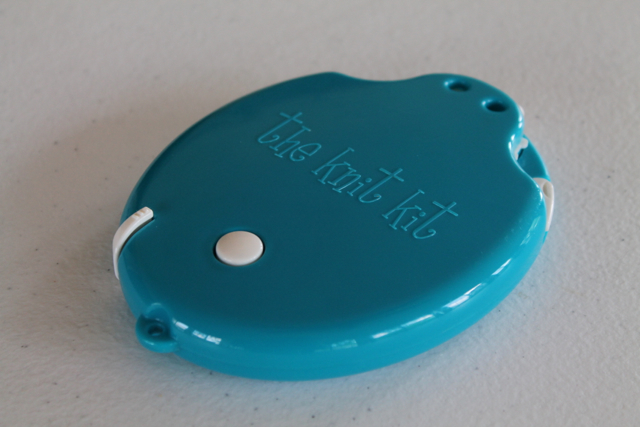
Not to toot my own horn too much, but I’m awesome. I have a tape measure, crochet hook for picking up dropped stitches, row counter and yarn cutter… and that’s before I’m even OPEN.
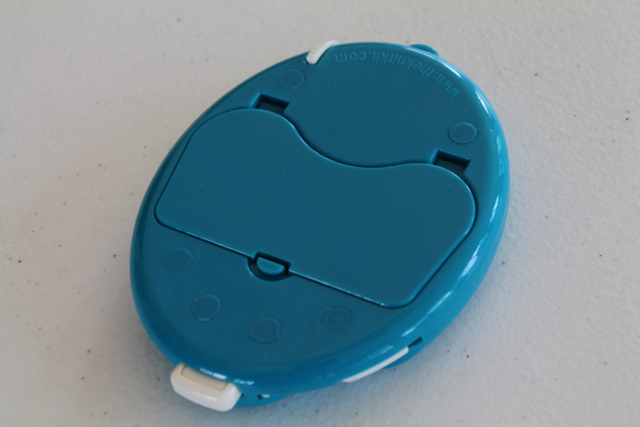
 Inside, I’ve got room for every common notion a knitter needs:
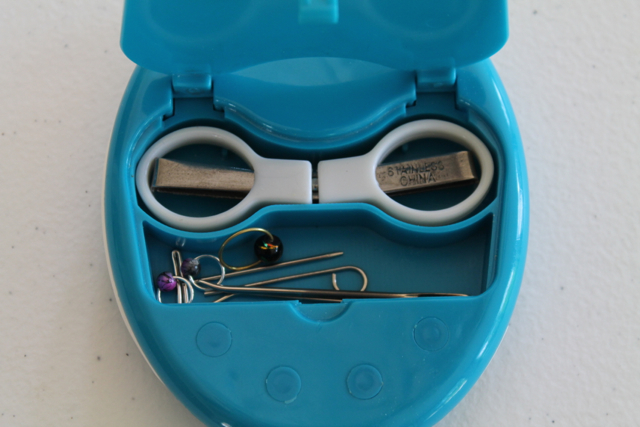
 I mean, really. It doesn’t get much better than that.
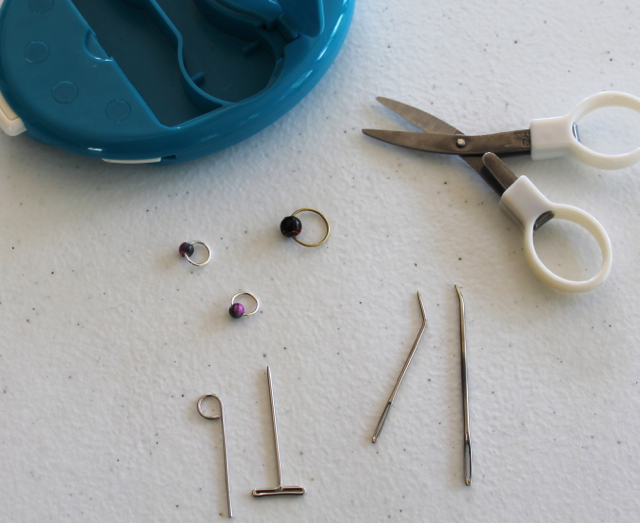
Triona: Okay, hang on. I’m stepping in here. I know you think you’re the greatest knitting tool in the universe, but I think you’ve forgotten one important fact. I replaced almost all your inside contents with my own stuff within a month of getting you.
Knit Kit: Hey, it wasn’t my fault that I came with an inferior yarn needle, stitch markers, and point protectors. Or that my creators didn’t assume you would be using interchangeable needles and would therefore need tightening keys. My awesomeness still stands.
Triona: All right, I’ll give you that. Having a small, compact container to throw in my knitting bag when I travel has been pretty amazing.
Knit Kit (smugly): I’ve been to Rome.
Triona: Don’t push your luck, KK.
Blog Week Day 3: Experimental Photography 5KCBWDAY3
Experimental Photography And Image Handling For Bloggers: Refresh your skills at creating attention-grabbing pictures.
For today’s Blog Week topic, I decided to tackle some photo editing.
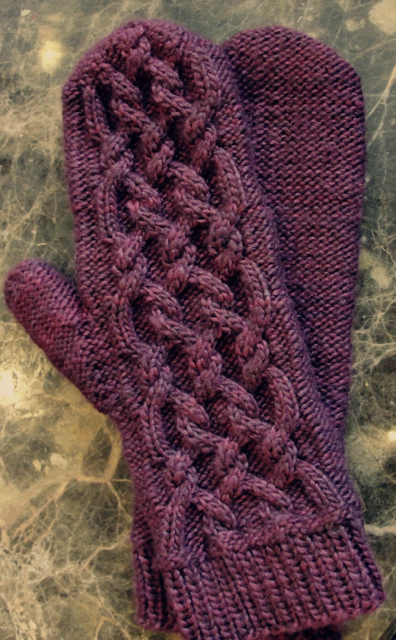
Below is one of the original, unedited pictures I took of my Morgandy Mittens pattern. I love, love, love the mittens, but I never really felt like the pictures showed them off to their best advantage.
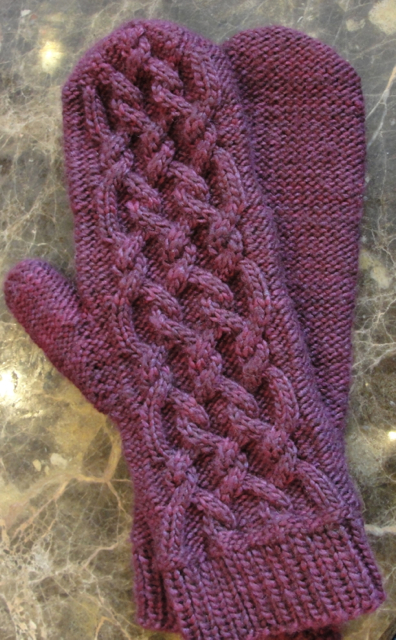
Original
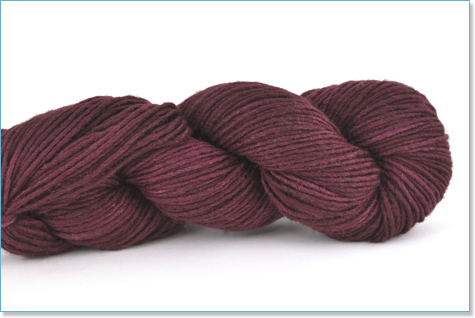
As you can see, the color of the mittens looks kind of washed out and flat, and the yellow table background is distracting. The actual yarn (Manos Silk Blend in Bing Cherry) is a luminous, multi-toned purple-red color. Not flat at all!
I went looking for an accurate depiction of it somewhere online and had a lot of trouble finding one. Looks like I’m not the only one whose camera has trouble with reds! This picture, from retailer Eat.Sleep.Knit., is the closest one I found:
 First, I tried my quick and dirty method of photo editing: using the tools in iPhoto to tweak exposure, colors, and contrast. After a few minutes, it looked slightly better:

with iPhoto treatment
Also kind of fluorescent. Not the best look. So I imported the photo into Photoshop to try some more powerful tools. I’m not great with Photoshop, and I only know how to use about 5% of the things it can do, but sometimes I can get good results by messing around for a while to see what looks good.
Here’s the result of tweaking levels and selective color on the original photo:
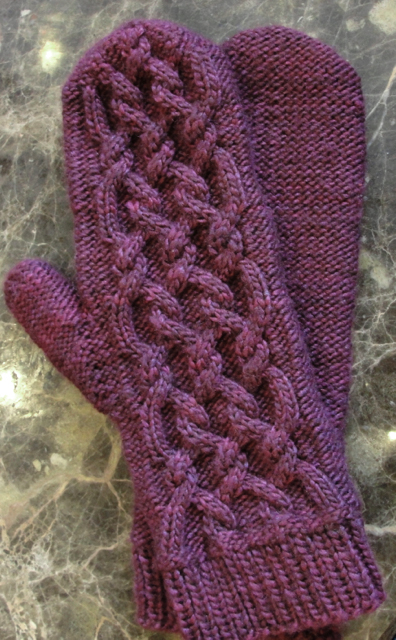
with Photoshop treatment
Maybe a little better… but still not great (although we’re getting closer to the actual color, so that’s good).
Now I decided to pull out the big guns. One of the best things I discovered a few years ago was Photoshop Actions. These are sequences of layers and filters that people put together to create certain effects and then put up online for free or sale. You click one button and everything gets applied to your original photo, and then you can adjust the layers to get the exact look you want. (I gushed about Actions in this blog post if you want to read more about them.)
Some of the actions I have obviously weren’t going to work for this picture (like the ones to bump up the reds), but I found several that I liked! All the actions below are from the Timecapsule Set by Nelly Nero.
with “Woodstock” action – I like the vintage-y look!
With “Milk” action
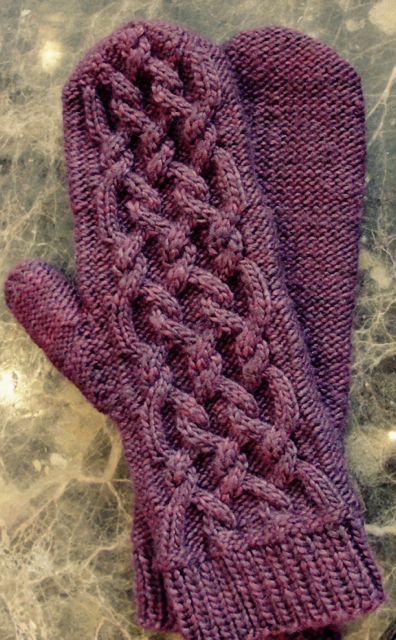
And my favorite of the bunch:

with “Mandolin” action
The colors are very close to the actual mittens and the yarn no longer looks flat and dull. Plus, I think the cables show up a lot better than they did in the original.
I’m calling this one a win!
Blog Week Day 2: Dating Profile 5KCBWDAY2
Write a dating profile for one of your past finished projects.
Introduction: Mature, well-loved blanket seeks people who like to cuddle.
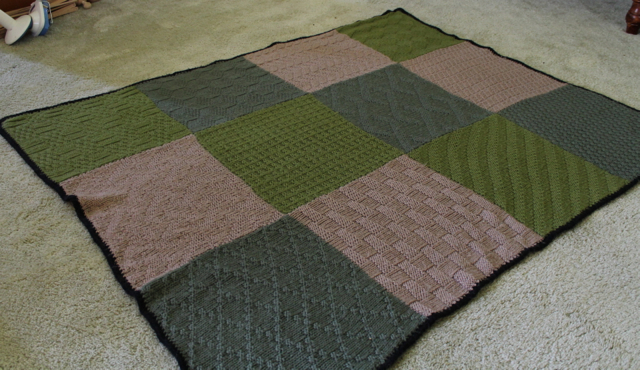 I was made all the way back in 2006 when my creator had less than a year’s knitting experience. She heard her beloved Mission Falls 1824 Wool was being discontinued and snapped up twelve skeins on clearance.
And okay, Mission Falls doesn’t necessarily hold up so well over eight years of heavy use and many trips through the washing machine and dryer.
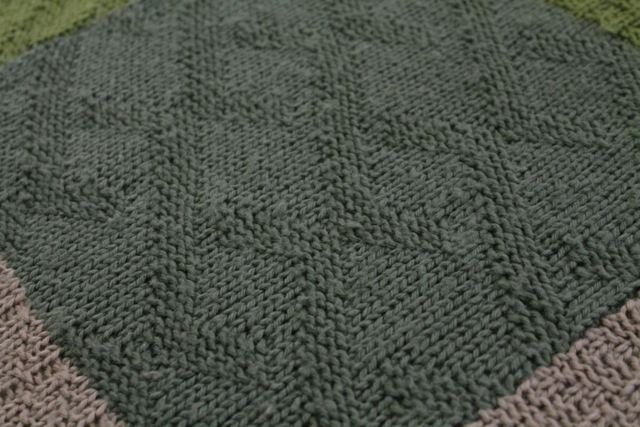 Character. I have lots of character.
Interests: I was created over a period of about a month as my knitter discovered what would become her favorite show, Stargate SG-1. So now my friends call me the Stargate blanket.
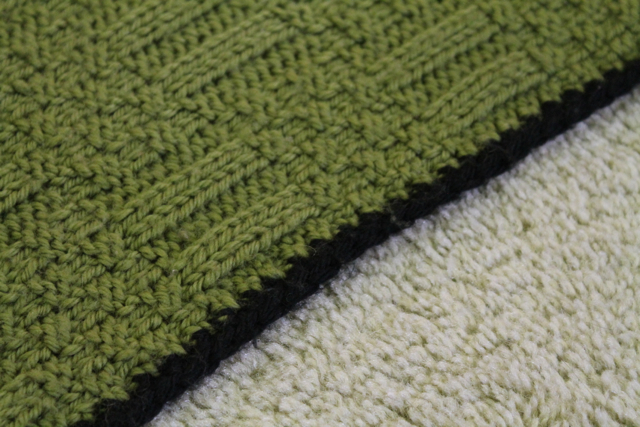
I also have a fondness for crochet, since my knitter learned how to crochet to make my edging:
 Dislikes: Now, I wouldn’t say I dislike this guy exactly:
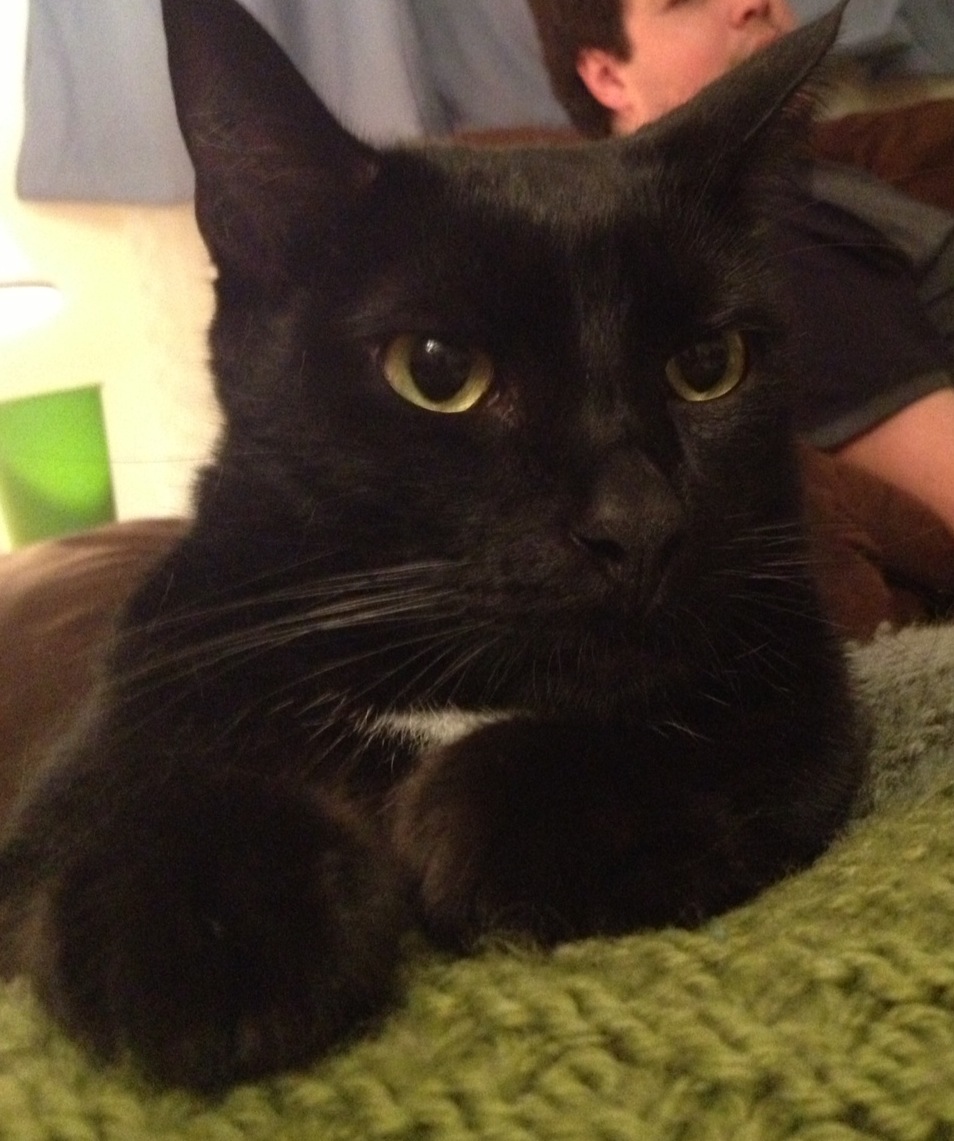 But when he gets too comfortable, the kneading can get out of control. I’m just saying.
The Future: I have a sneaking suspicion that I’m going to be getting pretty cozy with the new baby arriving in a few months. I’m soft and just the right size for floor time and snuggling.
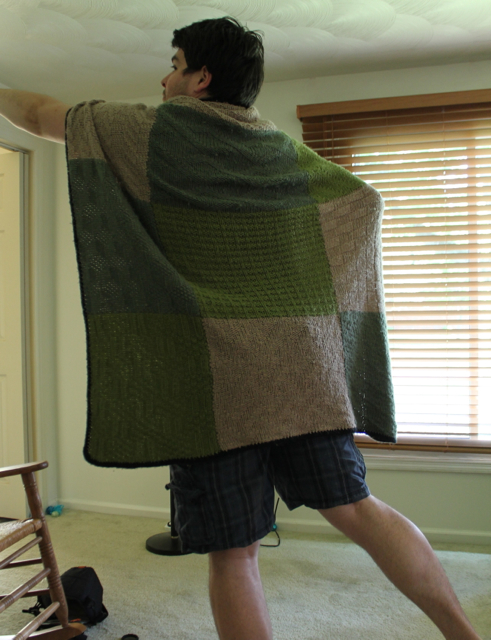
Plus I have it on good authority that I make a pretty good superhero cape:
Blog Week Day 1: A Day In The Life 5KCBWDAY1
Describe a day in the life of a project that you have made, or are in the process of making.
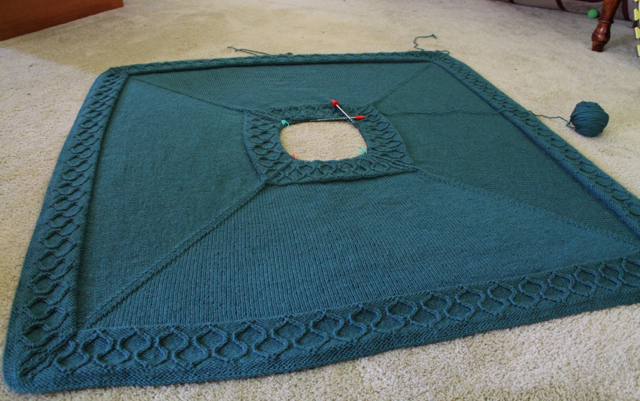
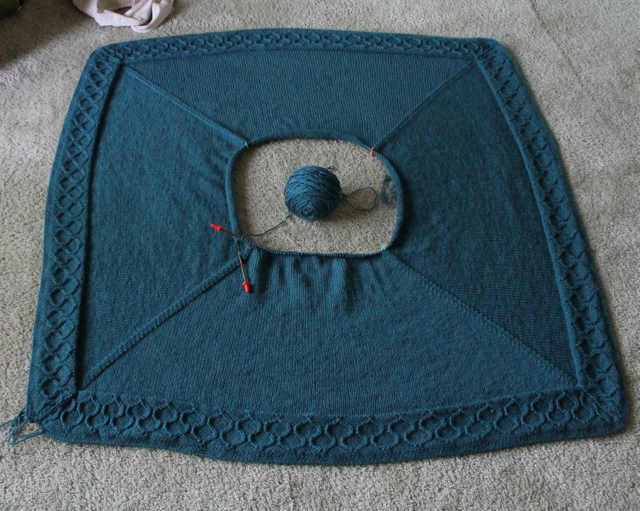
A month and a half ago, the idea to design a baby blanket for my in-utero son/daughter was born. It would be worked from the outside in (so the work went more and more quickly as it got closer to completion, rather than the other way around).
664 cast-on stitches and many hours of work later, this is what it looked like.
 Imagine my surprise when, due to a discrepancy between the swatch and the actual blanket, it began to be clear that it was at least 8 inches longer per side than originally intended.
Oh well, it could always go on the baby’s toddler bed, right?
The blanket was stuffed in my largest project bed and placed by the sofa, in perfect position to be picked up during TV watching (mostly Castle, since the hubby and I were catching up on the latest seasons). It progressed sloooowllly, but it did progress.
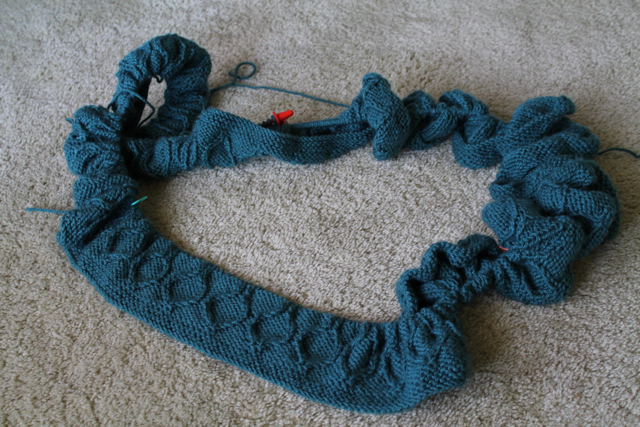
Right about this point is where I decided I’d like some visual interest in the center (and honestly, a break from all that stockinette didn’t sound like a bad idea either). Cue ripping back five or six rounds and knitting another repeat of the border pattern:
Then it was a question of geometry. I tried continuing the every-other-round decreases in the very center, but I was heading for a “nipple” of epic proportions. So I ripped it back to the motif. Then I tried every round decreases in stockinette. This worked geometrically, but visually… it just wasn’t doing it. Rip again.
Cue some attempted interference:
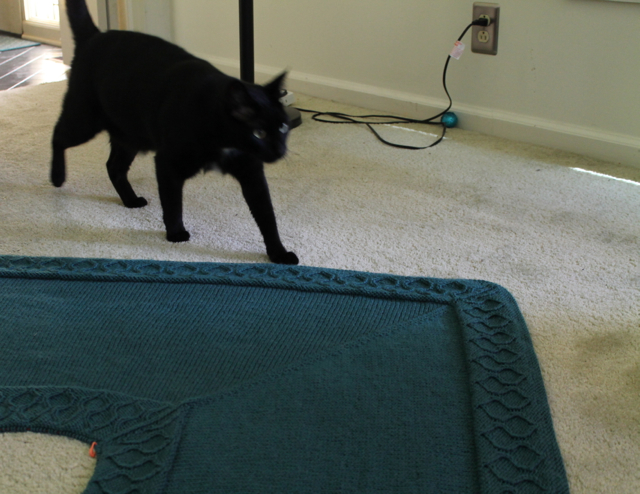
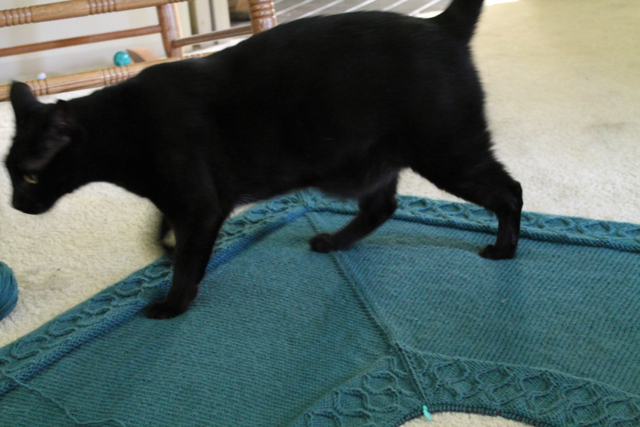
After shooing the cat away, I finally hit on the solution: a reverse stockinette stitch center, with decreases every round. This worked perfectly and looked great! As of (very late) last night, the knitting is done. No pics yet, but they’ll be coming soon.
Now it’s just a matter of weaving in ends and blocking. The baby isn’t coming for two months, so surely I’ll have it done by then….
Knitting & Crochet Blog Week 2014!
I had a fantastic time at the annual TNNA summer show this past weekend and can’t wait to tell you all about it. But that wrap-up post will have to wait, because next week is Knitting & Crochet Blog Week!
 This annual blog event is hosted by the lovely Mimi of Eskimimi Makes. She provides thought-provoking blog topics for a full week. Keeping up can be challenging, but it’s also great for getting one to think outside the usual blogging box.
This will be my third (!) year participating in Knitting & Crochet Blog Week. I found some great blogs to follow last year and the year before, and I’m thinking this year will be no different. Let me know if you’re playing along, too, and I’ll make sure to check out your posts!
About Me

I’m an aspiring young-adult novelist and voracious knitter/designer, currently living in Portland, OR.
I’m planning to mostly talk about knitting here – but writing and reading, my other two passions, may sneak in from time to time.
Click here if you’d like to contact me.


Patterns For Sale

- Concord Vest – $5.00

- Full Circle Cardigan – $6.00

- Dream a Little Dream – $6.00

- Lavandula – $7.00

- Blue Betty – $6.00

- Rosanna Wrap – $5.00

- Hipster Stripe – $5.99

- Bevin Pullover – $5.99

- Kari Baby Blanket – $5.00

- Daisy Cloche – $3.00

- Daisy Mittens – $3.00

- Europos Scarf – $4.00

- Morgandy Mittens – $4.00

- SoCal – $3.50

- Santa Slouch – $3.00

- Give ‘Em the Slip Hat – $3.50

- Give ‘Em the Slip Mitts – $3.50

- Put Together – $5.00

- Helix – $3.50

- Chandail – $6.00