
Design Process: Blocking!
(Seventh in my series of design posts. Earlier posts are here: Part Six, Part Five, Part Four, Part Three, Part Two, Part One.)
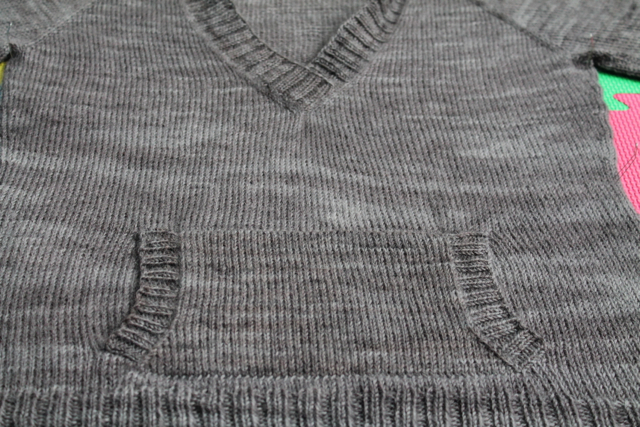
The sweater is done! I had plenty of the BFL sport left when I finished the last sleeve, so I couldn’t resist adding a cozy pocket on the front. I kept it small-scale to (hopefully) avoid the young teenager/sweatshirt look:
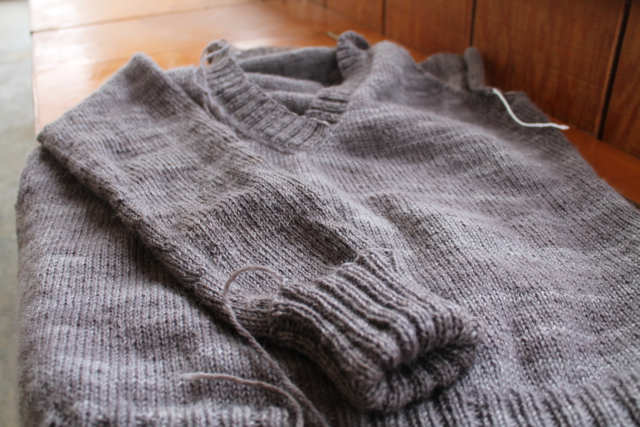
 Next up in the design process is blocking. When I’m knitting someone else’s pattern, I sometimes skip blocking–especially if it’s an item that’s going to get wet anyway, like a woolly hat–but I always, always block designs intended for publication.
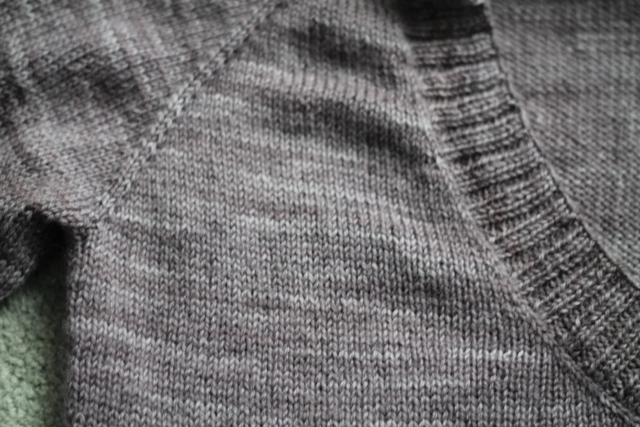
This pre-blocking picture illustrates why. See the wrinkles and uneven stitches?
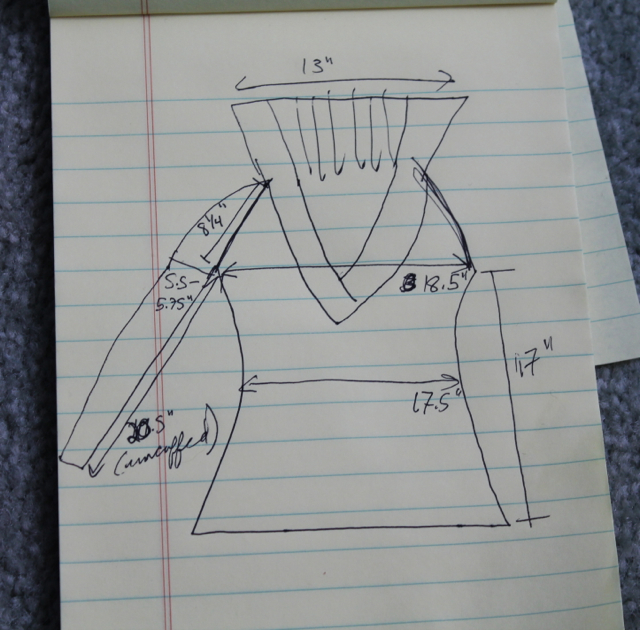
 The sweater fit me perfectly before blocking, which is good, since my swatch didn’t change in length or width when I blocked it. I took detailed pre-blocking measurements anyway, since the fabric usually gets stretched out and needs to be patted back into shape.
I warned you earlier about my nonexistent artistic skills.
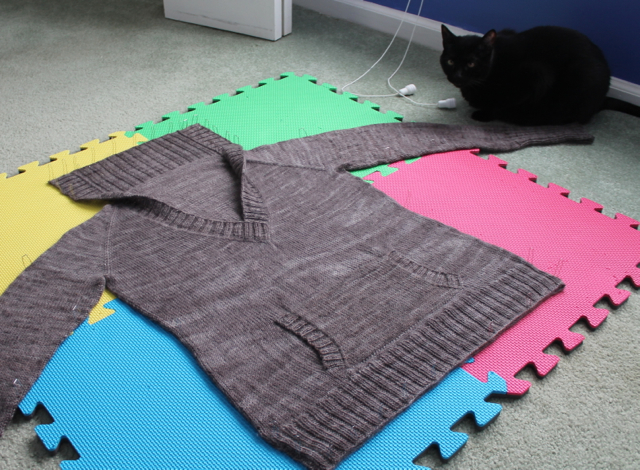
And here it is in all its pinned-out glory. Esme is guarding the sleeve (and was summarily ejected from the room after the picture was taken):
 Next step in my design process: schedule a haircut/color. No, seriously. I’ll be the model for this design (obviously, since I knit it to my measurements), and I’m waaaayy overdue for a trip to the salon. While I’m waiting for my appointment, I’ll start in on the pattern writing–my least favorite part of the whole process, but necessary!
Sweater update (and some stash enhancement!)
(Sixth in my series of design posts. Earlier posts are here: Part Five, Part Four, Part Three, Part Two, Part One.)
I missed WIP Wednesday this week (probably just as well, since I keep showing the same sweater–I imagine people might get sick of it eventually!), but I thought I’d do a little progress report anyway.
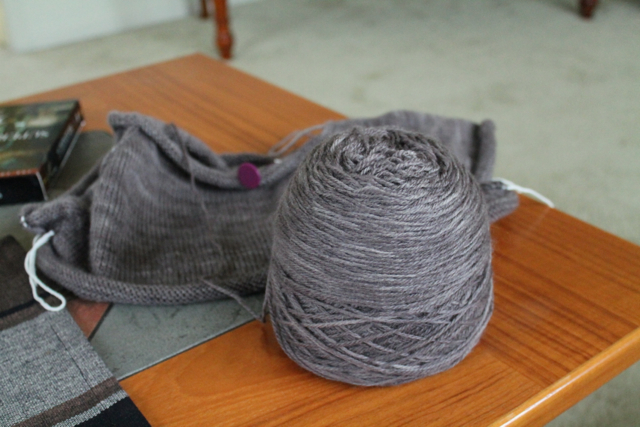
The gray sweater is moving right along. I made a design decision when I reached the sleeves to knit them twice as long as I originally intended, so they can be cuffed or flipped over to cover the hands if it’s especially cold. I thought this worked well with the cozy vibe of the sweater.
 Of course, that means I have to knit 2×2 ribbing on little needles for twice as long. Ugh. But since that picture was taken, I’ve knit the second sleeve up to the ribbing. I’m hoping to grit my teeth and power through the rest tonight.
But when that’s done, I’ll have to make another design decision–front pocket or no? Hmm.
In other news, I’ve gone kind of nutty with yarn buying this week. I swear I didn’t mean to! One of my favorite online retailers, Doodlebug Yarn, sent me an email announcing a sale on Imperial Yarn Columbia. I’ve been dying to knit a sweater out of this yarn since my husband used it to knit his first hat, so I snapped up a sweater’s worth:
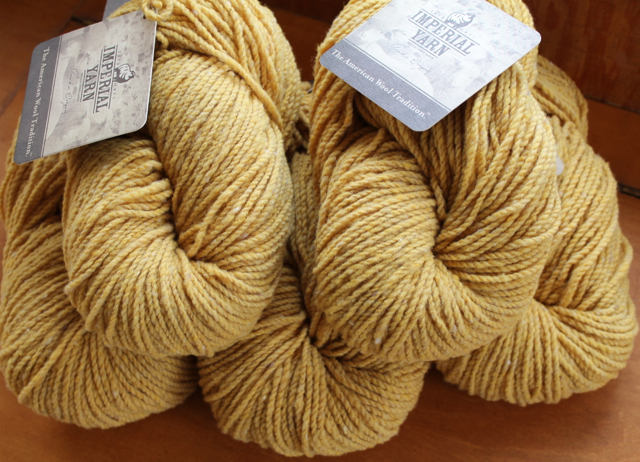 I’m trying to branch out a little from my usual jewel tones, so I decided to order this delicious golden yellow.
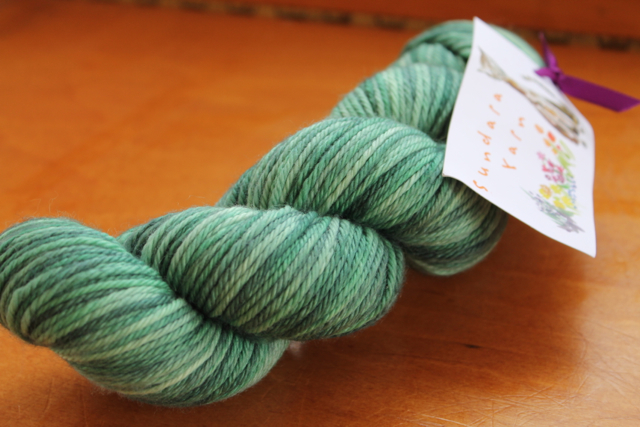
And then I spotted a single skein of Mint Julep Sundara Yarn Merino Worsted in someone’s Ravelry destash. Yum.
 And just to make me look really hedonistic, I realized I forgot to show off the skein of Malabrigo Rastita I bought a few weeks ago (my mom suggested a visit to a yarn store! Really, was I going to say no??):
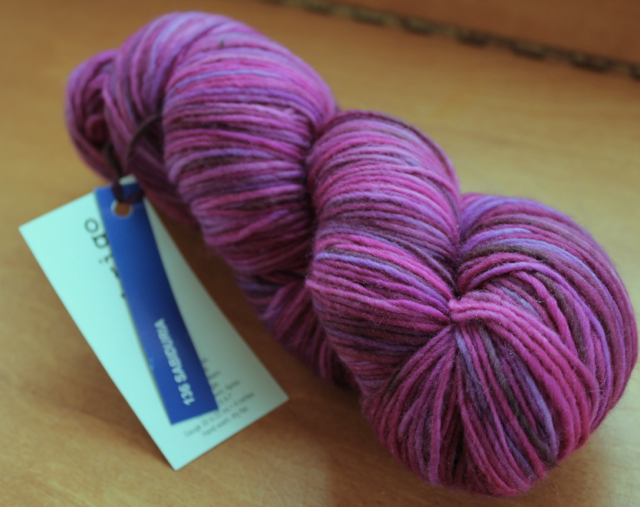 It was a little hard to photograph the color correctly, but it’s a gorgeous blend of magentas and purples.
I better finish the gray sweater soon, because I’ve got a lot of yarn calling my name….
FO Friday: Critters!
I finished the Owl Puff for my friend a few days ago:
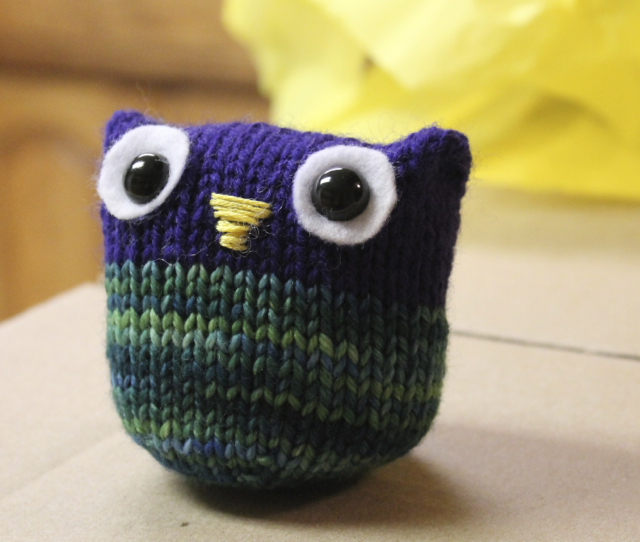 Isn’t it adorable? Really simple, too. If I made it again, I might add a purl row between the base and the straight rows, just to make the owl stand up a little better. But my owl-loving friend got her package and adores it!
I also whipped up an apple mascot for a second writer-friend:
 I used this pattern, and I think it came out pretty cute! (Check the comments on that blog post if you plan to knit the apple–there’s an error in the pattern as written.) I was a little worried the safety eyes took the apple into creepy territory, but my friend loved it and I’ve been informed it’s cute rather than creepy by several others. Whew. :-)
Oh, and I realized I forgot to show off some new yarn I bought last weekend!
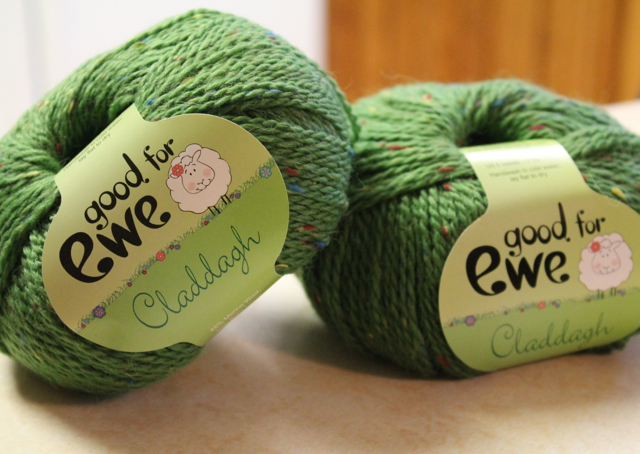 I hadn’t heard of Good for Ewe before I saw their yarn in a local-ish shop, but it turns out they’re a new, Indianapolis-based yarn company! The Claddagh pictured above is the perfect St. Patrick’s Day yarn, isn’t it? And it’s sooooffffttt. I’m thinking a hat (because I’m pretty much always thinking a hat)… and maybe some short fingerless gloves to match?
WIP Wednesday: Neck! And Buttons!
(This is fifth in my series of design process posts. Earlier posts are here: Part Four, Part Three, Part Two, Part One.)
The sweater is progressing, if a little slower than I’d like (I’ve been working on a bunch of pattern writing, which is cutting into my knitting time). But I got the neck finished last night!
 I was going for a “looks like a hoodie from the front, but hardly any bulk in the back” thing, and I’m really happy with the way it turned out! Needs blocking, of course, but I think it’ll be pretty close to the sketch once the back neck is stretched out a little more. I did the neck before the sleeves, as that’s usually the more iffy part of a design for me, so I’ll be working on the sleeves this week.
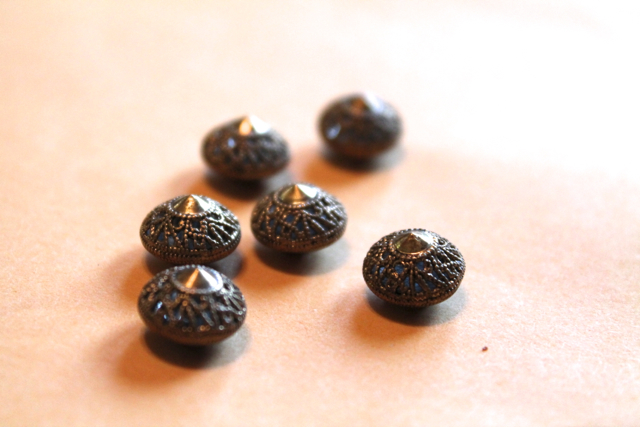
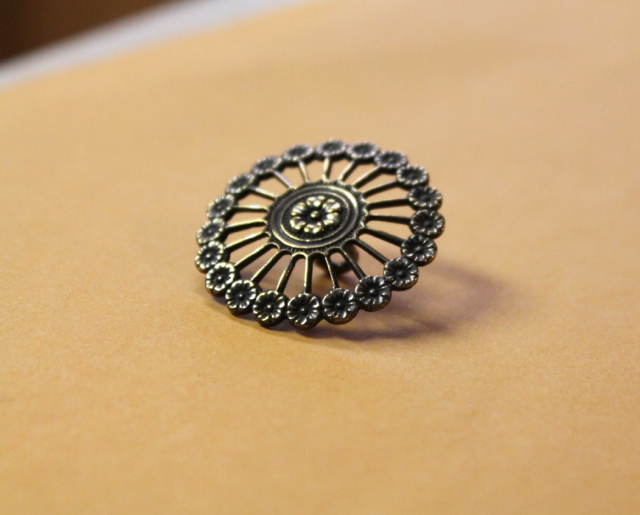
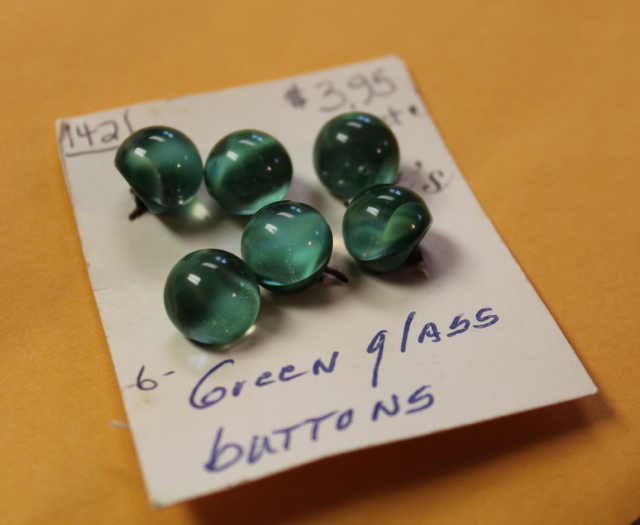
In other news, I went to a button show this week!
 It was, quite frankly, a little surreal. I was hoping to find some neat buttons for future designs, which I did (see below!), but I didn’t quite realize how passionate most of the people there would be about their buttons. These people are SERIOUS collectors. There were buttons there selling for hundreds, even thousands of dollars!
Every once in a while, it’s nice to be reminded there are people with hobbies that are generally regarded as even crazier than mine, heh.
But everyone there was incredibly nice, and I came away with some very lovely (and cheap) buttons!
 If you want to know more about the button show (you masochist, you), my husband did a great blog post about it–and the bizarre hotel that hosted the show–on his blog here.
WIP Wednesday: Sweater-in-progress and Owl Puff
(This is fourth in my series of design process posts. Earlier posts are here: Part Three, Part Two, Part One.)
The sweater design is still rolling along! I just started the bottom ribbing on size US #3 needles, ugh. But I should be done with the body later tonight.
Last weekend, I was working merrily along on the neck increases below the sleeve split when I realized I’d made a pretty serious math error when I set the whole thing up. This is, unfortunately, as much a part of my design process as sketching or swatching. (That’s what I get for trying to crunch numbers while watching Supernatural episodes.)
So I had two choices at that point–rip out the entire yoke of the sweater, back to the point when I started the neck decreases–about an inch from the cast on–or rearrange the numbers so they worked with what I’d already done.
Guess which one I picked?
Turns out I like this neckline shape better anyway, though. I’m calling it a fortuitous accident. :-)
I also cast on a little mini-project yesterday:
 It’s an in-progress Owl Puff (Ravelry link)! A friend of mine has helped me tremendously with the fiction-writing side of my life and loves owls, so she’s getting a little surprise in the mail as soon as I can get to the craft store to buy some felt and safety eyes.
And along those lines: I signed with a literary agent for my fiction yesterday! It means I’m that much closer to my goal of writing for a living. So it’s been a very good week all around. :-)
Design Process Part 3: The WIP
Earlier posts in this series: Design Process Part 2: Sketching, Swatching and Math ~ Design Process Part 1: Inspiration
The next step in the design process is, of course, to knit the sweater. (Actually, I shouldn’t say “of course”. There are plenty of designers who work out the whole pattern for the sweater, grading and all, before they knit a stitch of the actual sweater. That just doesn’t happen to be my process.)
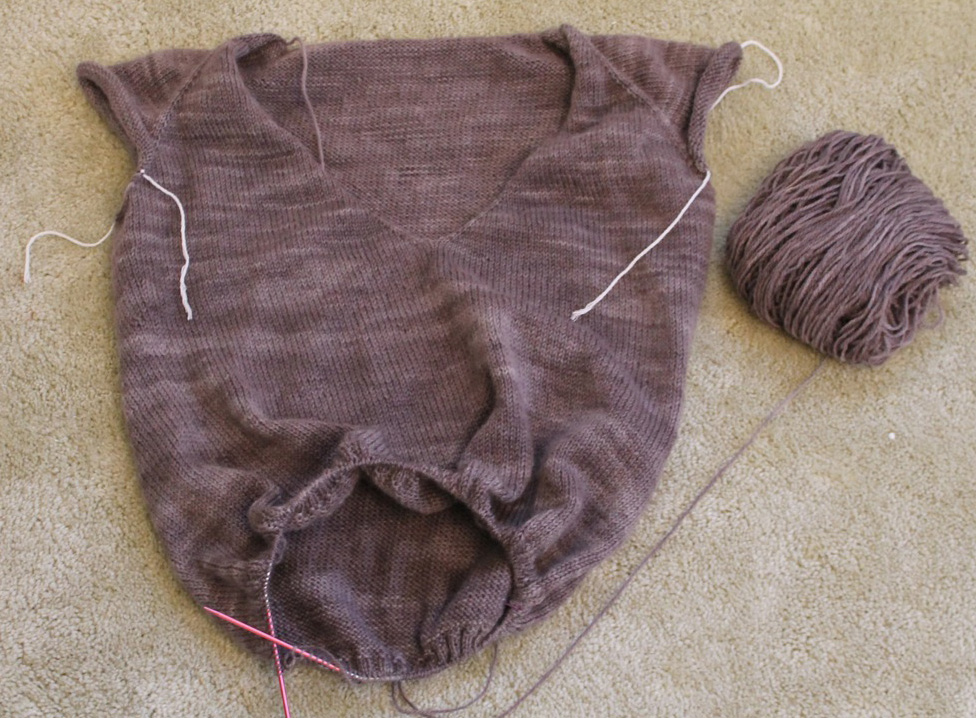
I’ve been working on it for a few days, and I just split the sleeves off last night:

I’m very pleased with the sweater so far! The only hiccup I experienced was a slight change in row gauge from my swatch to the sweater. In the swatch, I got 8.5 rows to 1 inch, which didn’t change when I blocked it. In the sweater, I’m getting 8 rows/in. Luckily I noticed this in time to realize I’d need to shorten the yoke depth by a few rows. Not a big change–but something I always check now, after being burned by gauge swatches before!
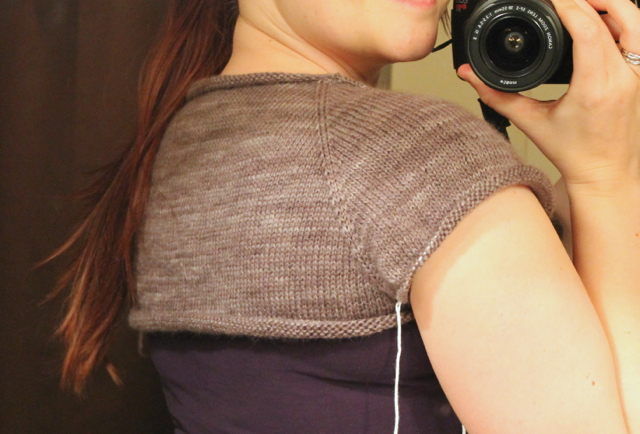
And look, it fits rather well (these pics were taken at about 11:00 last night, so please forgive the messy hair and lack of makeup):

Another reality check I do as the sweater progresses relates to the amount of yarn I’m using. There have definitely been times where I assumed I’d need a certain number of skeins and completely mis-estimated–and that’s much nicer to figure out at the beginning of a sweater, so I have time to order more.
But it looks like I’ll have plenty of yarn. I still have well over half the giant skein left, which should hopefully get me the rest of the way through the body. And if that works, I won’t have to worry about alternating skeins at the changeover point (a real concern when working with handpainted yarn). So bonus!
 More WIP photos to come!
Design Process Part 2: Sketching, Swatching, and Math
Earlier posts in this series: Design Process Part 1: Inspiration
Now that I have a pretty good idea of the general look and construction I want for the sweater, it’s time to think about the details. First up, I do a rough sketch of the design.
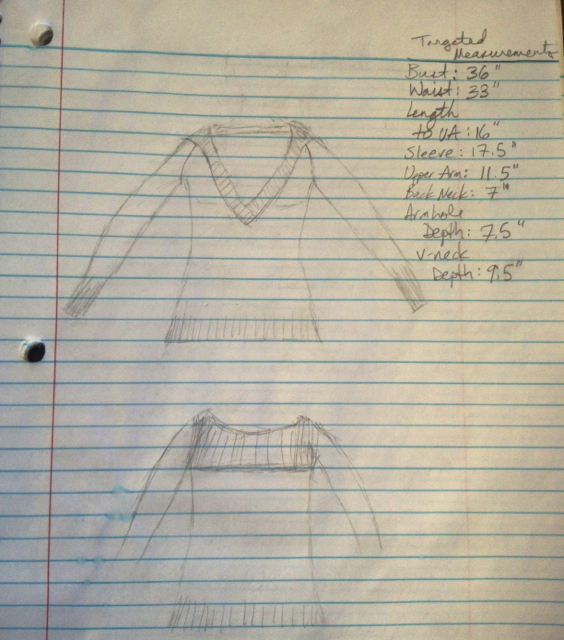 Ahem. I did warn you it was rough. I’m not much of an artist, so if the sketch isn’t for submission to a publication, I don’t spend much time on it. But it gets the idea across!
I also included the targeted measurements for my size. Before, I would need to look up standard guidelines for this bust size, but I’ve knit enough size M fitted sweaters now that I know most of these measurements off the top of my head. A few of them are specifically tailored to my preferences–I like a little bit of positive ease on the upper arm, for example, but I tend to like an inch or two of negative ease at the bust. I also tend to like slightly longer sweaters (probably because a large bust tends to make shorter sweaters ride up at the bottom!).
Next up, choosing yarn! Fun!
It was pretty easy in this case. I have this gorgeousness in my stash:
 This is Blue Moon Fiber Arts BFL Sport in the “Manly, yes, but I like it too!” colorway (great name, eh?). I purchased two giant skeins (about 1300 yds) at Rhinebeck last October. After checking Ravelry, this looks like plenty to knit this type of sweater in a 36″ bust size. The great thing about top-down, too, is I know I have the option of knitting shorter sleeves or a shorter body if it looks like I’m running low on yarn.
Swatch time! As I mentioned in this post, the recommended size on the label for this yarn is incorrect. After a quick check on the yarn’s Ravelry page, I started with US #4 (3.5 mm), and I liked the fabric I got after I wet-blocked the swatch:
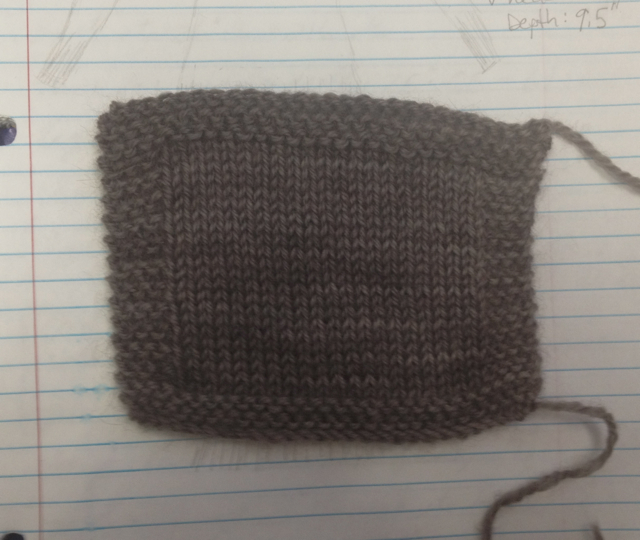
Pardon the craptacular phone picture.
My measured gauge after blocking is 6 sts/8.5 rows to the inch. A little thinner than I usually prefer (I’m generally a DK and up girl), but the yarn’s soft and nice to knit with. Due to some kind of distracting life stuff going on right now, a stockinette, finer gauge sweater is just what the doctor ordered!
If I were knitting a bottom-up sweater, this is the point where I’d usually do some quick, rough calculations and then dive right into the knitting.
BUT… this is going to be a top-down sweater. So that means I have to do a whole bunch of math before I know how many stitches to cast on.
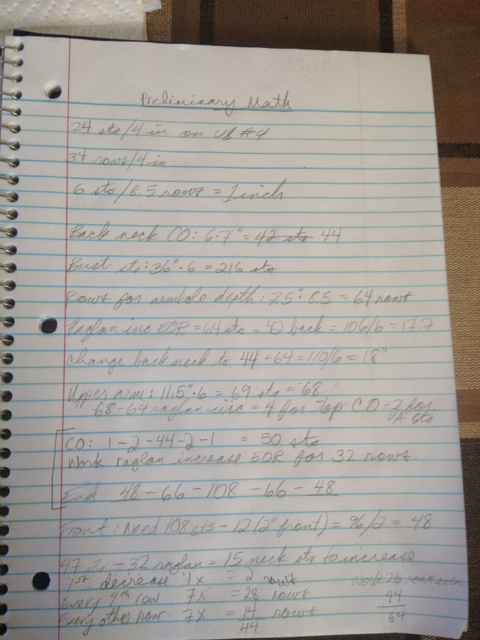 Yeah, that wasn’t too much fun. It took me two whole episodes of Supernatural!
Some designers prefer to grade the pattern for all the sizes before they start knitting the sample in their size. I confess, I’m not one of those. I work out the numbers for my size, tweaking them as I go, and then grade the pattern for the rest of the sizes when I’m finished with the prototype.
Next up: casting on! Woohoo!
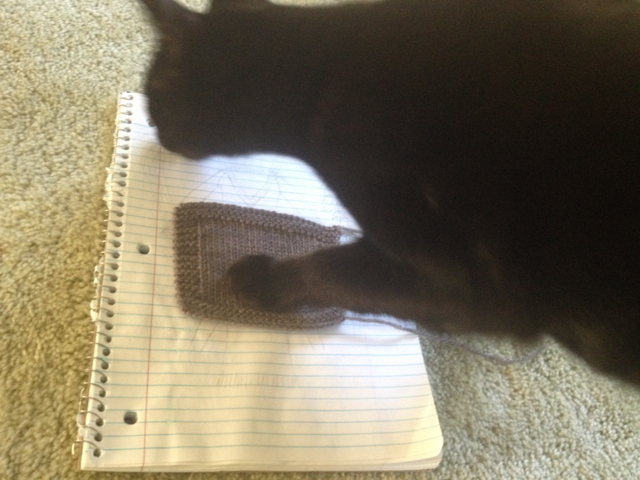
Bonus picture: one of the kitties “helping” me photograph the swatch.
Design Process Part 1: Inspiration
I got such a nice response to the post about my design process for Lavandula that I thought I’d try an experiment! A new design idea bit me hard a few days ago, so I thought it might be fun to do a series of posts detailing its creation, from first idea to pattern release. (Thanks to the lovely Becky of Sugar Tree Designs for the idea!)
First up: the inspiration.
The initial spark of an idea comes, more often than not, from some hole in my wardrobe.
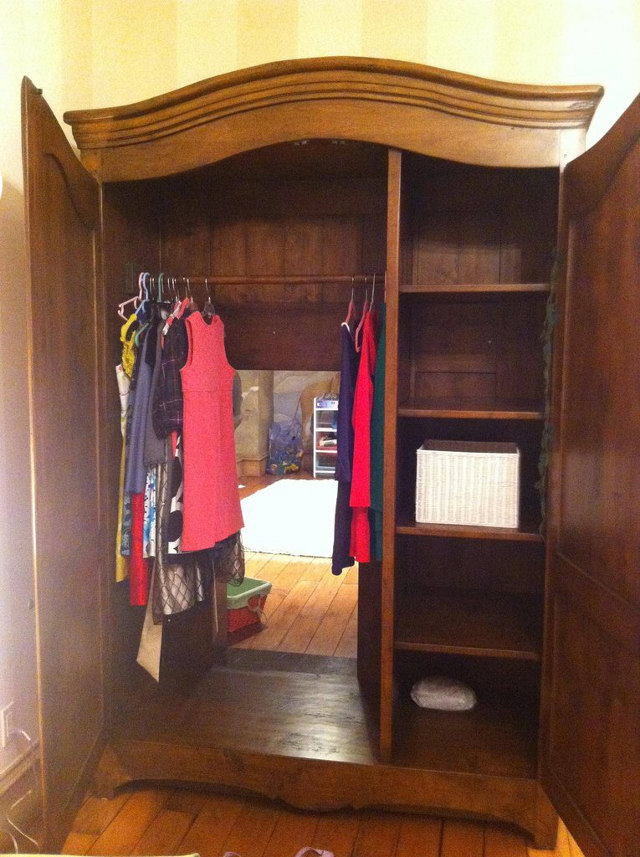
I only wish I meant this kind of hole.
I’m not doing much dressing up these days, so I’m feeling a lack of casual, comfy, cozy pullovers. You know, the kind you’d wear to curl up in a big chair in front of a fireplace.
So that’s the basic concept out of the way. But what about the details?
I save lots of pictures from catalogs, email mailings, and random internet searches for features I like. I also take pictures of sweaters A LOT. In clothing stores, out walking around, in lines at the grocery store… I know some designers prefer to look at fashion magazines or runway collections, but to me there’s nothing like seeing the way a collar drapes, color does/does not flatter, etc. in person.
I’ve perfected my “take a surreptitious picture with my iPhone, without freaking out the subject” technique.
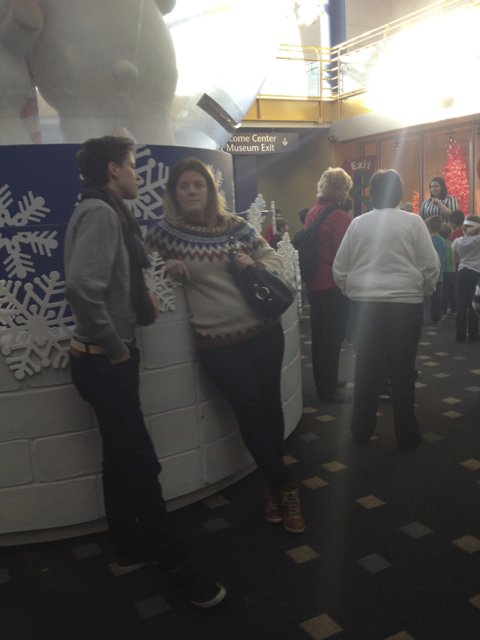
Well, almost perfected. I think this lady might have been on to me.
Every so often, I go through my photos and see if inspiration strikes.
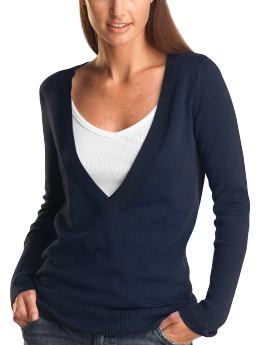
I saved this picture because I liked how far down the v-neck came (very flattering to larger busts):
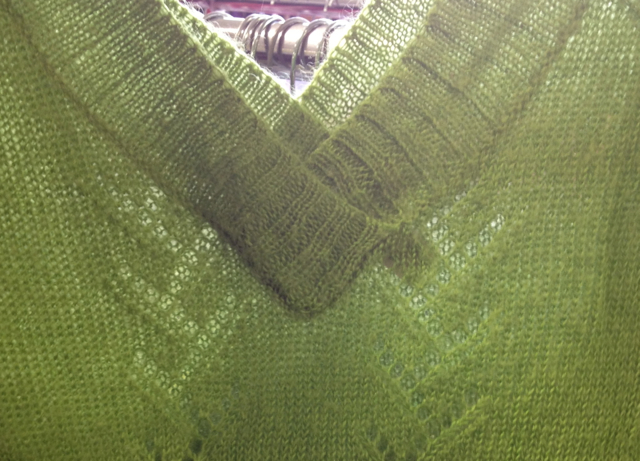
 I like the width of the ribbing on this next one (although I’m not really a fan of the lace pattern in the rest of the sweater or the airy-ness of the yarn used, and I don’t think I’d put a v-neck in the back as well as the front):
 Big, floppy collars just scream cozy to me–plus I like when it looks like there’s a hood from the front, but there’s not all the extra fabric of a full hood, just a rectangle of fabric partway down the back. Actually, I have no idea what to call this. Is it a shawl collar, just without the short-rows? I can’t find a picture of what I’m talking about by searching for shawl collar, so maybe not. Anyone know what its official name is?
I also like front pockets, and they’re definitely cozy… but I’m a little iffy on whether I want to include one in this design or not–it’s hard to pull off without making the sweater seem too casual. But I’m putting the decision off until later, when I have a better idea about yarn choices and the overall look of the piece.
Cute sweater, but maybe a little too teenage for my tastes.
With those criteria in mind, I can start brainstorming in earnest. Next step: sketching!
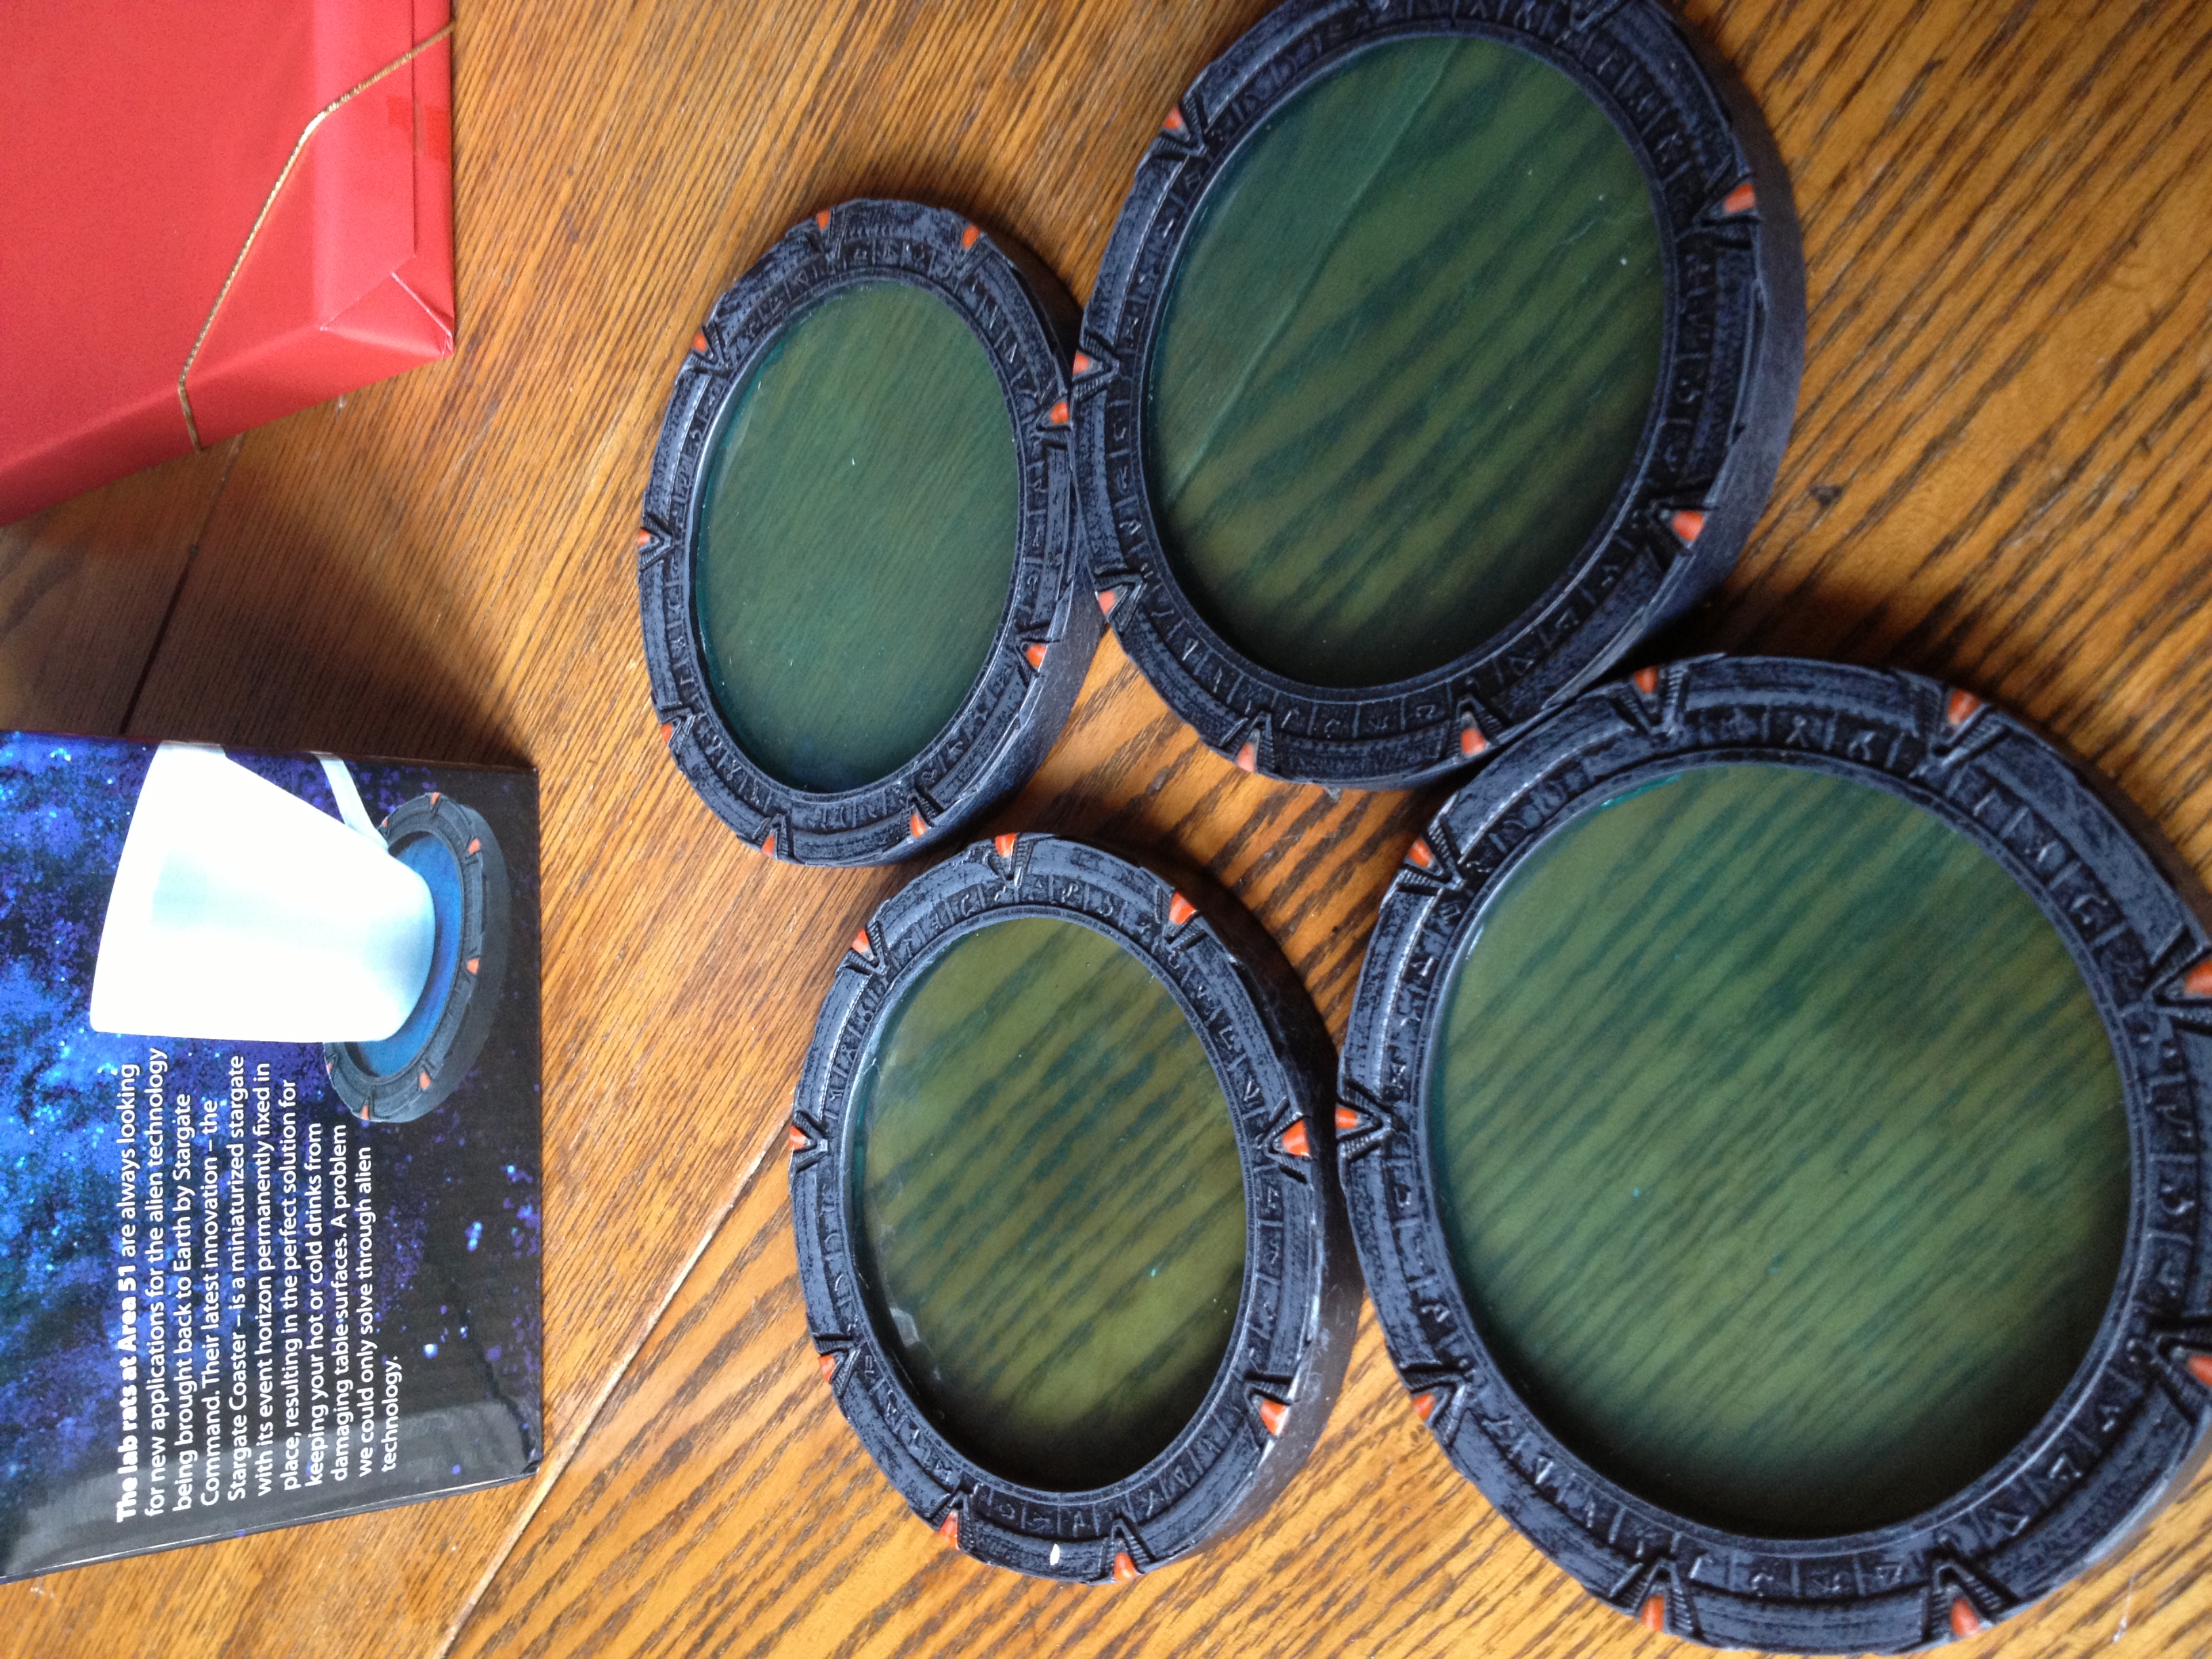
Happy Valentine’s Day – and Coupon Code!
Happy Valentine’s Day!

My awesome husband gave me a box of chocolate truffles and these wonderfully geeky coasters from my favorite TV show. Obviously you can see why I married him.
 In other news, the Malabrigo Junkies group on Ravelry is celebrating Malabrigo March next month, which is a celebration of this colorful, yummy yarn (which happens to be one of my favorites!).
In honor of Mal March, I’m offering a Ravelry coupon code good for 20% off any of my self-published patterns. Enter the code MM2013 during checkout (either from this website or through Ravelry) to get the discount through March 15th.
Wishing you and yours a great Valentine’s Day filled with fiber!
FO Friday: Baby Sophisticate
Gosh you guys, I was overwhelmed by the lovely comments on my last two sweaters. Way to give a gal a big head! I started designing because I had trouble finding simple designs that suited my figure, and it’s so gratifying to hear that other people appreciate them too.
So of course, today’s FO Friday post is someone else’s design, haha.
Remember how I said I was addicted to baby knits?
 Ahem. They’re just so fast! And after finishing (mostly) a BIG secret design project that’s been giving me fits, I needed something quick.
(I don’t think the intended recipient of this little sweater reads my blog. But Laura, if you’re reading this, act surprised, okay?)
The specs:
Pattern: Baby Sophisticate (Ravelry link) by Linden Down. I modified the pattern quite a bit. One thing I love about designing is that it has given me the confidence to make extensive mods to existing patterns with confidence. I have my favorite techniques that I know work well, and I sub them in frequently when I’m not a fan of the technique given in the pattern.
That said, sometimes I like trying a new technique too! This is a top-down pattern, and it uses the backwards-loop cast on for the raglan increases (instead of the more usual kfb or M1 increases). I’d never considered doing them this way, and to be honest, they were a little fiddly to work, but I like the clean lines they made.

Yarn: Berroco Vintage in Indigo. I’ve used this yarn for a few baby knits now–it’s probably my favorite acrylic/wool blend. Soft, great depth of color, non-squeaky, and washes really well. I used one full skein and maybe a fifth of another.
Which brings me to my main modification: a very different gauge. The pattern specifies 15 sts over 4 inches with size US #8 needles, which I knew right off the bat I wasn’t going to get from anything thinner than a chunky yarn (and it would be pretty bulletproof on size 8s, at that). Most of the people who’ve posted FOs on Ravelry used worsted or Aran weight yarn and did modifications for gauge, too. Mine ended up being 4.5 sts/in on size 8s, which gave me a nice fabric.
Notes: I detailed all my modifications on my Rav project page, so I won’t repeat them here. One thing I wanted to mention, though, is a confession: I usually hate doing short rows. It’s not so much the wrapping and turning, but the picking up the wraps and making it look decent that gives me problems. This pattern has you pick up the wraps, so I was resigned to gritting my teeth and getting through it.
BUT, I learned on this project that you don’t have to pick up the wraps in garter stitch–they’re pretty much invisible anyway!
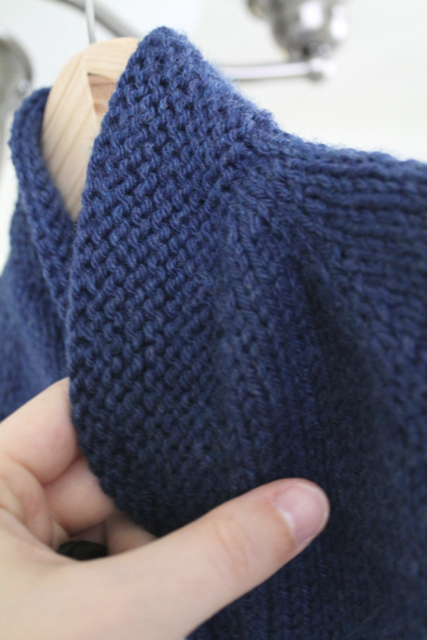
Can you find the wraps?
This immediately fills my mind with garter stitch-short row ideas.
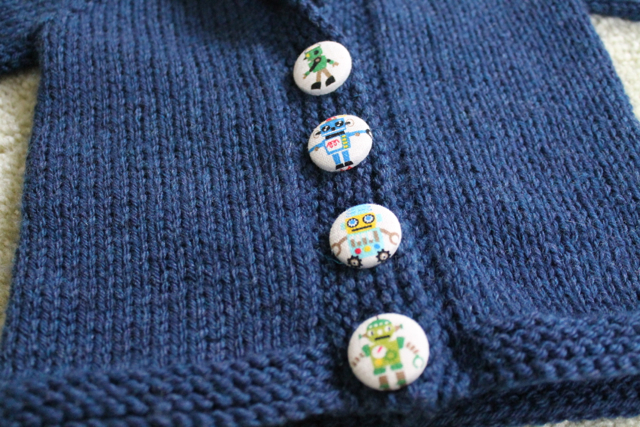
And the pièce de résistance: robot buttons! I found out the parents-to-be are going with a robot theme for their little boy’s bedroom, so I found these from an Etsy seller. I think they’re perfect!
About Me

I’m an aspiring young-adult novelist and voracious knitter/designer, currently living in Portland, OR.
I’m planning to mostly talk about knitting here – but writing and reading, my other two passions, may sneak in from time to time.
Click here if you’d like to contact me.


Patterns For Sale

- Concord Vest – $5.00

- Full Circle Cardigan – $6.00

- Dream a Little Dream – $6.00

- Lavandula – $7.00

- Blue Betty – $6.00

- Rosanna Wrap – $5.00

- Hipster Stripe – $5.99

- Bevin Pullover – $5.99

- Kari Baby Blanket – $5.00

- Daisy Cloche – $3.00

- Daisy Mittens – $3.00

- Europos Scarf – $4.00

- Morgandy Mittens – $4.00

- SoCal – $3.50

- Santa Slouch – $3.00

- Give ‘Em the Slip Hat – $3.50

- Give ‘Em the Slip Mitts – $3.50

- Put Together – $5.00

- Helix – $3.50

- Chandail – $6.00