
The Great Blog Reboot of 2015
Hello out there! Blog posts have been rare around here since my son was born back in July, but I miss blogging regularly and interacting with other bloggers and crafters. So I made a resolution (about a week late, but hey…) to get back to regular blogging in 2015.
Here’s how I’m going to do it: every Friday, I’ll post a weekly update like the one below. To solve my ever-present problem of working on secret knitting projects that I’m not allowed to blog about, I’m branching out a bit. I don’t know if I’ve ever mentioned it here on the blog before, but my household is about 90% vegan (no meat or dairy products). Another one of my resolutions is to cook healthy meals instead of eating mostly frozen and pre-made entrees, so I’ll be sharing new recipes I’m trying. It should be fun!
I’m also going to be sharing books I’m reading, since I’m still working on getting books published and it’s important to keep reading in the genre that I’m writing. I’m hoping a weekly check-in will motivate me to plow through some titles on my to-read list.
Without further ado, here’s my first new post! :-)
What I’m Knitting
I’m working on secret projects. Quelle surprise. But there are a lot of them this time. I’m doing a baby/child collection for a yarn company which is going to include two hats, two sets of mittens, a scarf, and a vest. The yarn is hand-dyed and scrumptious. I can’t wait to show these off. I have all the samples knit except the vest, which is in progress. Bulky yarn + hand-dyed goodness = fun to knit.
Here’s a teeny little preview of one of the hats (really just an excuse to show off my adorable son):

What I’m Cooking
Here’s something that probably won’t surprise you: cooking interesting, healthy vegan meals day after day is hard. But I got this amazing new cookbook as a Christmas present:
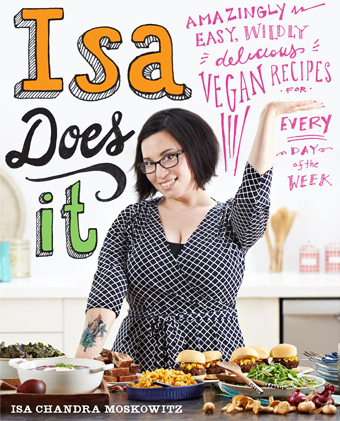 This is the absolute best cookbook I’ve ever had, vegan or not. I’ve made something like 15 recipes from it since Christmas, and everything has been good. When does that ever happen?
I used to use internet recipes much more than cookbooks, but there’s something oddly satisfying about flipping to a recipe in a big, thick cookbook and consulting it as you go. Maybe that’s just me.
I didn’t think to take pictures of anything I made last week, so my foray into the world of food photography will have to wait until next week.
What I’m Reading
Isla and the Happily Ever After by Stephanie Perkins.
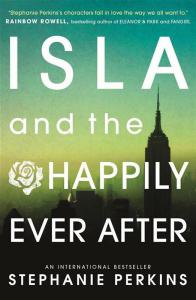 This is kind of cheating, because I’m writing middle grade fiction (for ages 8-12), so I really shouldn’t be reading young adult. But I gave myself permission to cheat. I loved this author’s first two books (Anna and the French Kiss & Lola and the Boy Next Door), so I have high hopes for this one.
Blog Week Day 1: A Day In The Life 5KCBWDAY1
Describe a day in the life of a project that you have made, or are in the process of making.
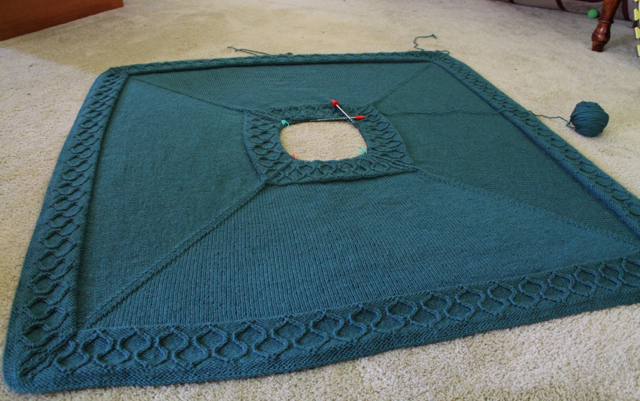
A month and a half ago, the idea to design a baby blanket for my in-utero son/daughter was born. It would be worked from the outside in (so the work went more and more quickly as it got closer to completion, rather than the other way around).
664 cast-on stitches and many hours of work later, this is what it looked like.
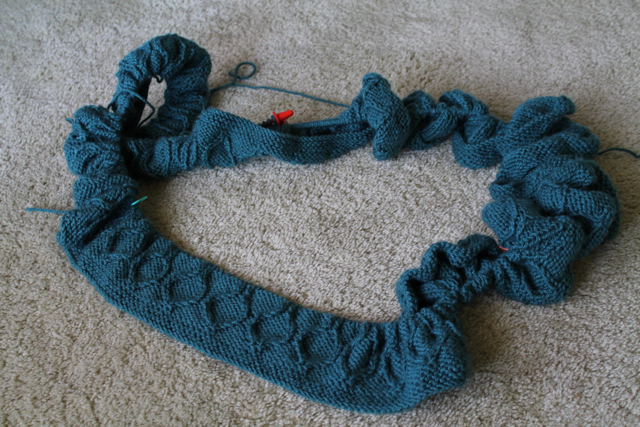 Imagine my surprise when, due to a discrepancy between the swatch and the actual blanket, it began to be clear that it was at least 8 inches longer per side than originally intended.
Oh well, it could always go on the baby’s toddler bed, right?
The blanket was stuffed in my largest project bed and placed by the sofa, in perfect position to be picked up during TV watching (mostly Castle, since the hubby and I were catching up on the latest seasons). It progressed sloooowllly, but it did progress.
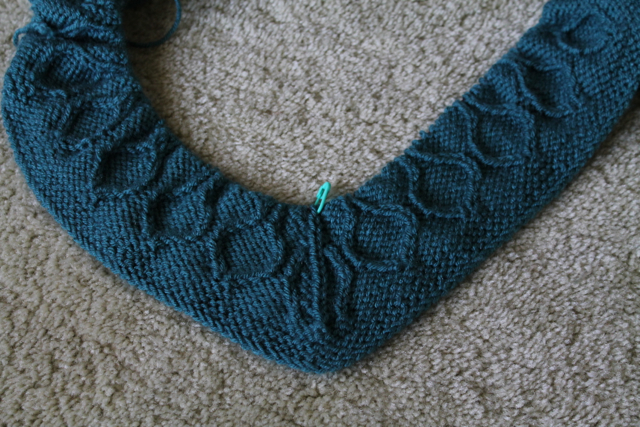
Right about this point is where I decided I’d like some visual interest in the center (and honestly, a break from all that stockinette didn’t sound like a bad idea either). Cue ripping back five or six rounds and knitting another repeat of the border pattern:
 Then it was a question of geometry. I tried continuing the every-other-round decreases in the very center, but I was heading for a “nipple” of epic proportions. So I ripped it back to the motif. Then I tried every round decreases in stockinette. This worked geometrically, but visually… it just wasn’t doing it. Rip again.
Cue some attempted interference:
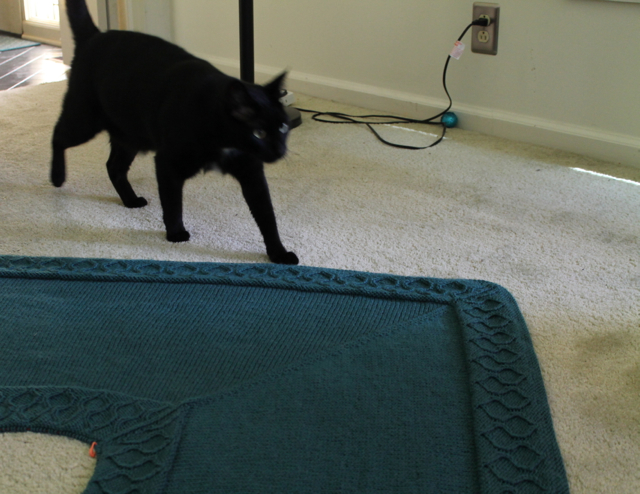
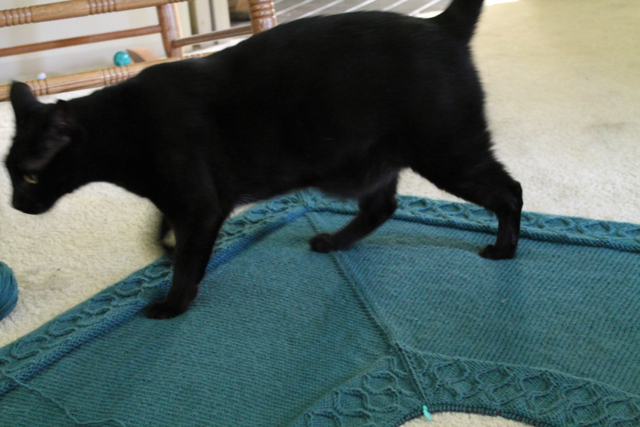
After shooing the cat away, I finally hit on the solution: a reverse stockinette stitch center, with decreases every round. This worked perfectly and looked great! As of (very late) last night, the knitting is done. No pics yet, but they’ll be coming soon.
Now it’s just a matter of weaving in ends and blocking. The baby isn’t coming for two months, so surely I’ll have it done by then….
WIP Wednesday: Outside-In Baby Blanket
Remember how I said I was obsessed with baby knits these days?
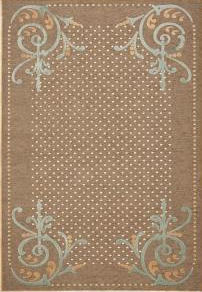
I knew I wanted to design some kind of baby blanket for my kiddo, so I delved into my inspiration folder and came up with these two blanket-like ideas.
After a bunch of swatching, I found a stitch pattern I liked that was reminiscent of the swirls from the first pattern. I figured a “start at the middle and increase on four lines to the edges” construction would work well for the pattern, but there was just one problem.
I hate projects that start with very few stitches and increase out to a zillion at the edges.
I would so much rather slog through the loooong part at the beginning and then be rewarded with ever-increasing speed and progress as I go on. That way the initial burst of enthusiasm sustains me through the beginning, and the visible progress sustains me through the rest of the project. So I decided to design this blanket to be worked outside-in instead of the more traditional inside-out.
I swatched a corner, took a picture, put it in Photoshop, and played around a little:
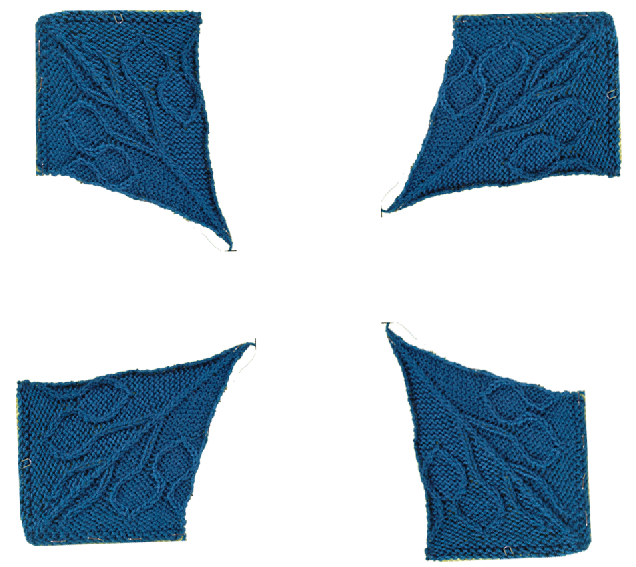 That’s the general idea, anyway.
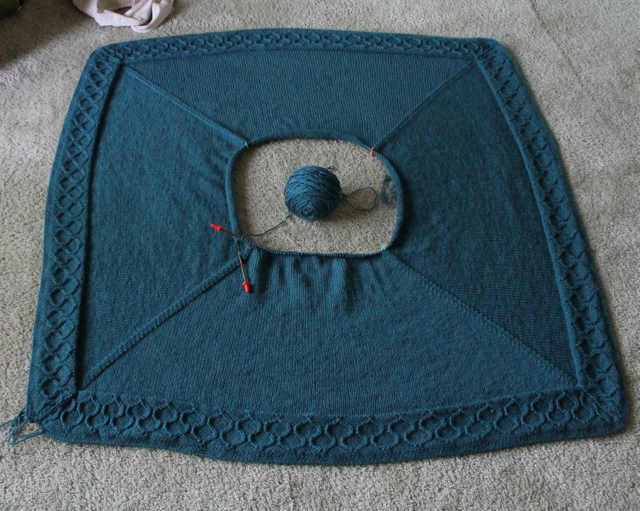
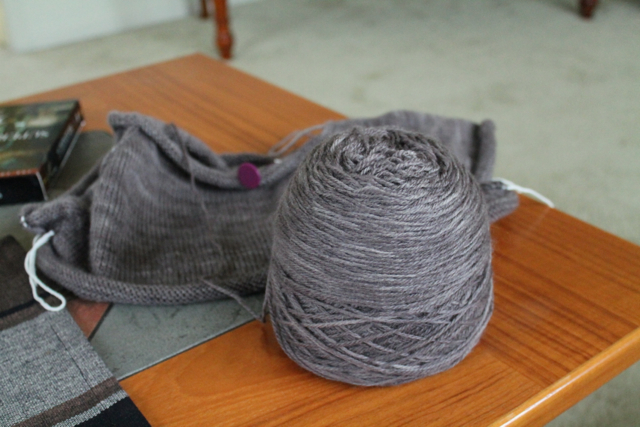
I’ve been working on the blanket steadily for about a week now, and here’s what I have to show for it:
 Not very impressive, is it? But when you consider that the CO had 664 sts…
I could possibly use a longer circular needle.
WIP Wednesday: Creme de Menthe
I finished the large design and shipped it off, woohoo! Although I still have a few commissioned accessories I’m working on, with the sweater load off my shoulders, I allowed myself to start a new design.
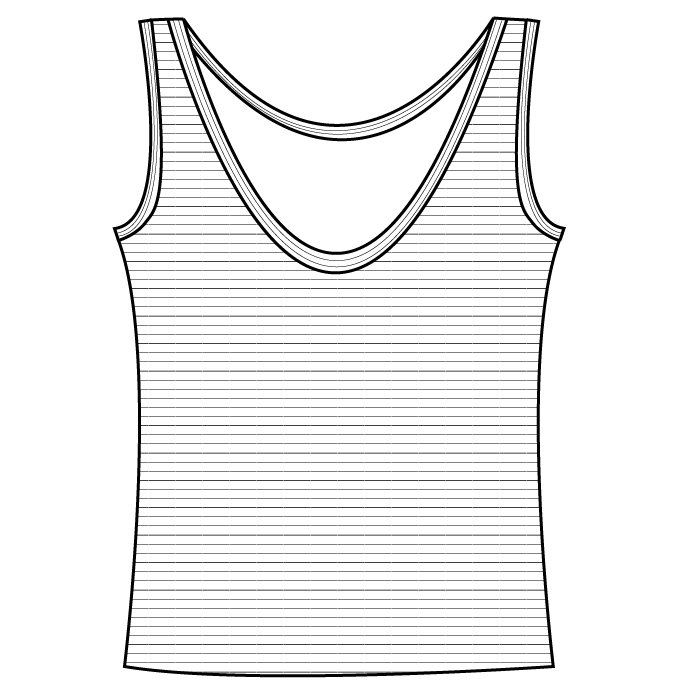 Here’s the sketch (which I did in about 10 minutes using Adobe Illustrator–I’m getting pretty good with that program, if I do say so myself). I really like the idea of a vest with skinny stripes running perpendicular to each other, so that’s what I’ll be attempting. It’ll either be cute or a mess… but that’s part of the fun of designing, right?
I’m using the Tosh DK Twist I showed off in last week’s post, and man is this stuff lovely. It’s as springy as Tosh Vintage, but lighter weight and softer. I’m an addict after only a few inches: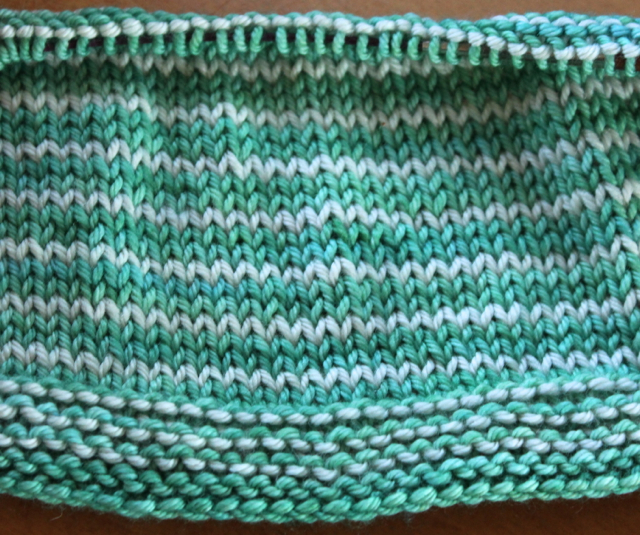 The tank is bottom up, in the round to the armholes and then back and forth. The 2-1 stripe pattern I’m using will necessitate pushing the work back and forth on the circular needles to keep the stripe pattern correct when it’s worked flat, but I tried it on a swatch and it’s actually kind of fun. You have to think about the fabric you’re making on each row, but that helps alleviate the boredom of endless stockinette. :-)
Also: I thought of a name for this design right away, which almost never happens. It shall be Creme de Menthe. Perfect, isn’t it?
Thanks to lightning-fast shipping from Knit Picks, I got my extra skein of Gloss DK this week and finished Concord, too!
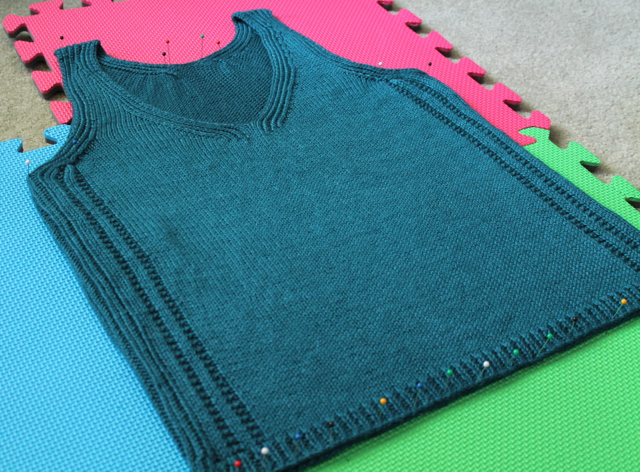 Hopefully I’ll have some modeled pics by Friday, and then the vest gets popped in the mail.
Tough Decisions
(This is one of a series of design posts. The earlier posts can be found here.)
Remember I said we had a failed photoshoot for the gray sweater? Well, I was going through the pictures we got and realized something. Something not so fun.
I think I want to rip out and re-knit 30-50% of the sweater.
This is a really tough decision, particularly because it has nothing to do with the fit of the sweater. The fit is perfect, actually. See below:
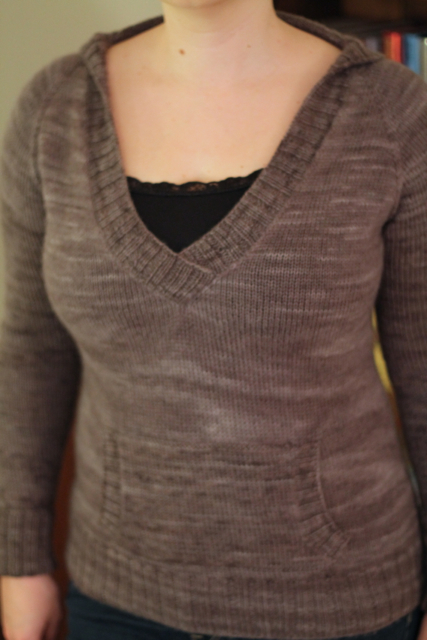 What’s not so perfect (and even easier to see in these pictures than in life!) is the really terrible pooling of the hand-dyed yarn at the waist and below. This is particularly irritating because the upper body was knit with the exact same skein, but the smaller width below the armholes didn’t agree with the length of the color changes. What’s worse, I was working on this sweater mostly in the evenings in front of the TV and didn’t notice until the whole body was finished.
It’s also easy to see that the second skein I used for the sleeves and front pocket, while appearing virtually identical in the skein, included lots of dark bits not found anywhere in the first skein.
To tell you the truth, this is the kind of thing I’d ignore completely if I were knitting the sweater only for myself. The fit is perfect! The sweater is snuggly and cozy, just like I wanted! Who cares about some color differences?
But since I’m planning to sell the pattern, I know I won’t be happy with anything less than great pictures. And that is going to require ripping, rewinding, and alternating skeins.
Sigh.
Another factor is the season. This sweater is definitely more of a fall/winter piece. By the time I get it re-knit (sport-weight yarn, remember), we’ll be well into the spring/summer knitting season. So I think this is going into the WIP bin for a few months. I’ll probably revisit it in July and get everything ready for test-knitting during August, which will put me on track for a fall 2013 pattern release.
But it’s not all doom and gloom on the pattern-writing front! I started a new vest design with more Rhinebeck yarn, these two beautiful skeins of Cephalopod Traveller:
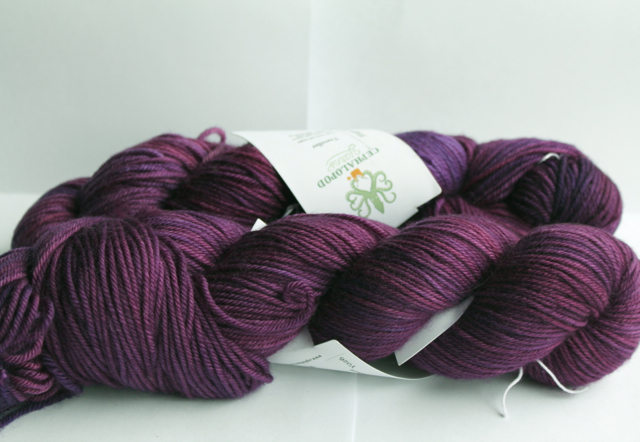
Learning from my mistakes, I’ve been alternating skeins the whole way. I’m pretty sure I’ll run out of yarn before I reach the end, but I found a Raveler willing to sell me a skein of this colorway and it’s already on the way, so no worries there. The vest is really, really cute so far. A great cure for the meh of the gray sweater.
Easter and Gray Sweater Update
Hope everyone out there had a happy Easter! (Or a happy Sunday, if you don’t celebrate.) My husband and I like to exchange little Easter baskets. This year, I left my shopping until the last minute–and to my horror, the store was out of Easter grass! So I improvised with a skein of truly horrific Day-Glo acrylic:

Wrapping the yarn before cutting…

Filling the basket… Esme’s trying to distract me by being adorable, but it’s not working…

Tah-Dah!
My husband was properly appreciative of my ingenuity.
I was hoping to have pictures of the gray sweater for you today, since it’s all done and blocked, but our impromptu photo shoot this weekend didn’t go so well. I wanted to take pictures of the sweater in the library of our new house, since that works with the sweater’s cozy feel. It turns out our library is just too dark for good photos, though, even with every light we have in the house.
Ah well. We’re scouting out potential locations for an outdoor shoot this week.
In the meantime, there’s a lot of this going on behind the scenes:
 I’ve finally switched entirely over to using Excel for pattern writing. I used to do everything by hand, but I recently took Faina Goberstein’s excellent Craftsy class on pattern writing, and I’m a total Excel convert now. It saves me so much time!
Design Process: Blocking!
(Seventh in my series of design posts. Earlier posts are here: Part Six, Part Five, Part Four, Part Three, Part Two, Part One.)
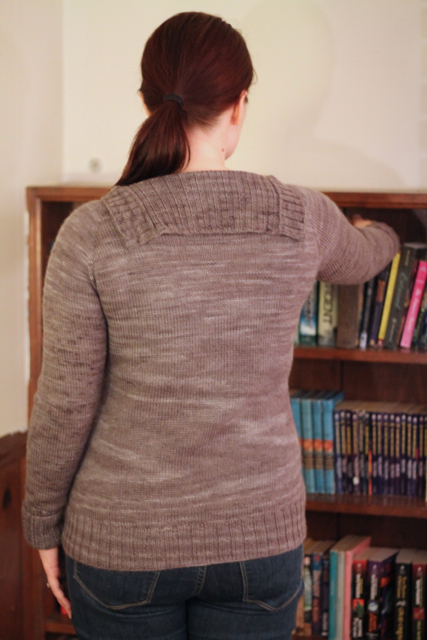
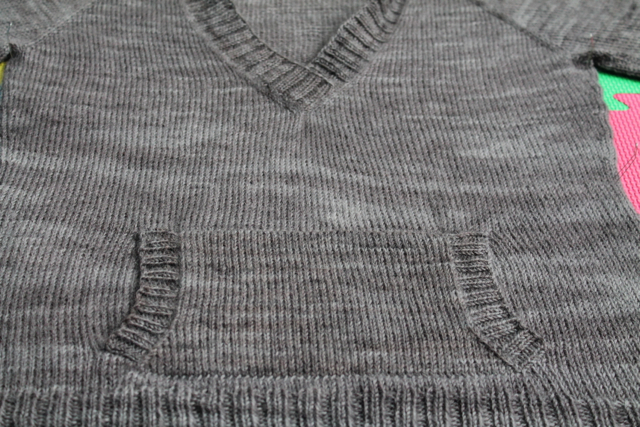
The sweater is done! I had plenty of the BFL sport left when I finished the last sleeve, so I couldn’t resist adding a cozy pocket on the front. I kept it small-scale to (hopefully) avoid the young teenager/sweatshirt look:
 Next up in the design process is blocking. When I’m knitting someone else’s pattern, I sometimes skip blocking–especially if it’s an item that’s going to get wet anyway, like a woolly hat–but I always, always block designs intended for publication.
This pre-blocking picture illustrates why. See the wrinkles and uneven stitches?
 The sweater fit me perfectly before blocking, which is good, since my swatch didn’t change in length or width when I blocked it. I took detailed pre-blocking measurements anyway, since the fabric usually gets stretched out and needs to be patted back into shape.
I warned you earlier about my nonexistent artistic skills.
And here it is in all its pinned-out glory. Esme is guarding the sleeve (and was summarily ejected from the room after the picture was taken):
 Next step in my design process: schedule a haircut/color. No, seriously. I’ll be the model for this design (obviously, since I knit it to my measurements), and I’m waaaayy overdue for a trip to the salon. While I’m waiting for my appointment, I’ll start in on the pattern writing–my least favorite part of the whole process, but necessary!
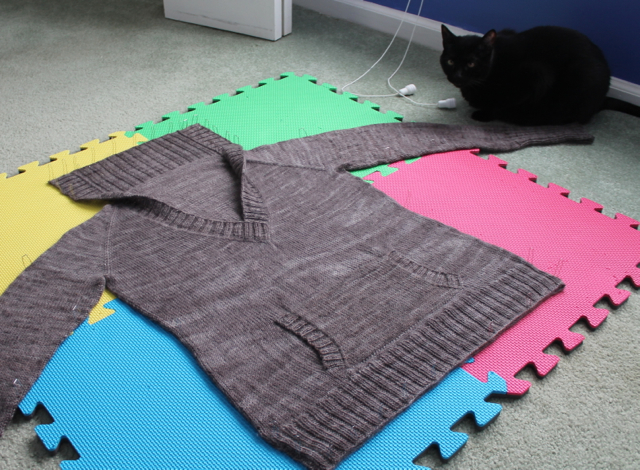
WIP Wednesday: Neck! And Buttons!
(This is fifth in my series of design process posts. Earlier posts are here: Part Four, Part Three, Part Two, Part One.)
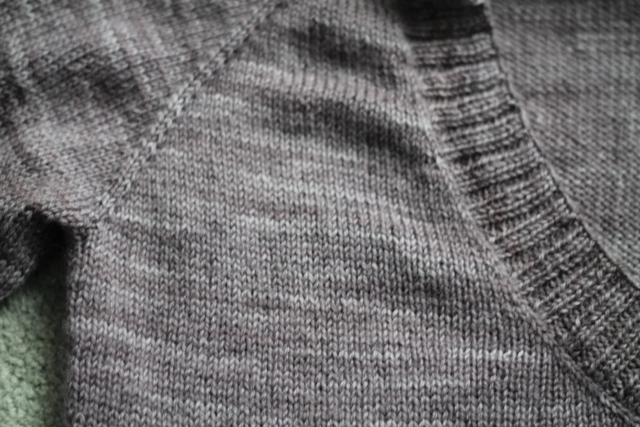
The sweater is progressing, if a little slower than I’d like (I’ve been working on a bunch of pattern writing, which is cutting into my knitting time). But I got the neck finished last night!
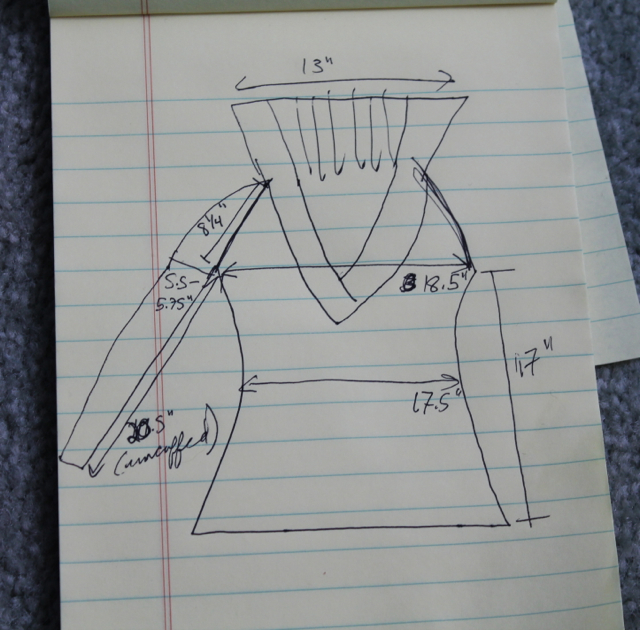
 I was going for a “looks like a hoodie from the front, but hardly any bulk in the back” thing, and I’m really happy with the way it turned out! Needs blocking, of course, but I think it’ll be pretty close to the sketch once the back neck is stretched out a little more. I did the neck before the sleeves, as that’s usually the more iffy part of a design for me, so I’ll be working on the sleeves this week.
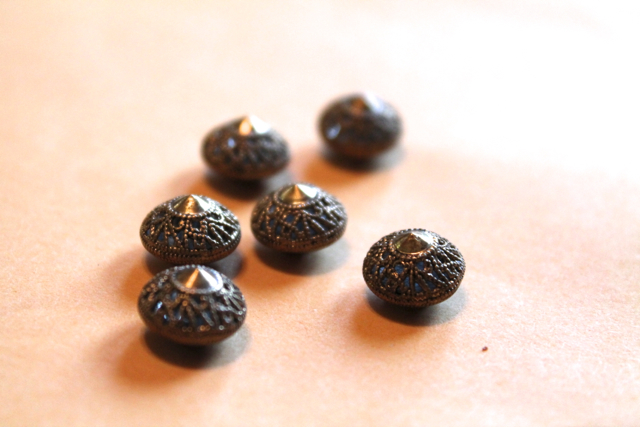
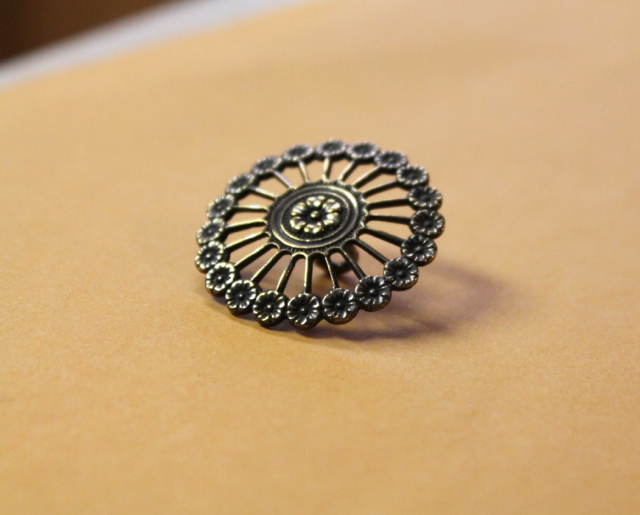
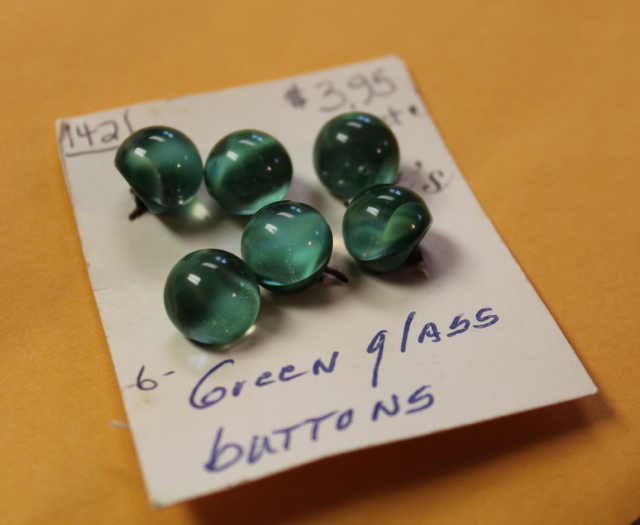
In other news, I went to a button show this week!
 It was, quite frankly, a little surreal. I was hoping to find some neat buttons for future designs, which I did (see below!), but I didn’t quite realize how passionate most of the people there would be about their buttons. These people are SERIOUS collectors. There were buttons there selling for hundreds, even thousands of dollars!
Every once in a while, it’s nice to be reminded there are people with hobbies that are generally regarded as even crazier than mine, heh.
But everyone there was incredibly nice, and I came away with some very lovely (and cheap) buttons!
 If you want to know more about the button show (you masochist, you), my husband did a great blog post about it–and the bizarre hotel that hosted the show–on his blog here.
WIP Wednesday: Sweater-in-progress and Owl Puff
(This is fourth in my series of design process posts. Earlier posts are here: Part Three, Part Two, Part One.)
The sweater design is still rolling along! I just started the bottom ribbing on size US #3 needles, ugh. But I should be done with the body later tonight.
Last weekend, I was working merrily along on the neck increases below the sleeve split when I realized I’d made a pretty serious math error when I set the whole thing up. This is, unfortunately, as much a part of my design process as sketching or swatching. (That’s what I get for trying to crunch numbers while watching Supernatural episodes.)
So I had two choices at that point–rip out the entire yoke of the sweater, back to the point when I started the neck decreases–about an inch from the cast on–or rearrange the numbers so they worked with what I’d already done.
Guess which one I picked?
Turns out I like this neckline shape better anyway, though. I’m calling it a fortuitous accident. :-)
I also cast on a little mini-project yesterday:
 It’s an in-progress Owl Puff (Ravelry link)! A friend of mine has helped me tremendously with the fiction-writing side of my life and loves owls, so she’s getting a little surprise in the mail as soon as I can get to the craft store to buy some felt and safety eyes.
And along those lines: I signed with a literary agent for my fiction yesterday! It means I’m that much closer to my goal of writing for a living. So it’s been a very good week all around. :-)
Design Process Part 3: The WIP
Earlier posts in this series: Design Process Part 2: Sketching, Swatching and Math ~ Design Process Part 1: Inspiration
The next step in the design process is, of course, to knit the sweater. (Actually, I shouldn’t say “of course”. There are plenty of designers who work out the whole pattern for the sweater, grading and all, before they knit a stitch of the actual sweater. That just doesn’t happen to be my process.)
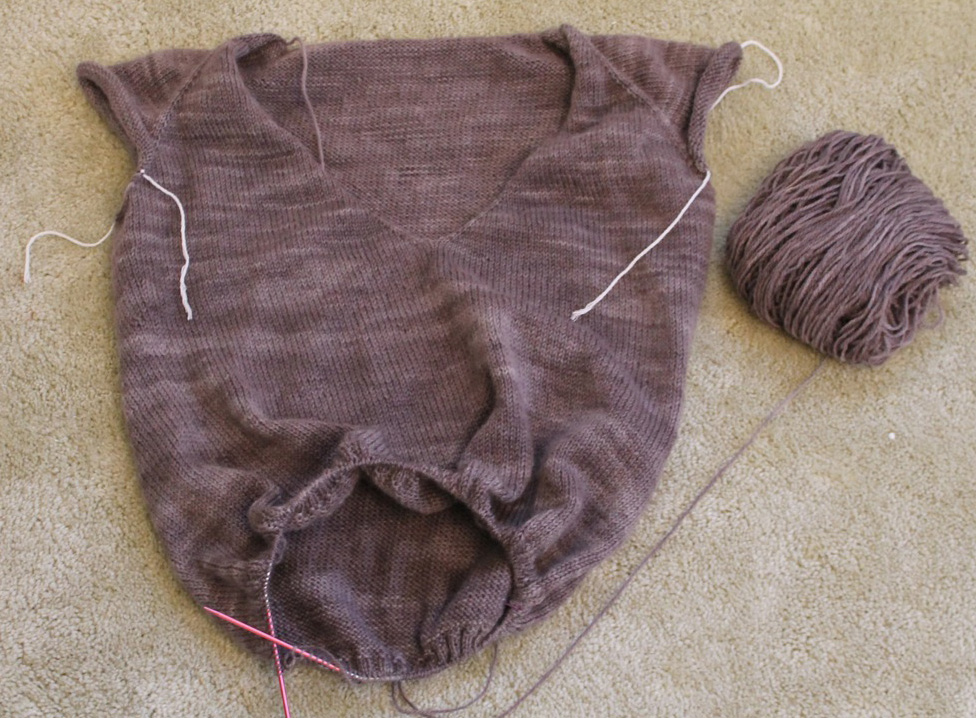
I’ve been working on it for a few days, and I just split the sleeves off last night:

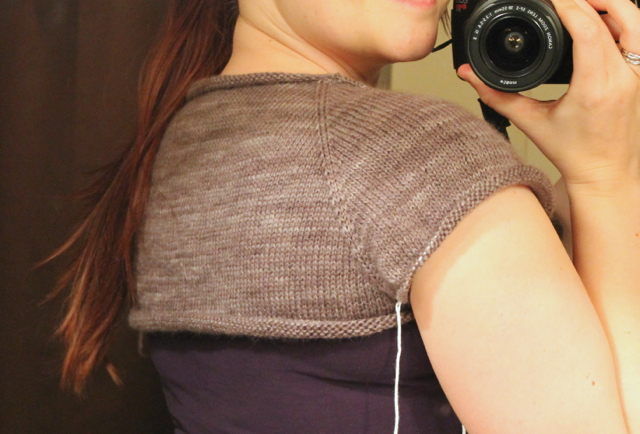
I’m very pleased with the sweater so far! The only hiccup I experienced was a slight change in row gauge from my swatch to the sweater. In the swatch, I got 8.5 rows to 1 inch, which didn’t change when I blocked it. In the sweater, I’m getting 8 rows/in. Luckily I noticed this in time to realize I’d need to shorten the yoke depth by a few rows. Not a big change–but something I always check now, after being burned by gauge swatches before!
And look, it fits rather well (these pics were taken at about 11:00 last night, so please forgive the messy hair and lack of makeup):

Another reality check I do as the sweater progresses relates to the amount of yarn I’m using. There have definitely been times where I assumed I’d need a certain number of skeins and completely mis-estimated–and that’s much nicer to figure out at the beginning of a sweater, so I have time to order more.
But it looks like I’ll have plenty of yarn. I still have well over half the giant skein left, which should hopefully get me the rest of the way through the body. And if that works, I won’t have to worry about alternating skeins at the changeover point (a real concern when working with handpainted yarn). So bonus!
 More WIP photos to come!
Patterns For Sale

- Concord Vest – $5.00

- Full Circle Cardigan – $6.00

- Dream a Little Dream – $6.00

- Lavandula – $7.00

- Blue Betty – $6.00

- Rosanna Wrap – $5.00

- Hipster Stripe – $5.99

- Bevin Pullover – $5.99

- Kari Baby Blanket – $5.00

- Daisy Cloche – $3.00

- Daisy Mittens – $3.00

- Europos Scarf – $4.00

- Morgandy Mittens – $4.00

- SoCal – $3.50

- Santa Slouch – $3.00

- Give ‘Em the Slip Hat – $3.50

- Give ‘Em the Slip Mitts – $3.50

- Put Together – $5.00

- Helix – $3.50

- Chandail – $6.00