
Design Process: Blocking!
(Seventh in my series of design posts. Earlier posts are here: Part Six, Part Five, Part Four, Part Three, Part Two, Part One.)
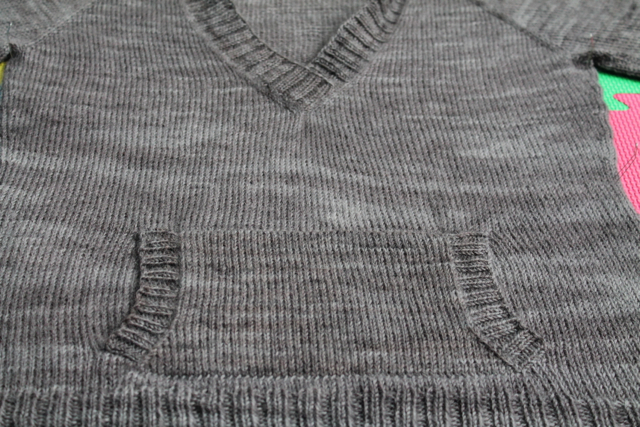
The sweater is done! I had plenty of the BFL sport left when I finished the last sleeve, so I couldn’t resist adding a cozy pocket on the front. I kept it small-scale to (hopefully) avoid the young teenager/sweatshirt look:
 Next up in the design process is blocking. When I’m knitting someone else’s pattern, I sometimes skip blocking–especially if it’s an item that’s going to get wet anyway, like a woolly hat–but I always, always block designs intended for publication.
This pre-blocking picture illustrates why. See the wrinkles and uneven stitches?
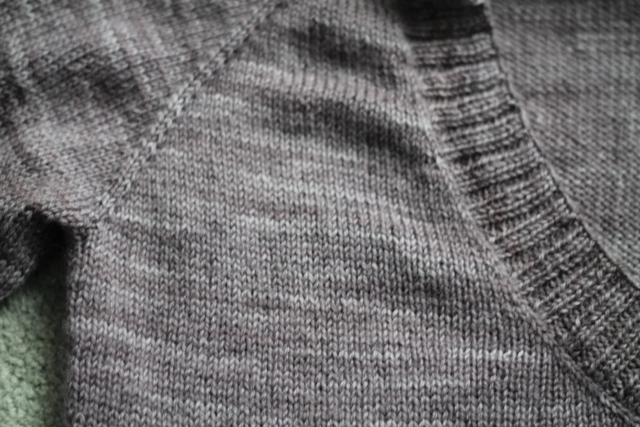 The sweater fit me perfectly before blocking, which is good, since my swatch didn’t change in length or width when I blocked it. I took detailed pre-blocking measurements anyway, since the fabric usually gets stretched out and needs to be patted back into shape.
I warned you earlier about my nonexistent artistic skills.
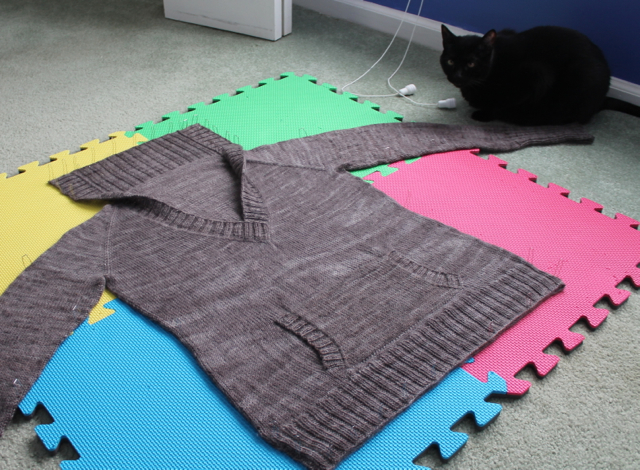
And here it is in all its pinned-out glory. Esme is guarding the sleeve (and was summarily ejected from the room after the picture was taken):
 Next step in my design process: schedule a haircut/color. No, seriously. I’ll be the model for this design (obviously, since I knit it to my measurements), and I’m waaaayy overdue for a trip to the salon. While I’m waiting for my appointment, I’ll start in on the pattern writing–my least favorite part of the whole process, but necessary!
Design Process Part 2: Sketching, Swatching, and Math
Earlier posts in this series: Design Process Part 1: Inspiration
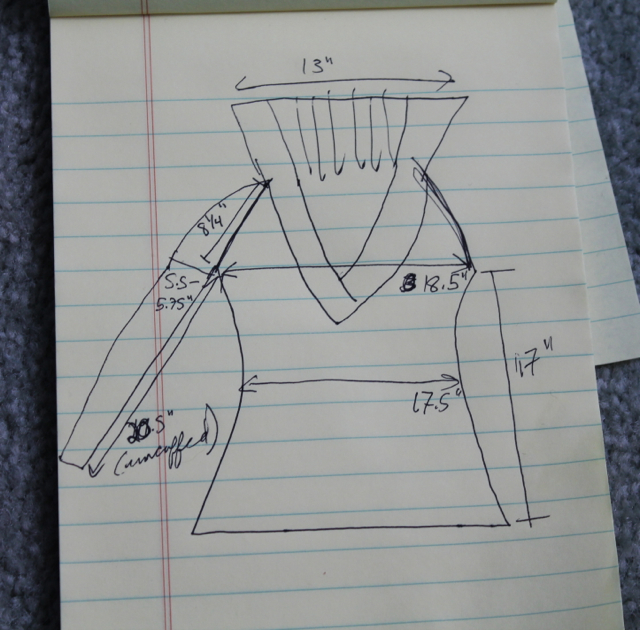
Now that I have a pretty good idea of the general look and construction I want for the sweater, it’s time to think about the details. First up, I do a rough sketch of the design.
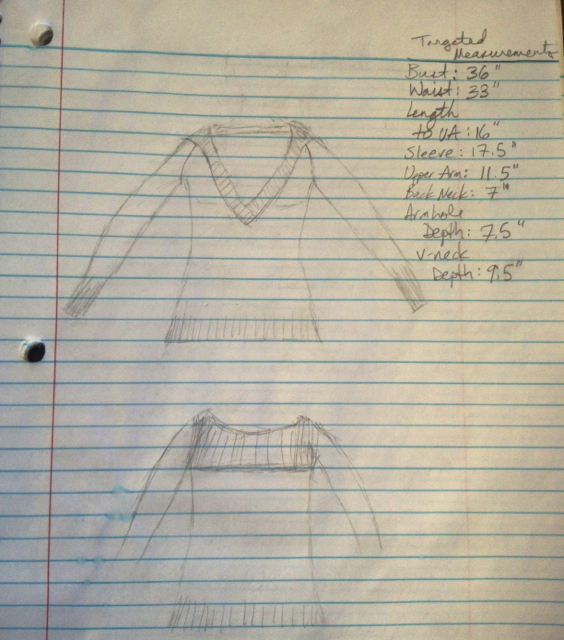 Ahem. I did warn you it was rough. I’m not much of an artist, so if the sketch isn’t for submission to a publication, I don’t spend much time on it. But it gets the idea across!
I also included the targeted measurements for my size. Before, I would need to look up standard guidelines for this bust size, but I’ve knit enough size M fitted sweaters now that I know most of these measurements off the top of my head. A few of them are specifically tailored to my preferences–I like a little bit of positive ease on the upper arm, for example, but I tend to like an inch or two of negative ease at the bust. I also tend to like slightly longer sweaters (probably because a large bust tends to make shorter sweaters ride up at the bottom!).
Next up, choosing yarn! Fun!
It was pretty easy in this case. I have this gorgeousness in my stash:
 This is Blue Moon Fiber Arts BFL Sport in the “Manly, yes, but I like it too!” colorway (great name, eh?). I purchased two giant skeins (about 1300 yds) at Rhinebeck last October. After checking Ravelry, this looks like plenty to knit this type of sweater in a 36″ bust size. The great thing about top-down, too, is I know I have the option of knitting shorter sleeves or a shorter body if it looks like I’m running low on yarn.
Swatch time! As I mentioned in this post, the recommended size on the label for this yarn is incorrect. After a quick check on the yarn’s Ravelry page, I started with US #4 (3.5 mm), and I liked the fabric I got after I wet-blocked the swatch:
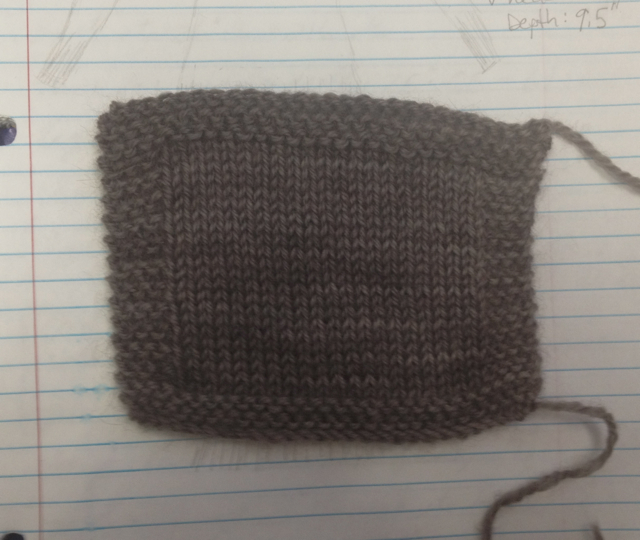
Pardon the craptacular phone picture.
My measured gauge after blocking is 6 sts/8.5 rows to the inch. A little thinner than I usually prefer (I’m generally a DK and up girl), but the yarn’s soft and nice to knit with. Due to some kind of distracting life stuff going on right now, a stockinette, finer gauge sweater is just what the doctor ordered!
If I were knitting a bottom-up sweater, this is the point where I’d usually do some quick, rough calculations and then dive right into the knitting.
BUT… this is going to be a top-down sweater. So that means I have to do a whole bunch of math before I know how many stitches to cast on.
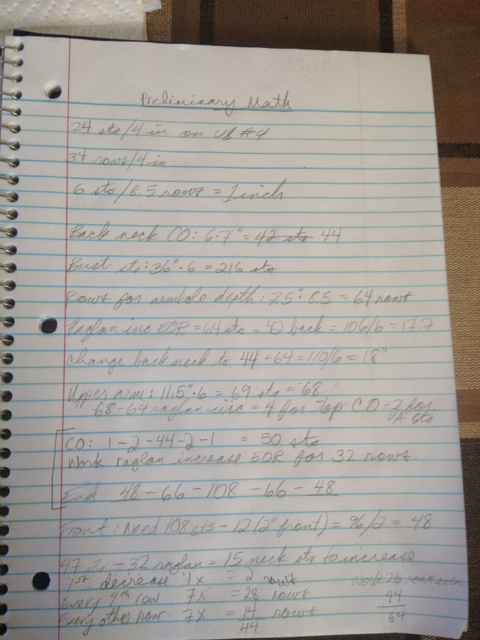 Yeah, that wasn’t too much fun. It took me two whole episodes of Supernatural!
Some designers prefer to grade the pattern for all the sizes before they start knitting the sample in their size. I confess, I’m not one of those. I work out the numbers for my size, tweaking them as I go, and then grade the pattern for the rest of the sizes when I’m finished with the prototype.
Next up: casting on! Woohoo!
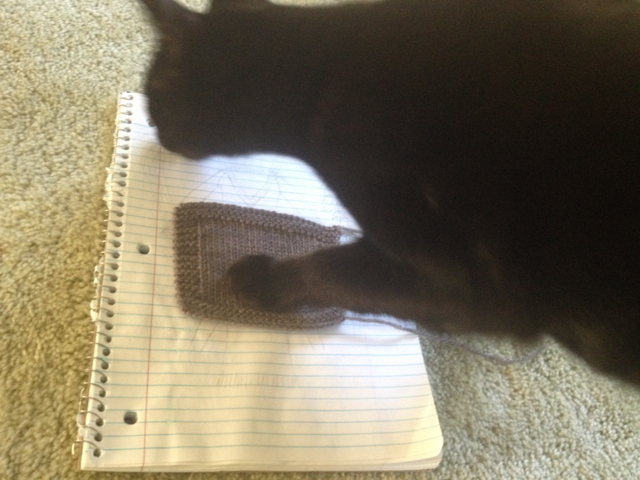
Bonus picture: one of the kitties “helping” me photograph the swatch.
Organized
(Warning: photo-heavy post)
I have been disgruntled with my yarn storage for a while now. When we moved into our current apartment, we found these cubes at Target and hung them on the wall:

There are several things to note in this photo. First, although the idea of having the yarn as decoration on the wall is a good one, everything ends up piled haphazardly in there. Second, the unattractive pieces of plastic stuck in the sides… which we found out pretty quickly were necessary to keep curious cats from jumping on the dresser and futzing with bits of yarn. And third… the top of the cubes pretty much serve as a clutter repository catch-all for random things.
And the rest of my yarny storage wasn’t much better. Here’s what my books/magazines/WIPs/needles/notions area looked like:

No, we don't live in a dorm room, but I don't blame you for thinking it.
My workspace, where I do the majority of my designing:

If you’re getting depressed by all this clutter, don’t worry! This post will have a happy ending, I promise.
A table covered with WIP patterns, swatches, etc:

So obviously I needed a new storage solution. Enter… (cue dramatic music)… IKEA!

The husband assembled it for me, assisted by the cats:


What? This is my hammer.
And here’s what my yarn storage looks like now!


All my yarn fits in the cabinet with room to spare (okay, not much room–but some). WIPs (including swatches and designs-in-progress) are in the middle bin, partial balls leftover from projects in the second bin, and yarn I’m hoping to trade or sell in the bottom bin. The cubes hold all my needles, notions, and books. Magazines have been moved to the bookcase in the living room, where they stand up better anyway.
The cabinet is a Billy bookcase from IKEA, with a Billy Olsbo half-glass door. All together (including the bins), it was just under $100. A steal, if you ask me.
Although… after sorting my yarn, I’m starting to think I need more sweater-quantities. So it may not end up being quite so cheap, heh.

TILT: Blocking
Thing I Love Today: the magic of blocking!
The baby blanket is done. I’ll have better pictures by Friday, but I thought a walk through my blocking process might be interesting.
I use these foam mats I bought at the hardware store to block everything. They were cheap and they do the job. The only problem is that they have some kind of magnetic attraction for one of my cats, so after two years they all look pretty much like this:


All four mats, with guilty cat for scale
Here’s the blanket as it came off the needles: crumpled and narrow. This pattern (my own) includes quite a bit of 1×1 ribbing, so this was to be expected.

Size before blocking: 22" by 32"
Then I measured carefully and spent waaay too much time using every pin I own to stretch it to size.

Kitty inspecting my work. She doesn't look impressed, does she?
I got a nifty new steam iron a few weeks ago. It does vertical steaming as well as horizontal, which is awesome for quick sweater touchups before photoshoots.

Steaming/spraying in progress:

And here’s the finished blanket drying. See how well the pattern opened up?

Non-iPhone pics coming soon!
Patterns For Sale

- Concord Vest – $5.00

- Full Circle Cardigan – $6.00

- Dream a Little Dream – $6.00

- Lavandula – $7.00

- Blue Betty – $6.00

- Rosanna Wrap – $5.00

- Hipster Stripe – $5.99

- Bevin Pullover – $5.99

- Kari Baby Blanket – $5.00

- Daisy Cloche – $3.00

- Daisy Mittens – $3.00

- Europos Scarf – $4.00

- Morgandy Mittens – $4.00

- SoCal – $3.50

- Santa Slouch – $3.00

- Give ‘Em the Slip Hat – $3.50

- Give ‘Em the Slip Mitts – $3.50

- Put Together – $5.00

- Helix – $3.50

- Chandail – $6.00