
Friday Roundup: I’m Back!
What I’m Knitting
I missed posting last week while on vacation, but I’m back home as of a few days ago and settling back into the routine! Thanks to a road trip from the Seattle area to Sacramento, CA, I managed to finish most of a little nautical-themed pullover idea I’ve had brewing for a while:
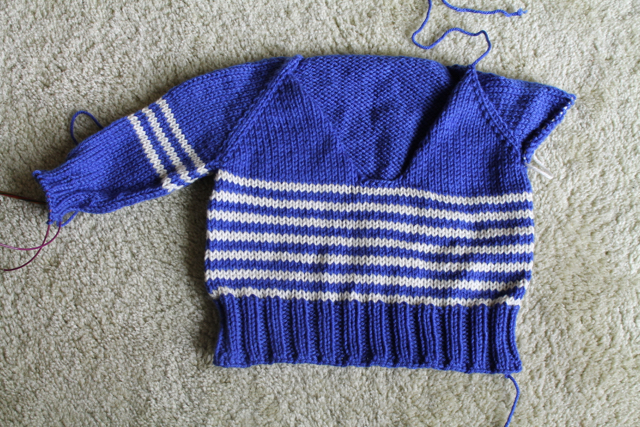 I would have finished the whole thing, but I only brought one ball of the blue yarn, thinking I’d never get through that much with the little one to worry about. Oh well, now that I’m back, hopefully I can get it wrapped up this week. It just needs the second sleeve and the shawl collar, so not too bad.
We stopped in another lovely little yarn shop on our travels and I managed to score another couple of great skeins…but our suitcases were overfull, so I had to have those shipped. Hopefully I’ll have them by next week!
What I’m Cooking:
I actually cooked quite a bit in Sacramento, but I forgot to get pics (and it was mostly my old standbys that I’ve shown a few times here already, anyway). My son’s favorite food right now is my vegan broccoli “cheddar” soup, so I whipped up a big batch of that for his first birthday party last week. It was a hit!
Now that I’m home, we’re about to go on an epic grocery shopping trip and much cooking will commence. I always feel like I need to detox after a vacation—anyone else feel that way too?
What I’m Reading:
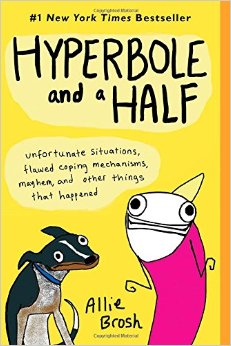
My husband and I have been fans of Allie Brosh’s Hyperbole and a Half blog for years, so I had to get him this book version for his birthday. I got to read it when he was done. It’s just as funny as the blog! I was reading it on the plane with my son sleeping on my lap, trying not to laugh too much and wake him up.
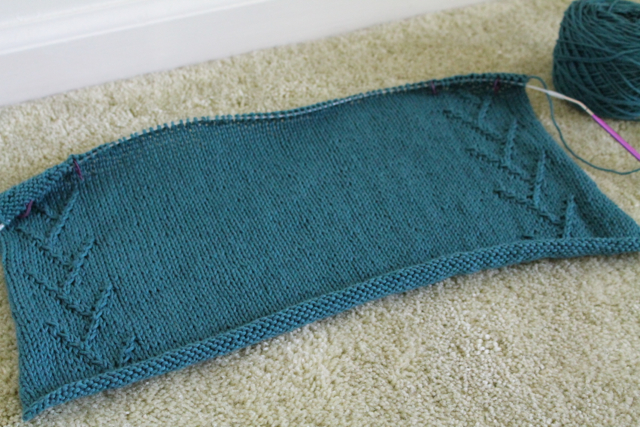
WIP Wednesday: Blanket and TNNA prep
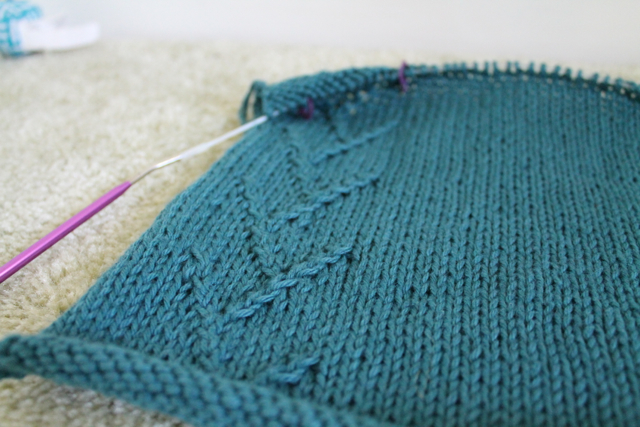
The baby blanket is almost done! It looks a lot better now that it’s not so scrunched up on the needles:
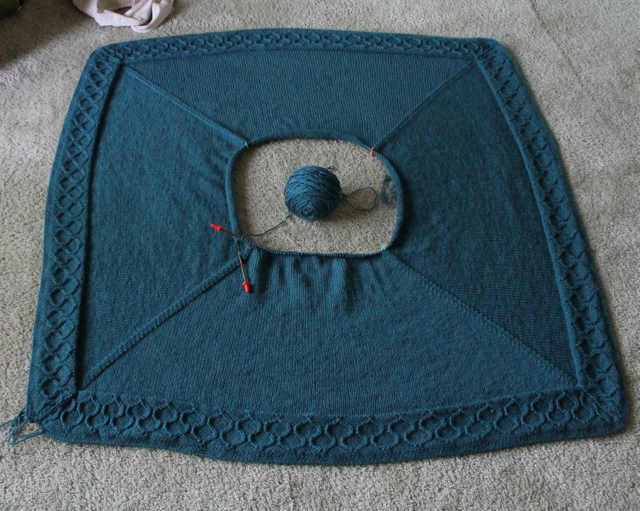
I ran out of yarn a few days ago and ordered a couple of skeins from Knit Picks on Monday with express shipping. Imagine my shock when they were on my doorstep yesterday. Their warehouse is in Ohio, only one state away from me, but still–that’s some lightning fast shipping!
I think I might do another repeat of the border pattern to echo the motif and break up the swath of stockinette, but I haven’t 100% decided yet. I’ll probably try it–I can always rip it out if I don’t like the way it looks. (It’s a lot less daunting to rip out sections at this point than it was earlier, when there were 600+ sts!)
I’m also deep in planning for the TNNA summer show this weekend. Like last year, I’m part of a rotating exhibit of designers through my print pattern distributor, Stitch Sprouts. I’m really excited that the show is in Indianapolis this year, only about 45 minutes away from me. It means I can haul my 7-month pregnant self there without too much difficulty.
I wanted a good way to display some hats on a table in my booth, but I forgot to order early enough to get cute hat stands from Etsy or eBay (I blame pregnancy brain). So yesterday I went out and got some inexpensive paper towel holders, styrofoam balls, fabric remnants, and ribbon. Following parts of a few different tutorials I found online, I came up with this:
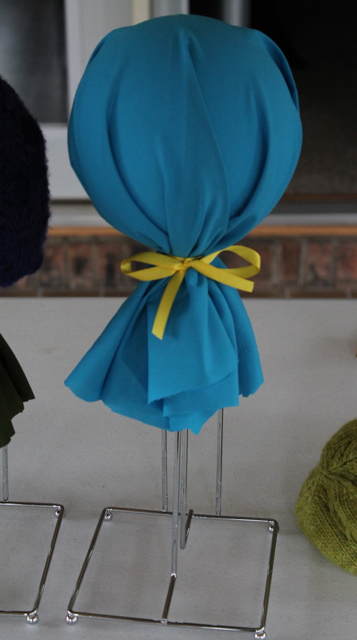
I think they turned out pretty cute!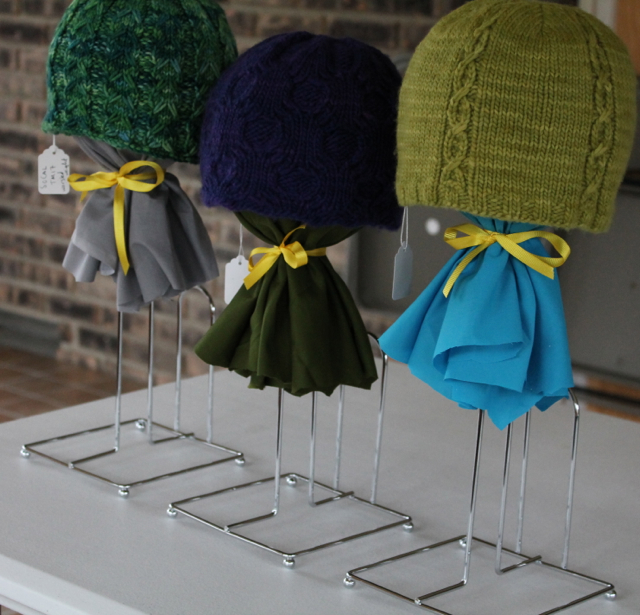
FO Friday: Baby Hats!
Well, I said I’d go nuts with baby stuff now that my commissioned designs were finished. Maybe you thought I was exaggerating?
Ahem. For FO Friday today, I have two baby hats, designed and knit up in about two days each.
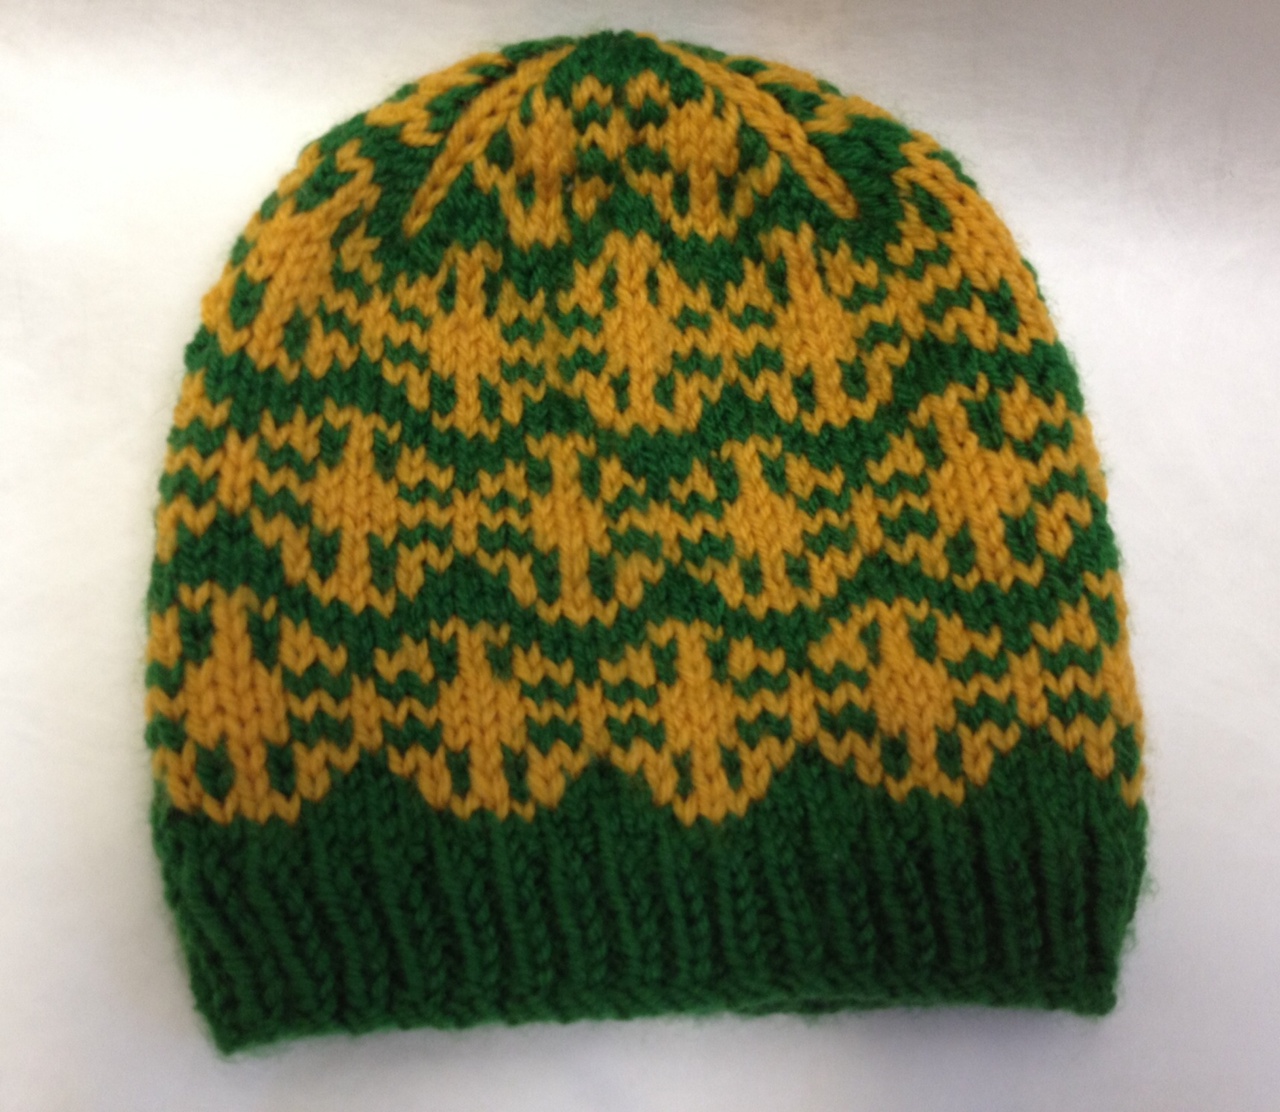
First up, this little fair isle number:
The specs:
Pattern: My own, coming… sometime? I’ll probably have a flurry of baby releases this fall, after the baby is born and I have a willing model. The colorwork pattern is one I was playing with more than a year ago, but I wasn’t happy with it for an adult hat. I think it’s perfect for babies, though!
Yarn: Knit Picks Brava Sport. I got a bunch of Brava in a few different weights for Christmas, since I knew I’d want to make some easy-care baby gifts. This was my first experience knitting with it. I totally understand why people are raving about it. If I didn’t know it was 100% acrylic, I wouldn’t have guessed. It’s soft and non-squeaky. Very nice to knit with.
Unfortunately, I’ve heard that Knit Picks has moved production of this yarn to another country recently, and it changed considerably so it’s closer to other types of 100% acrylic yarn. Here’s hoping they get it resolved, because I’d buy this stuff by the truckload if it was always like this.
Notes: Does this colorwork pattern look like TIE fighters to anyone else? Just me then? Okay.
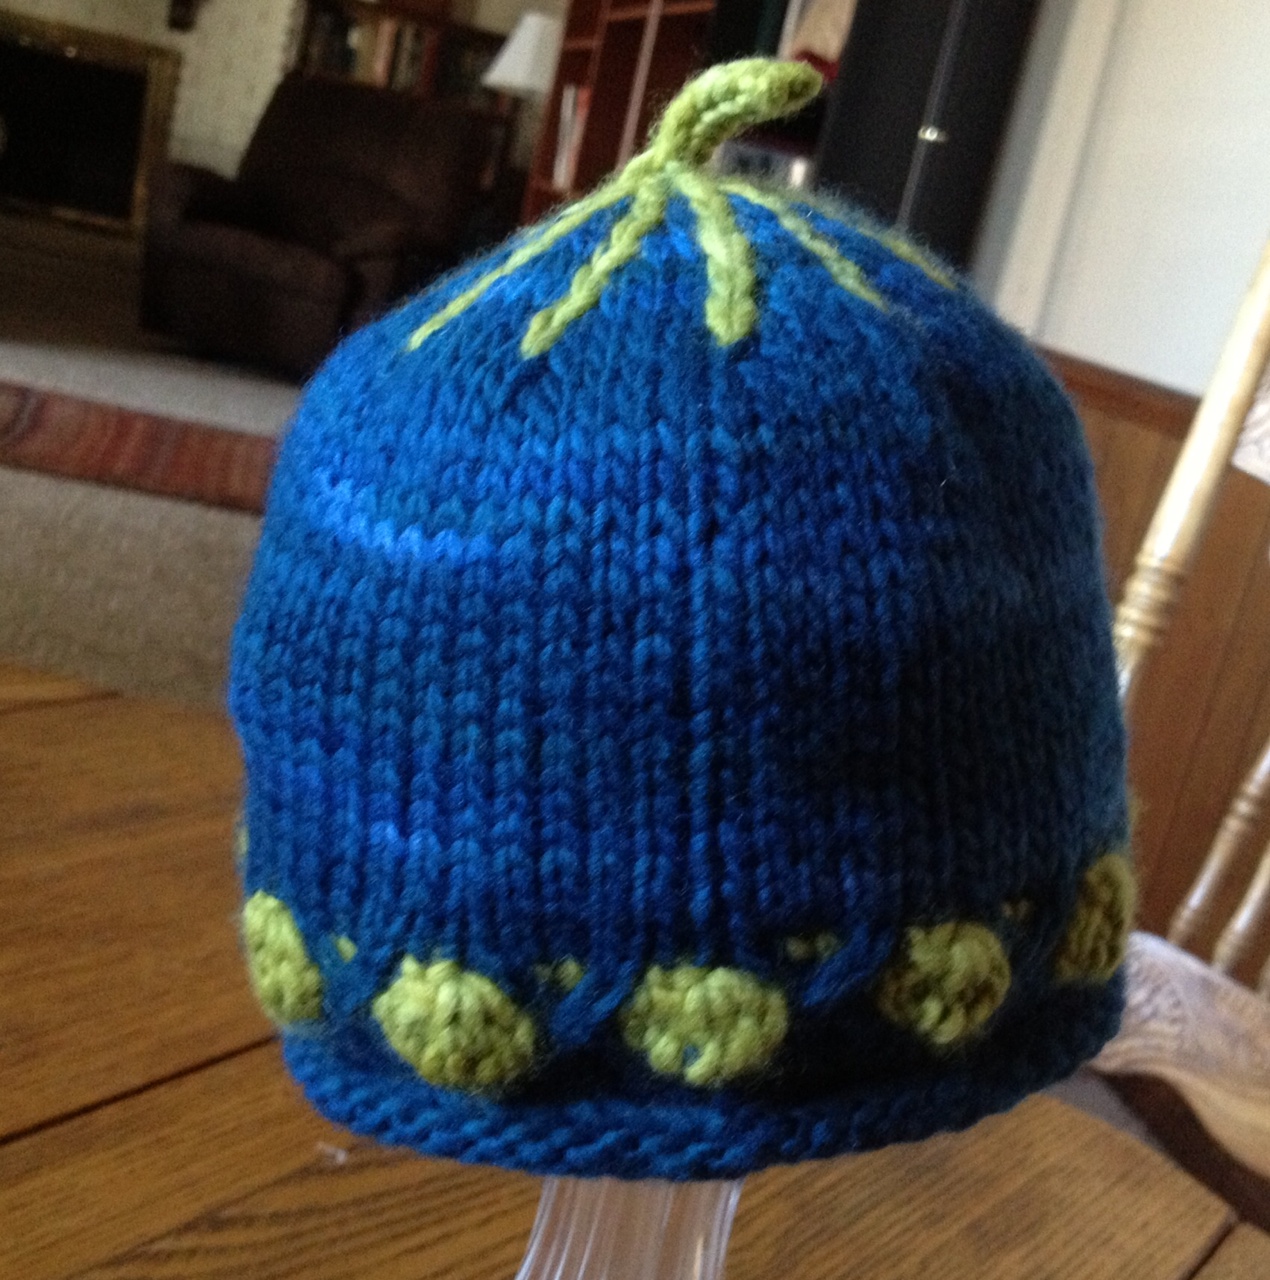
The next hat turned out pretty dang cute, too:
Pattern: My own, probably coming sometime this fall.
Yarn: Malabrigo Worsted in Azul Profundo and Lettuce. This yarn is soooo nice on the hands. After knitting with a cotton-like yarn on the commissioned designs, it was like bathing in lotion. And bonus–this is all leftover yarn! I knew I was hanging onto that teeny ball of Lettuce for a good reason.
Notes: I love the bobble-y pattern on the brim, but the contrasting color decreases and the teensy i-cord make this hat for me. I cannot WAIT to put it on my very own baby. I might die from cute.
And if those weren’t enough baby knits for you, I also started a little cabled sweater design, also in Malabrigo Worsted. It’s about 1/4 of the way done already. Maybe if I hustle, I’ll have it finished for next Friday. :-)
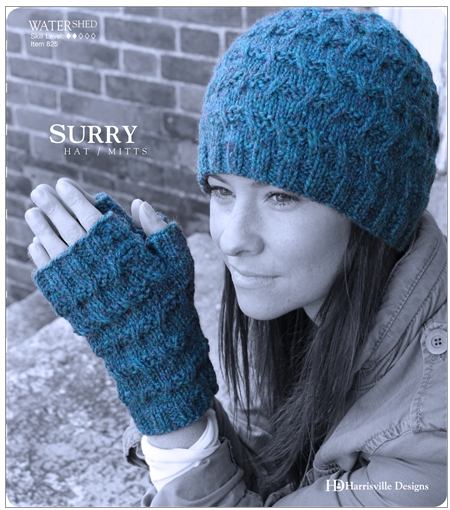
New Pattern Release: Surry Hat and Mitts!
I have two accessory patterns in the just-released Harrisville Designs Autumn 2013 Collection!
Here are the Surry Hat and Mitts:
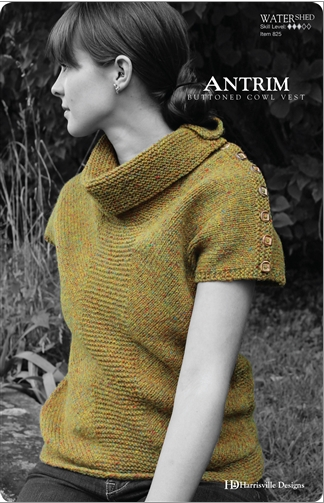
I highly suggest checking out the other patterns in the collection, too. There are five lovely sweaters and a set of hat and boot toppers. I’m absolutely drooling over Mercedes Tarasovich-Clark’s Antrim:
I gushed about working with the WATERshed when I showed you the swatch picture, so I won’t bore you with more… but let’s just say I was really excited to hear Harrisville Yarns will be at Rhinebeck this year. Don’t be surprised if I’m showing off a sweater quantity of this yarn the week after Rhinebeck…
Interview on Harrisville Designs Blog
I recently designed some accessories for the Harrisville Designs Autumn ’13 collection, and today they have an interview with me up on their blog!
They haven’t released the collection yet, so no pictures of the finished items… but I can show you my swatch of the stitch pattern (shown in the blog post, so I’m not giving anything away).
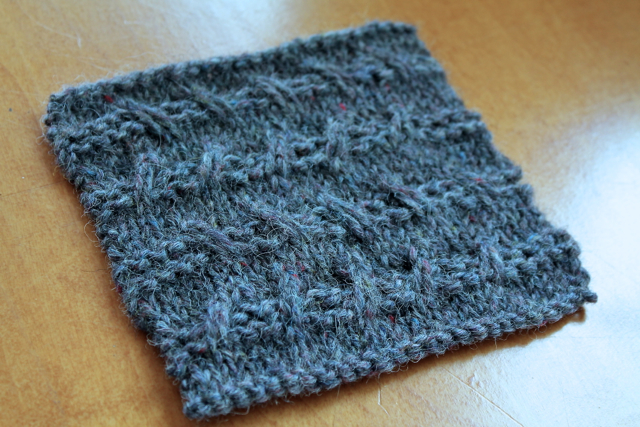 The yarn I used, Harrisville WATERshed, was ammmaaaazzing. It looks like a crunchy, tweedy, rustic yarn, but it feels incredibly soft and lofty. I can’t wait to see the rest of the collection–and like I said in the interview, I’m definitely eyeing this yarn for a future sweater design.
FO Friday: Blue Tosh Chunky Hat
I finished a hat this week! (Okay, actually I finished it the week before, but finally got it together to take some pictures this week.)
 It’s in Tosh Chunky, just like Dandelion Clock (pattern now available on Ravelry here!). Man, do I ever love this yarn. It’s just like Tosh Vintage, which is probably my favorite yarn ever, except FOs get done even more quickly. This color is Mica–isn’t it pretty?
Usually I have to rip out and reknit the decreases at the top of a new hat design a few times until they look right, but this one made this pretty floral-looking design on the first try! Bonus. :-)
 You guys were so helpful with name ideas last time–any thoughts on this one? I’m drawing a complete blank.
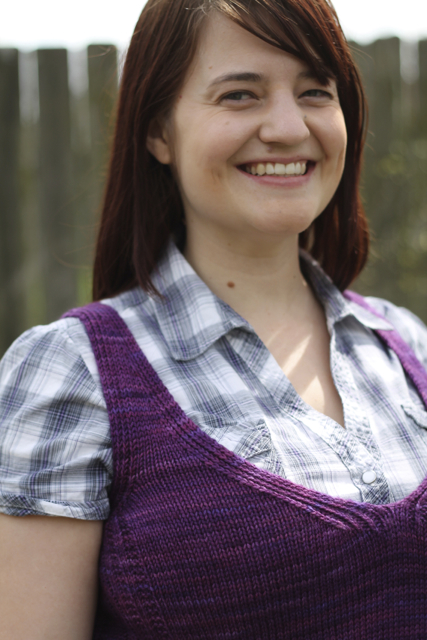
New Pattern Release: Concord Vest!
I got the pattern for my Concord Vest up for sale yesterday!
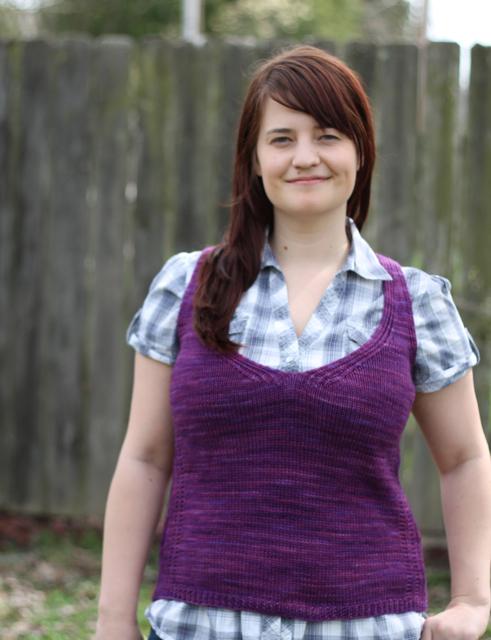 It’s my first independent pattern release in months, actually. This is thanks to two secret sweaters for a yarn company, and the hibernating gray sweater. So I’m really pleased to release this pattern out into the wild, just in time for summer knitting. It’s designed in DK weight yarn (Cephalopod Yarns Traveller, to be specific) and is available in bust sizes 27 (30.5, 33.5, 36.25, 39.25 / 42.25, 45, 49.5, 53)”, or 68.5 (77.5, 85, 92, 99.5 / 107.5, 114.5, 125.5, 134.5) cm.
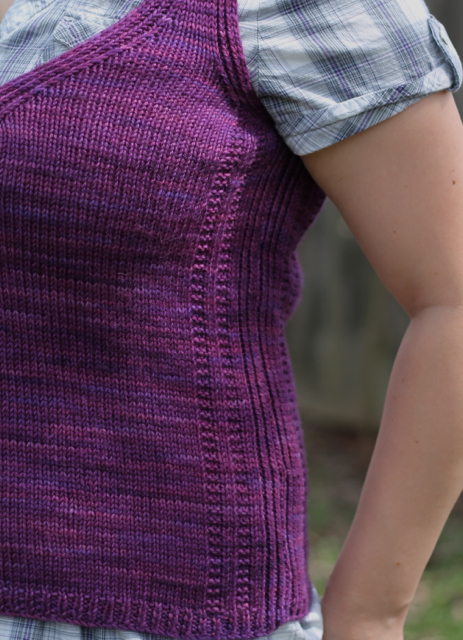
My favorite part about this vest is the interesting construction. Because I wanted a pick-up free sweater–that is, one in which there would be no picking up of stitches–I designed it with the armhole and neck edging knit along with the main piece.
 But this created a problem: how would I do the typical underarm shaping without being able to bind off stitches at the beginning of rows? The answer was creative decreasing. By working double and single decreases on both sides of the fabric, I was able to mimic the slope of “traditional” bind-off underarm shaping, while leaving the side pattern intact.
 Plus this meant it was really fun to knit. :-)
Concord is available for purchase for $5.00 through Ravelry via this link (you do not have to have a Ravelry account to purchase). I hope you all like it as much as I do!
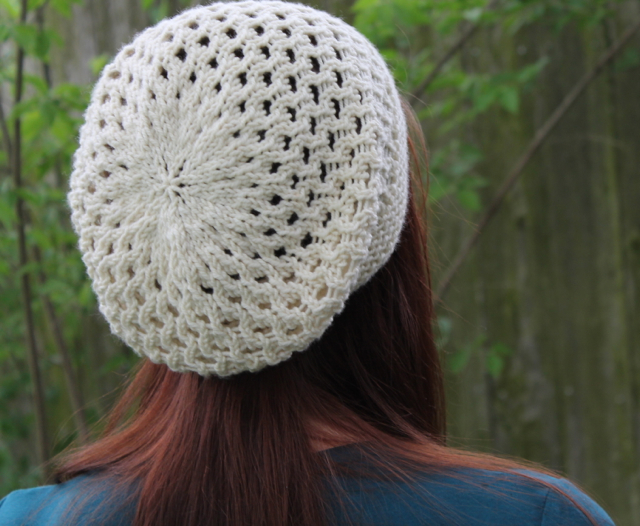
FO Friday: Nameless Hat
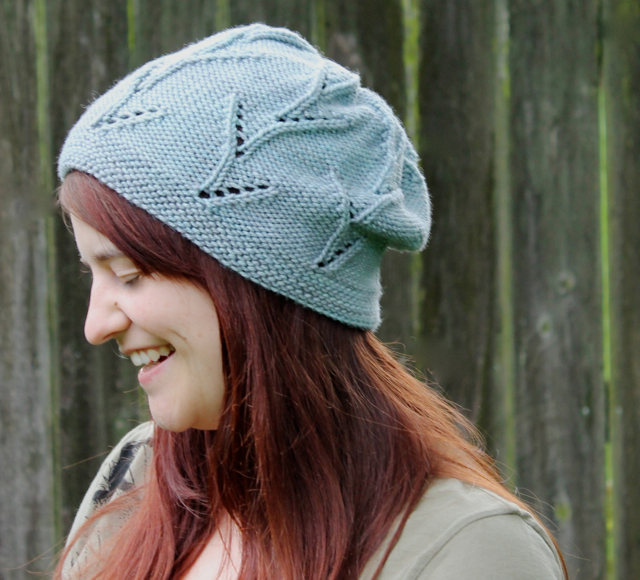
I finished a new hat this week!
 It’s a new design, but I’m drawing a blank on a name for it. If you have any ideas, let me know!
The specs:
Pattern: My own (probably will be released this month, depending if I decide the pattern needs testing)
Yarn: Madelinetosh Tosh Chunky in Natural. While the yarn was as squishy and delicious to knit with as ever, it was sort of bizarre to have colorless Madelinetosh. I really love the dyeing, so I think I’ll probably stay away from this shade in the future. I do like the color with my reddish hair, however!
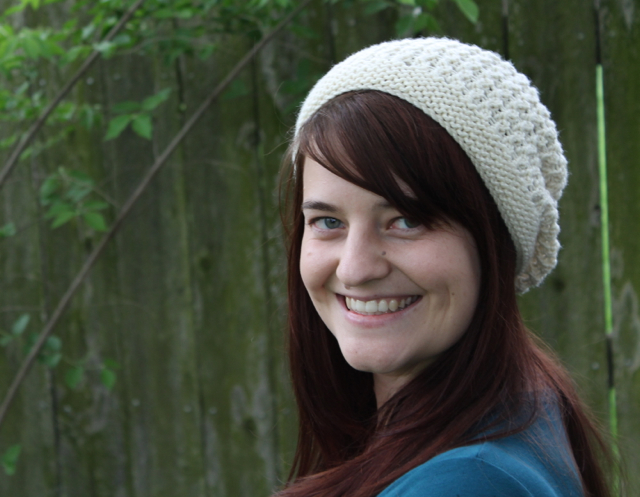
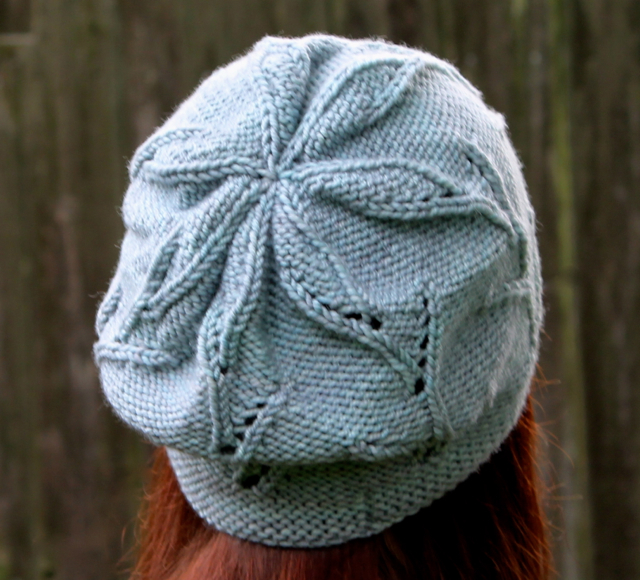
Notes: The lace and cable pattern I decided to use seemed very straightforward… until I tried to convert it to knitting in the round rather than flat. Many swatches later, I figured out that the end of round marker needs to be moved forward one stitch at the end of each pattern repeat. That also gives the hat a neat spiral effect.
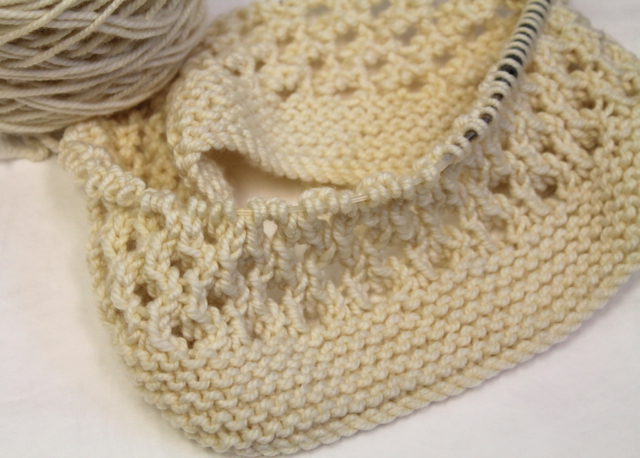
I decided to do a cable-cast on instead of my usual long-tail, because it plays more nicely with the garter stitch brim. The cable-cast on hurts my hands, and I find it much more fiddly than the long-tail, but I think the results were worth it. You can see the cast-on edge pretty well in this work-in-progress pic:
 I’m participating in Madelinetosh May, an event put on by the Madelinetosh Lovers group on Ravelry, so I’m going to try to get one more Tosh hat design done before the month is up!
WIP Wednesday: Bevin Mark 2
Well, I guess Knitting & Crochet Blog Week must have taken a bit more out of me than I thought, because it’s been over a week since I last posted. Oops.
Anyway, during that time I’ve finished a prototype for a new hat design (more on that Friday!) and started this:
I’m knitting another sample for my own Bevin Pullover pattern, in the called-for Knit Picks CotLin yarn. The first sample was shipped back to me just as I moved across the country, and between a wonky forwarding order and the not-very-conscientious tenants who moved into our apartment after us, the sweater went missing.
I was never totally thrilled with the original pattern pictures anyway, so I’m not too upset. They were taken on a beach in the middle of summer, so I was trying my very best not to sweat profusely the whole time. This is my chance to knit a new version and do a new photoshoot. I’m just lucky Knit Picks got some nice ones, which they graciously allow me to use as I see fit:

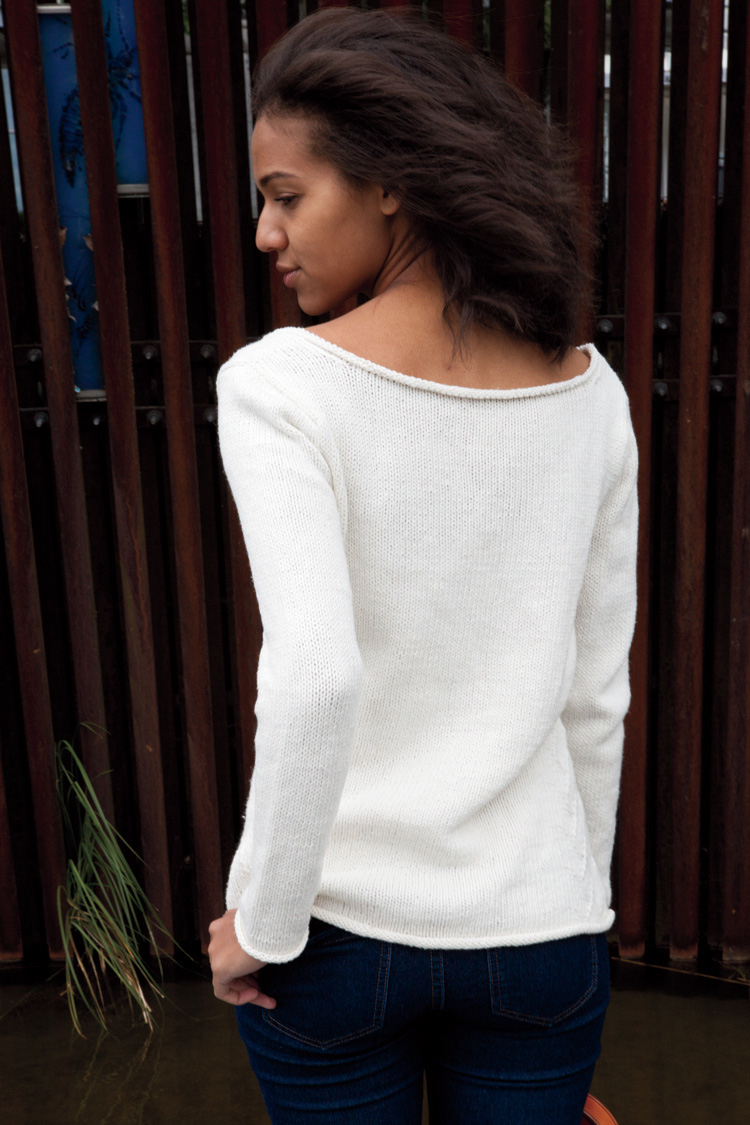
Their model looks gorgeous in the white color, but I think the teal is better for me!
It’s pretty bizarre to be knitting from my own pattern. It’s been long enough since I wrote it that I don’t really remember much of the process, so it’s like reading something someone else put together! So far, so good. We’ll see if I manage to get through it without getting frustrated with myself…
Day 4, Colo(u)r Review: 4KCBWDAY4
 Today’s prompt asks: What are your favorite colors for knitted or crocheted projects?
I thought it might be fun to compare this year’s post to one I did for last year’s Knitting and Crochet Blog Week, which was on a similar topic. Last year, I said I usually gravitated toward saturated, jewel-toned colors. I did, however, notice that I had started branching out a bit into neutrals and darks–something I hadn’t done much before I began designing.
Here are the projects I’ve finished since then (I excluded designs where I didn’t get to choose the yarn):
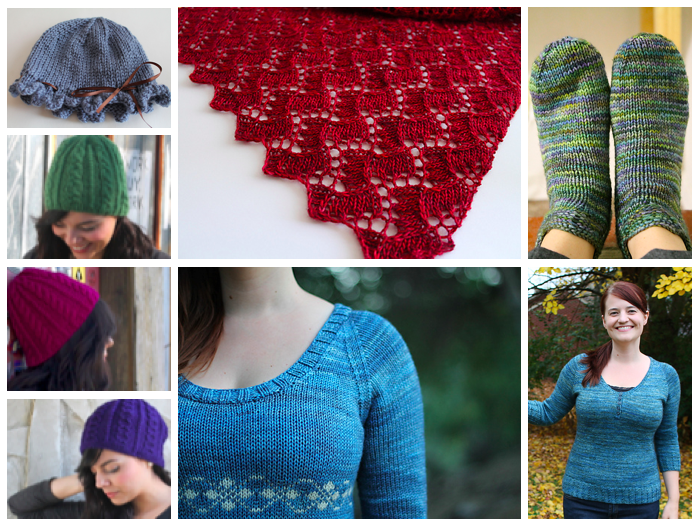
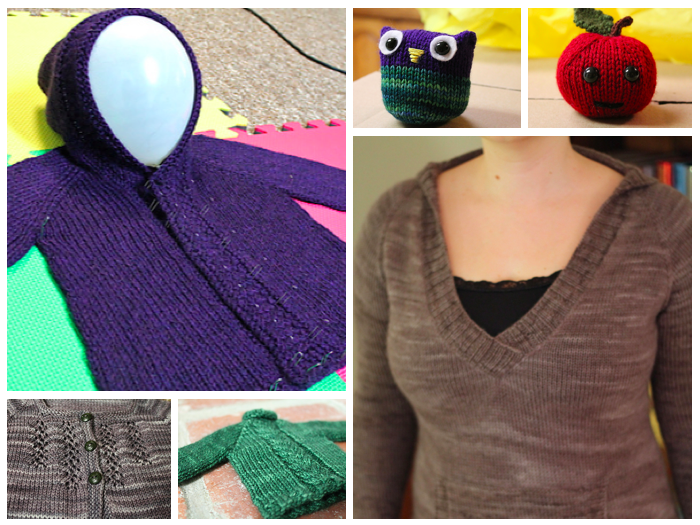
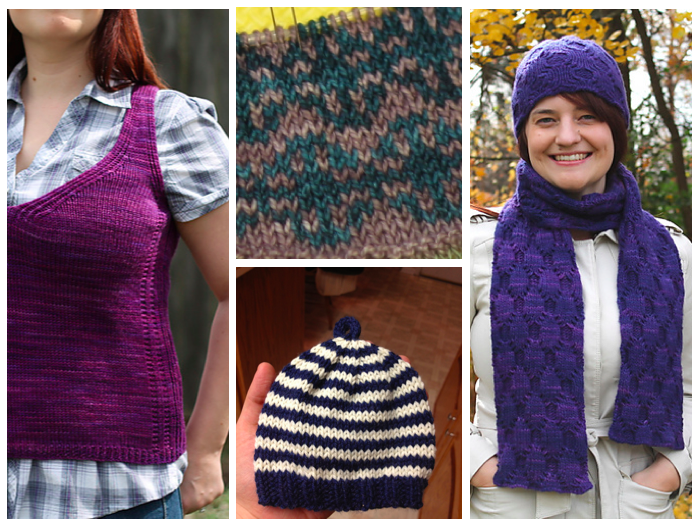 Not much has changed! Still a big preference for jewel-toned, saturated colors. My favorites, blue and green, are well-represented, although I think there might be more purple in there than anything else.
Just for fun, how about an infographic to see if my theories hold true? I’ll stick to projects completed since I started designing in 2011, just for simplicity’s sake, and also exclude projects where I didn’t get to choose the yarn color:

 Looks like my assessment was pretty accurate. More than half of my projects have been in green, blue, blue-green, or purple. Gray makes a surprisingly strong showing, but other than that, the other colors get pushed by the wayside to some degree.
Maybe I’ll branch out a little more in the coming year. I do have some delicious yellow yarn in my stash right now that would make a lovely sweater….
Patterns For Sale

- Concord Vest – $5.00

- Full Circle Cardigan – $6.00

- Dream a Little Dream – $6.00

- Lavandula – $7.00

- Blue Betty – $6.00

- Rosanna Wrap – $5.00

- Hipster Stripe – $5.99

- Bevin Pullover – $5.99

- Kari Baby Blanket – $5.00

- Daisy Cloche – $3.00

- Daisy Mittens – $3.00

- Europos Scarf – $4.00

- Morgandy Mittens – $4.00

- SoCal – $3.50

- Santa Slouch – $3.00

- Give ‘Em the Slip Hat – $3.50

- Give ‘Em the Slip Mitts – $3.50

- Put Together – $5.00

- Helix – $3.50

- Chandail – $6.00