
Day 3, Infographic: 4KCBWDAY3
Today’s prompt calls for an infographic, which is something new for me! (Luckily I’m a Monkey and this doesn’t faze me much.)
I found a neat site where you can make your own timelines, Dipity.com, and decided to do a walkthrough of a sweater design from inspiration to publication.
Below is the result. You can click on the timeline entries to see the details, or for a different and very neat effect, click on “flipbook” in the top corner and you can scroll through them that way!
Note: if for some reason the timeline won’t load on your computer, you can click “Sweater Design Timeline” at the bottom of the image to view it on Dipity.com.
WIP Wednesday: Grape Vest and Tosh-y Hat
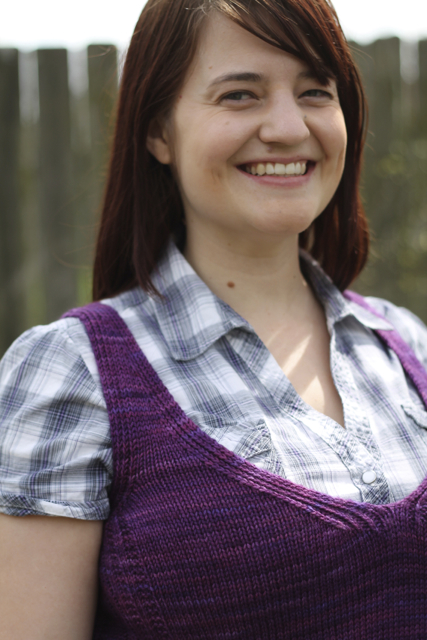
The purple vest is almost ready for public viewing! We did a very successful photoshoot in our new backyard. It has this great wooden fence, which makes an excellent photo backdrop. Here’s a sneak peek from the photoshoot:
 I’m done with the Excel sizing (XXS to 4X for this pattern), so the next steps are to lay out the pattern, finalize the chart, and proofread. Then I’ll put the pattern up for testing on Ravelry (likely in the Testing Pool group–if you think you might be interested in testing, drop me a line!).
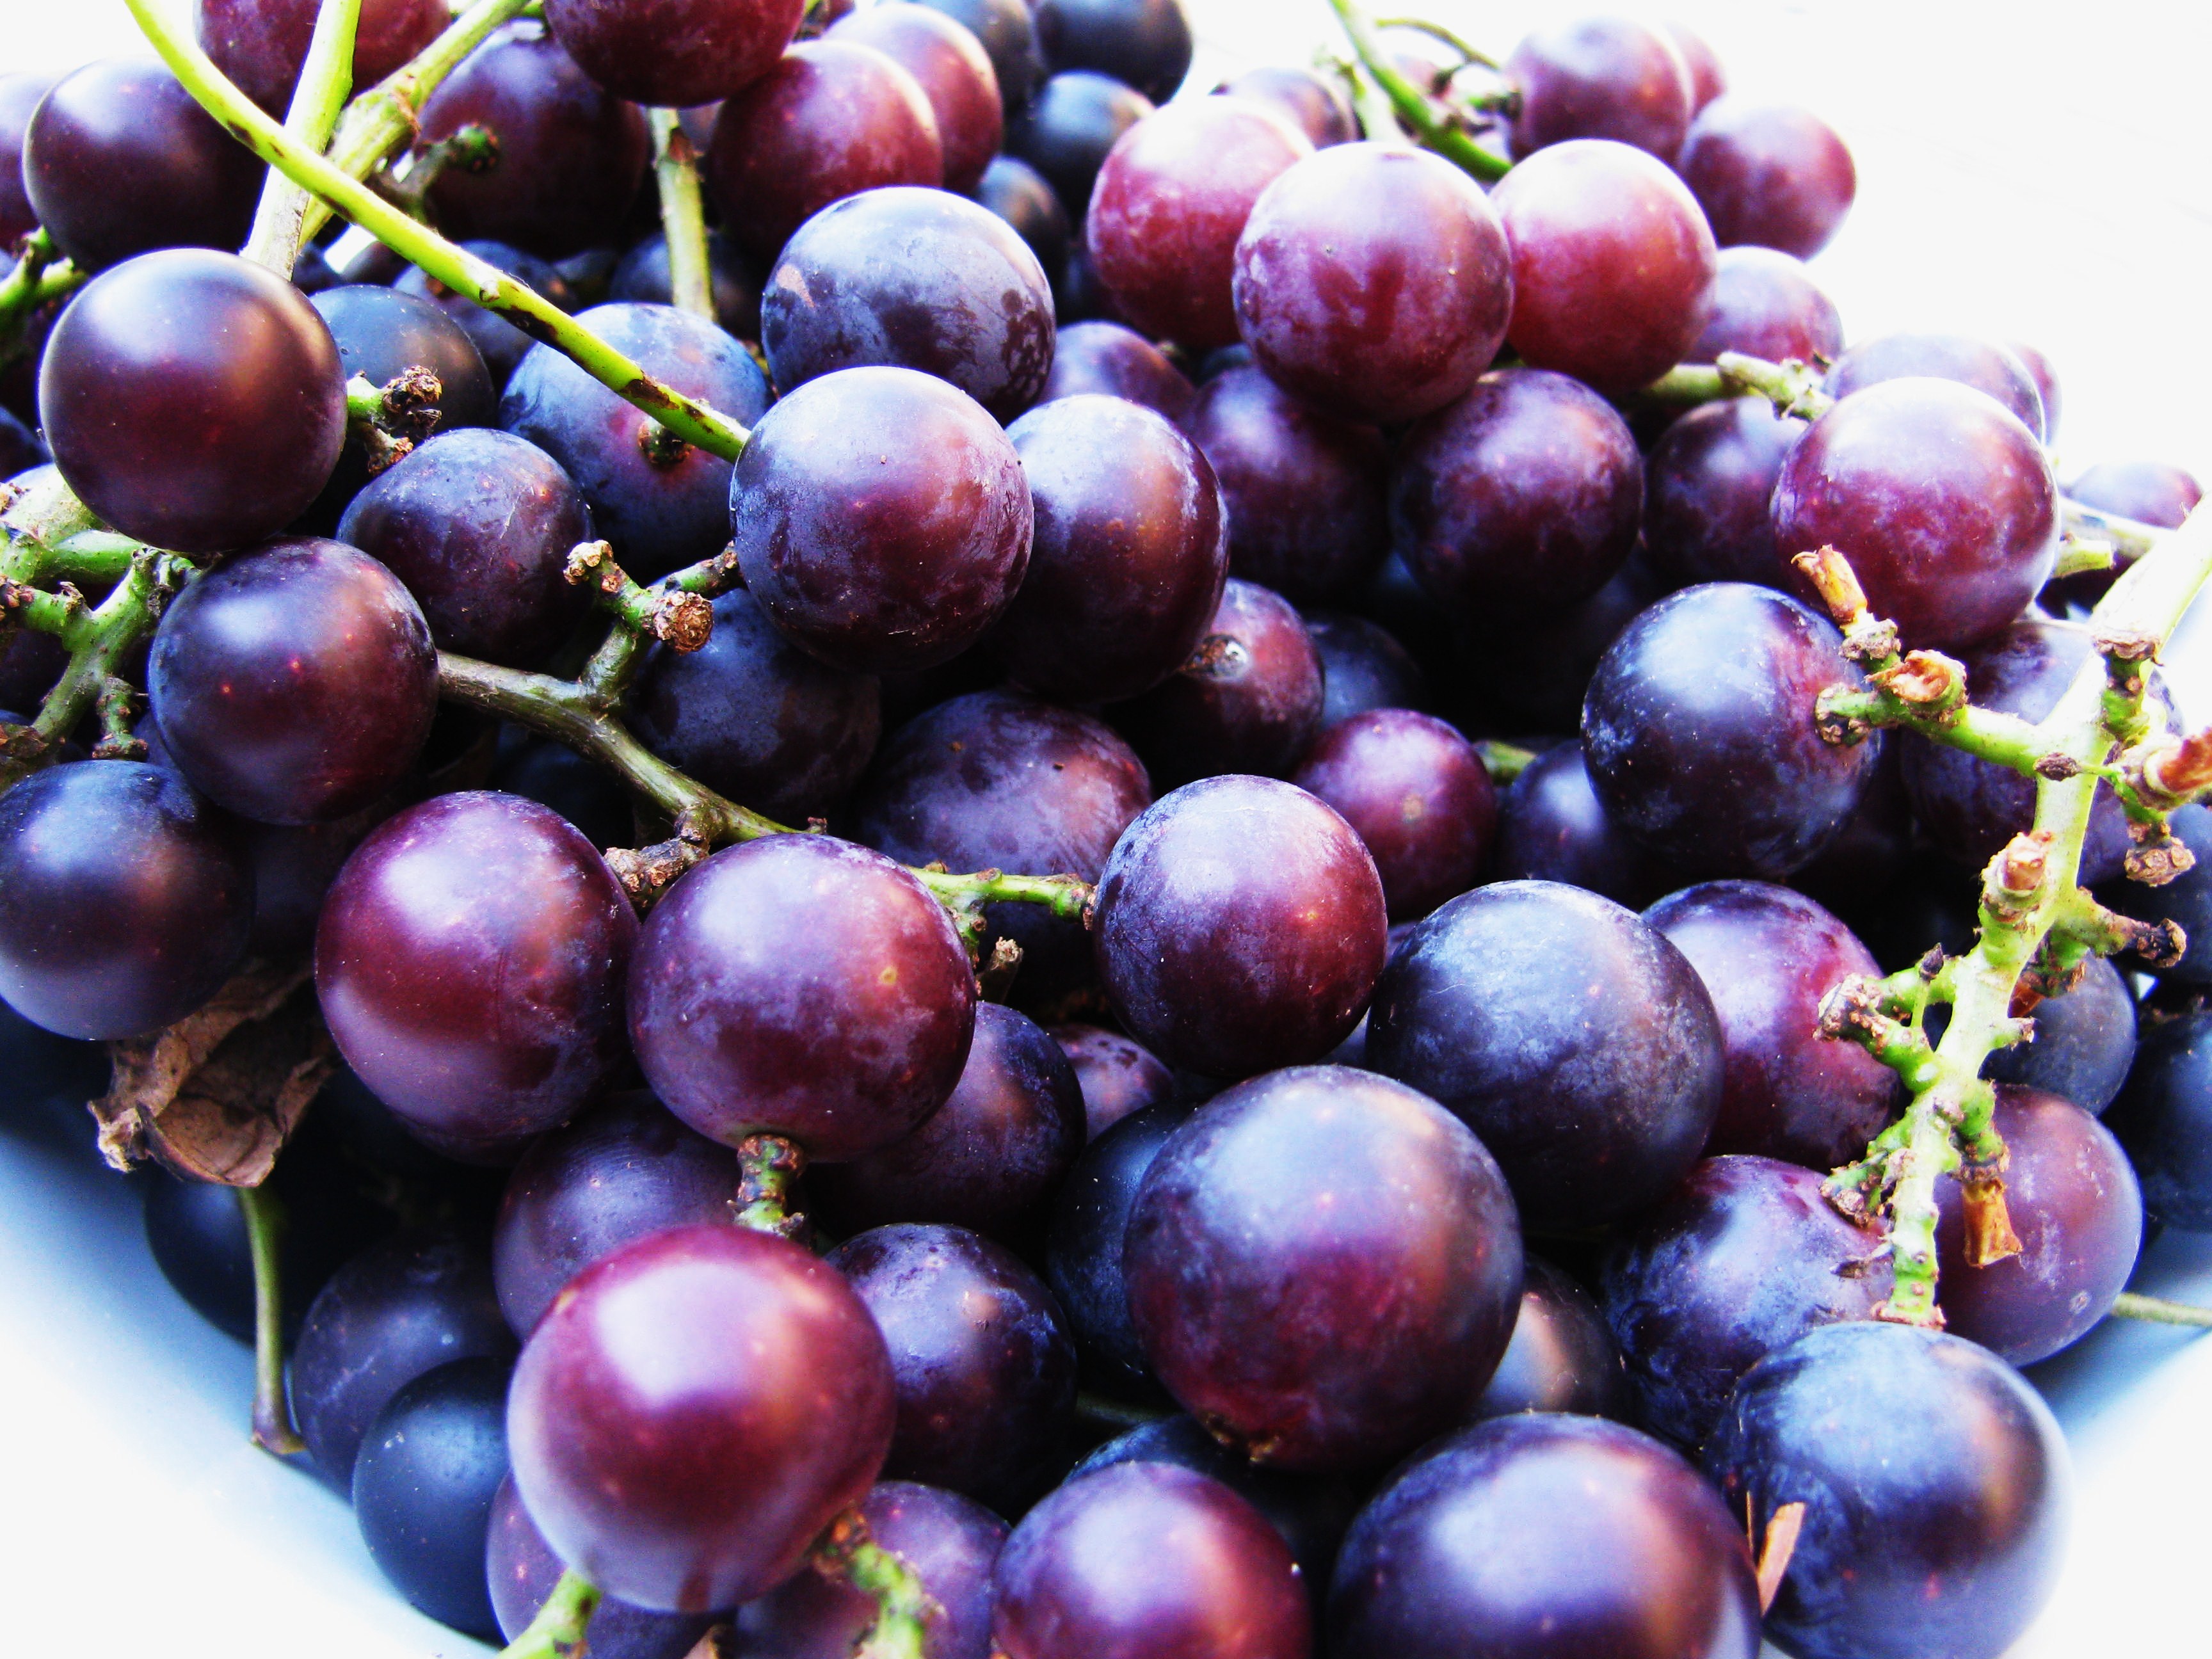
I also need to think up a name for the pattern. Since it reminds me so much of grapes, I’m thinking maybe Concord Vest? Like these concord grapes:
And I’ve started another project! While looking through my Madelinetosh stash to get ideas for Madelinetosh May projects, I was struck with a colorwork hat idea. I tried to be good and wait for May so I could do the knitalong with everyone else, but I couldn’t stand waiting, so…

The main colorwork pattern is in Tosh Sock in French Gray and Norway Spruce. The lining (to be tacked up when the rest of the hat is complete) is Tosh too, but laceweight so it’ll tuck under without much bulk. I love how the design is going so far!
I don’t know what my deal is, though: usually I’m strictly a DK and up gal, but my last three projects have been on size 2-5 needles. Guess I’m branching out a little…
Moving on!
Thanks for all the commiseration on my gray sweater debacle! Kirstin asked if Photoshop would be helpful in editing out the pooling spots. I’ve gotten pretty good at editing out the stray hair or tree branch, but I’m afraid making the middle part of the sweater look like the top would be well beyond my abilities. See all the light bits on the top?
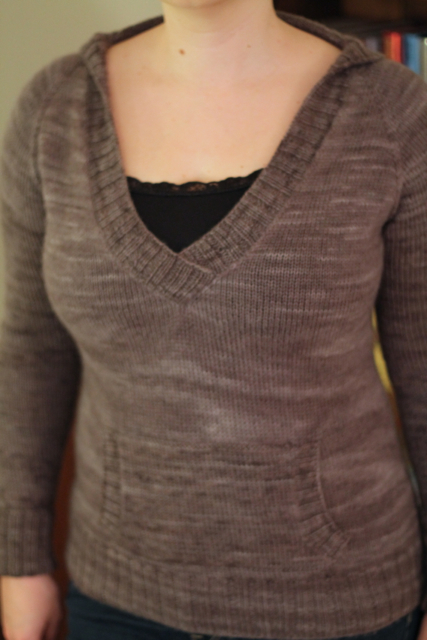 Yeah, I wouldn’t even know where to start. Plus, I like to keep my samples in photo-ready condition, since there’s always the possibility of trunk shows, the need for photo reshoots, etc.–and wouldn’t it be a cheat if I managed to fix the photo so it looked good and then showed up with the pooling monstrosity?
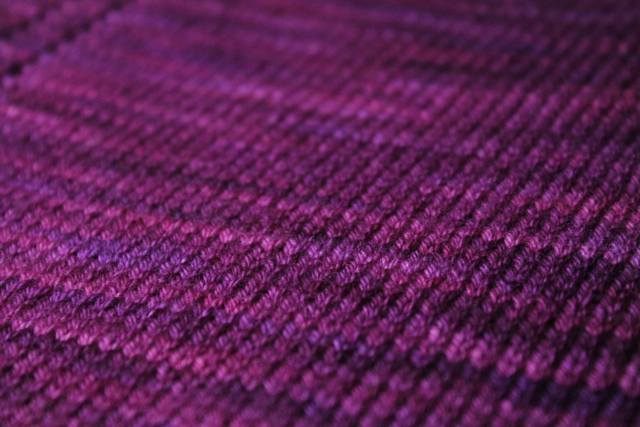
Anyway, I’m moving on! Due to a sudden and all-consuming love affair with this purple Cephalopod yarn (and, okay, a desire for some damn color and texture after all that endless gray stockinette!), I have the purple vest blocking already:
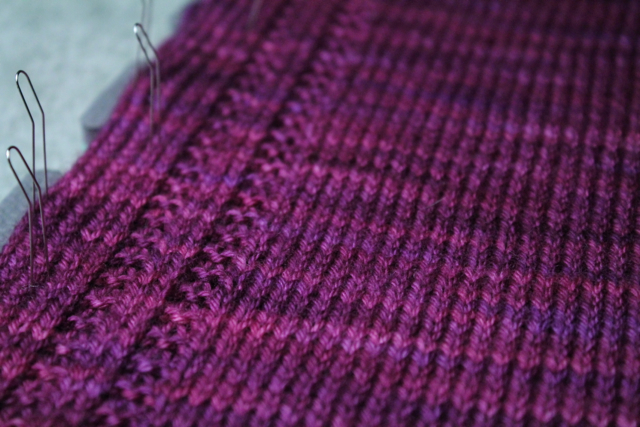 Yum. It really looks good enough to eat, doesn’t it? Its working title is the Grape Vest, because it reminds me of the luscious spectrum of purple grapes you get at the beginning of the fall season. I’ll probably change the name, but it’ll always be Grape Vest to me….
Design Process: Blocking!
(Seventh in my series of design posts. Earlier posts are here: Part Six, Part Five, Part Four, Part Three, Part Two, Part One.)
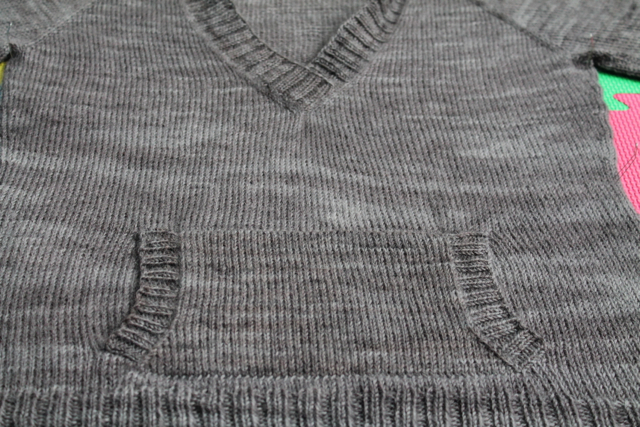
The sweater is done! I had plenty of the BFL sport left when I finished the last sleeve, so I couldn’t resist adding a cozy pocket on the front. I kept it small-scale to (hopefully) avoid the young teenager/sweatshirt look:
 Next up in the design process is blocking. When I’m knitting someone else’s pattern, I sometimes skip blocking–especially if it’s an item that’s going to get wet anyway, like a woolly hat–but I always, always block designs intended for publication.
This pre-blocking picture illustrates why. See the wrinkles and uneven stitches?
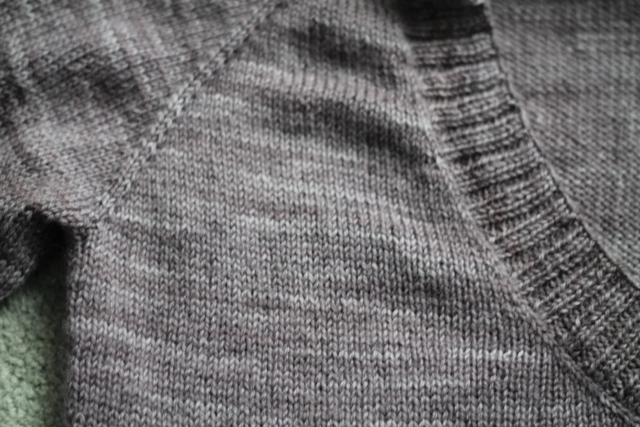 The sweater fit me perfectly before blocking, which is good, since my swatch didn’t change in length or width when I blocked it. I took detailed pre-blocking measurements anyway, since the fabric usually gets stretched out and needs to be patted back into shape.
I warned you earlier about my nonexistent artistic skills.
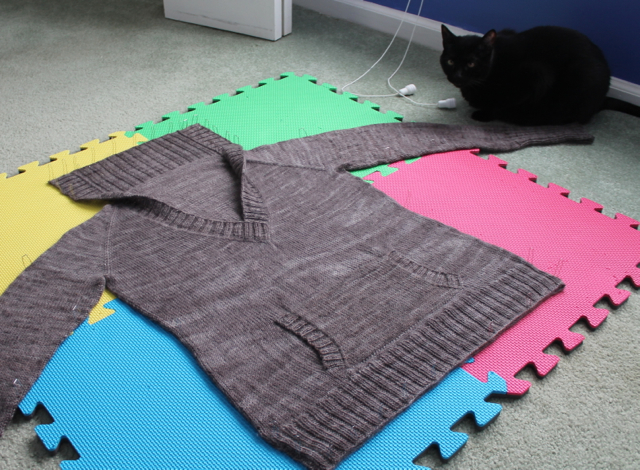
And here it is in all its pinned-out glory. Esme is guarding the sleeve (and was summarily ejected from the room after the picture was taken):
 Next step in my design process: schedule a haircut/color. No, seriously. I’ll be the model for this design (obviously, since I knit it to my measurements), and I’m waaaayy overdue for a trip to the salon. While I’m waiting for my appointment, I’ll start in on the pattern writing–my least favorite part of the whole process, but necessary!
Sweater update (and some stash enhancement!)
(Sixth in my series of design posts. Earlier posts are here: Part Five, Part Four, Part Three, Part Two, Part One.)
I missed WIP Wednesday this week (probably just as well, since I keep showing the same sweater–I imagine people might get sick of it eventually!), but I thought I’d do a little progress report anyway.
The gray sweater is moving right along. I made a design decision when I reached the sleeves to knit them twice as long as I originally intended, so they can be cuffed or flipped over to cover the hands if it’s especially cold. I thought this worked well with the cozy vibe of the sweater.
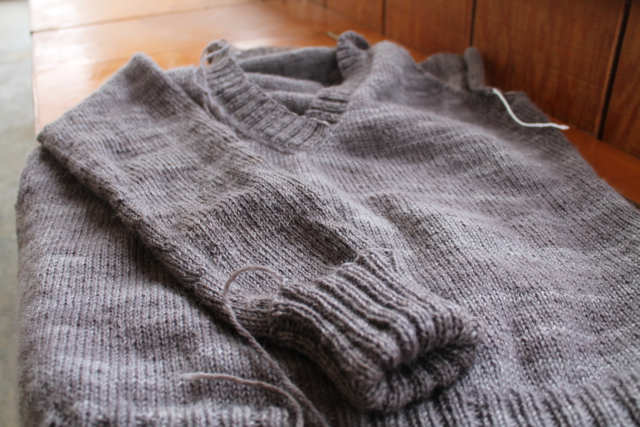 Of course, that means I have to knit 2×2 ribbing on little needles for twice as long. Ugh. But since that picture was taken, I’ve knit the second sleeve up to the ribbing. I’m hoping to grit my teeth and power through the rest tonight.
But when that’s done, I’ll have to make another design decision–front pocket or no? Hmm.
In other news, I’ve gone kind of nutty with yarn buying this week. I swear I didn’t mean to! One of my favorite online retailers, Doodlebug Yarn, sent me an email announcing a sale on Imperial Yarn Columbia. I’ve been dying to knit a sweater out of this yarn since my husband used it to knit his first hat, so I snapped up a sweater’s worth:
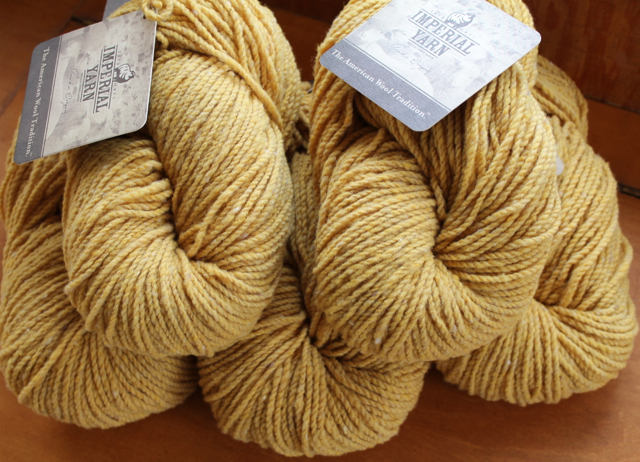 I’m trying to branch out a little from my usual jewel tones, so I decided to order this delicious golden yellow.
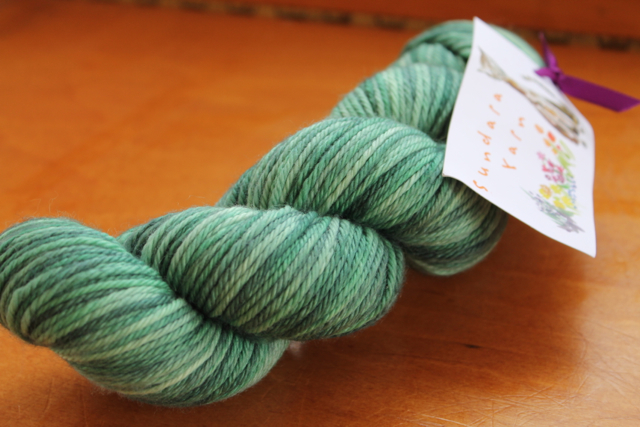
And then I spotted a single skein of Mint Julep Sundara Yarn Merino Worsted in someone’s Ravelry destash. Yum.
 And just to make me look really hedonistic, I realized I forgot to show off the skein of Malabrigo Rastita I bought a few weeks ago (my mom suggested a visit to a yarn store! Really, was I going to say no??):
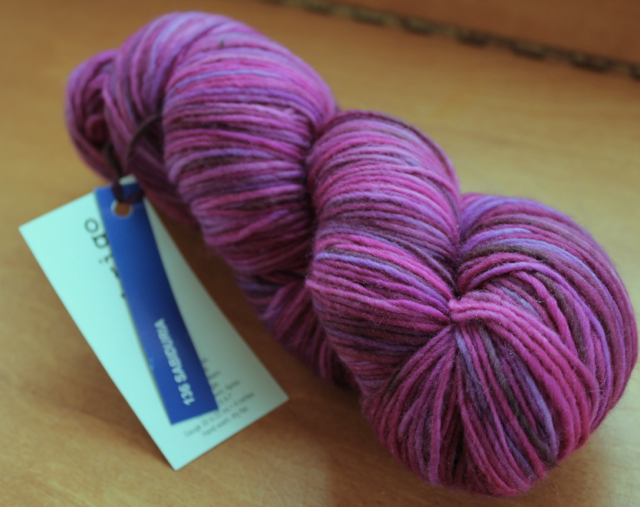 It was a little hard to photograph the color correctly, but it’s a gorgeous blend of magentas and purples.
I better finish the gray sweater soon, because I’ve got a lot of yarn calling my name….
WIP Wednesday: Neck! And Buttons!
(This is fifth in my series of design process posts. Earlier posts are here: Part Four, Part Three, Part Two, Part One.)
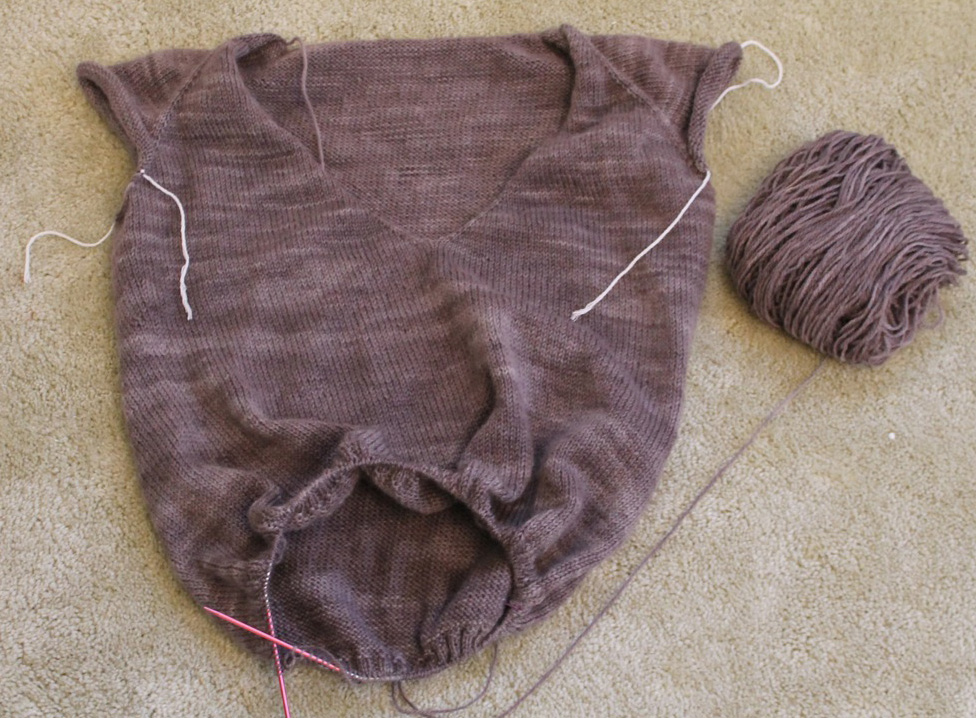
The sweater is progressing, if a little slower than I’d like (I’ve been working on a bunch of pattern writing, which is cutting into my knitting time). But I got the neck finished last night!
 I was going for a “looks like a hoodie from the front, but hardly any bulk in the back” thing, and I’m really happy with the way it turned out! Needs blocking, of course, but I think it’ll be pretty close to the sketch once the back neck is stretched out a little more. I did the neck before the sleeves, as that’s usually the more iffy part of a design for me, so I’ll be working on the sleeves this week.
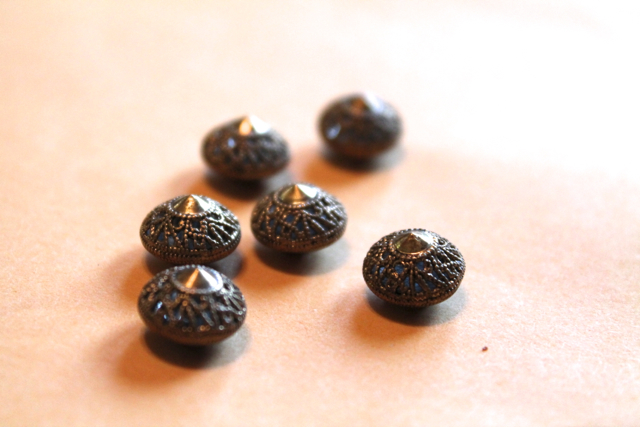
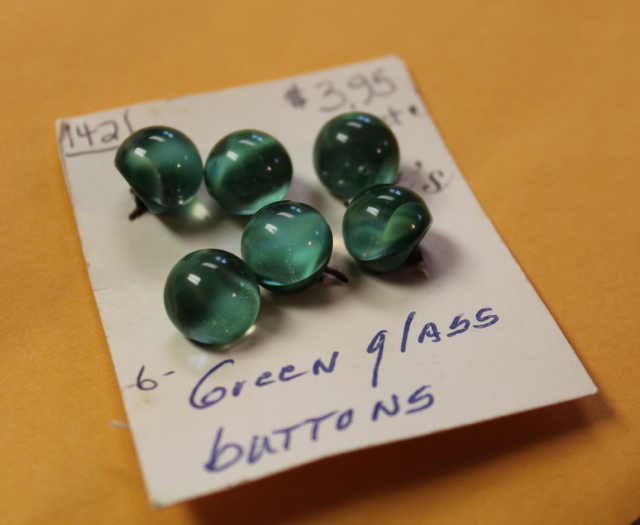
In other news, I went to a button show this week!
 It was, quite frankly, a little surreal. I was hoping to find some neat buttons for future designs, which I did (see below!), but I didn’t quite realize how passionate most of the people there would be about their buttons. These people are SERIOUS collectors. There were buttons there selling for hundreds, even thousands of dollars!
Every once in a while, it’s nice to be reminded there are people with hobbies that are generally regarded as even crazier than mine, heh.
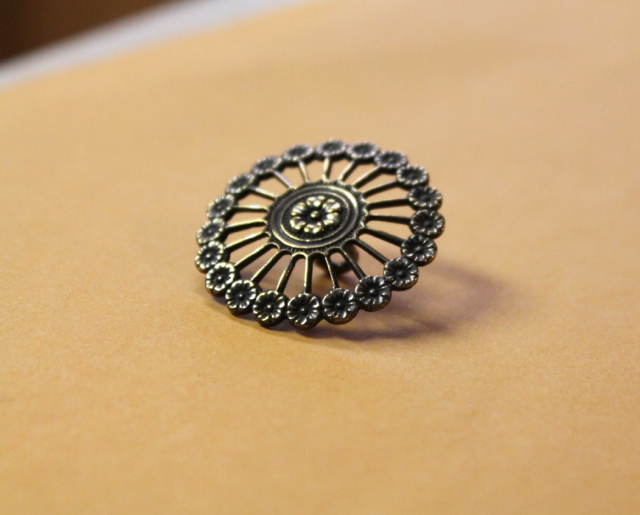
But everyone there was incredibly nice, and I came away with some very lovely (and cheap) buttons!
 If you want to know more about the button show (you masochist, you), my husband did a great blog post about it–and the bizarre hotel that hosted the show–on his blog here.
WIP Wednesday: Sweater-in-progress and Owl Puff
(This is fourth in my series of design process posts. Earlier posts are here: Part Three, Part Two, Part One.)
The sweater design is still rolling along! I just started the bottom ribbing on size US #3 needles, ugh. But I should be done with the body later tonight.
Last weekend, I was working merrily along on the neck increases below the sleeve split when I realized I’d made a pretty serious math error when I set the whole thing up. This is, unfortunately, as much a part of my design process as sketching or swatching. (That’s what I get for trying to crunch numbers while watching Supernatural episodes.)
So I had two choices at that point–rip out the entire yoke of the sweater, back to the point when I started the neck decreases–about an inch from the cast on–or rearrange the numbers so they worked with what I’d already done.
Guess which one I picked?
Turns out I like this neckline shape better anyway, though. I’m calling it a fortuitous accident. :-)
I also cast on a little mini-project yesterday:
 It’s an in-progress Owl Puff (Ravelry link)! A friend of mine has helped me tremendously with the fiction-writing side of my life and loves owls, so she’s getting a little surprise in the mail as soon as I can get to the craft store to buy some felt and safety eyes.
And along those lines: I signed with a literary agent for my fiction yesterday! It means I’m that much closer to my goal of writing for a living. So it’s been a very good week all around. :-)
Design Process Part 2: Sketching, Swatching, and Math
Earlier posts in this series: Design Process Part 1: Inspiration
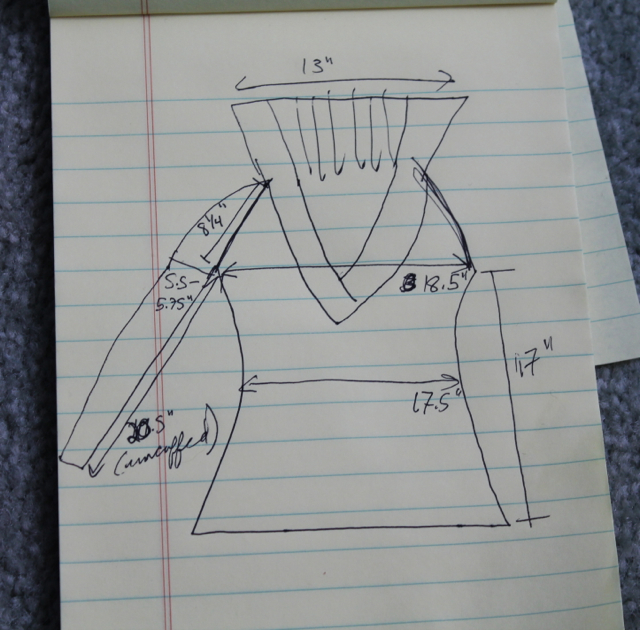
Now that I have a pretty good idea of the general look and construction I want for the sweater, it’s time to think about the details. First up, I do a rough sketch of the design.
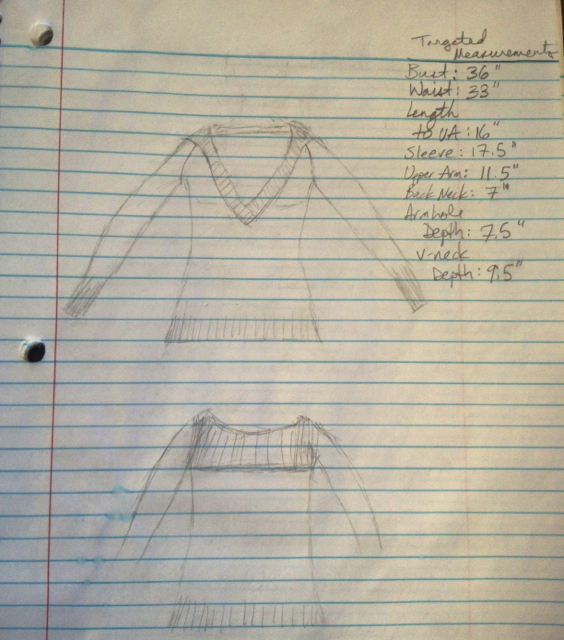 Ahem. I did warn you it was rough. I’m not much of an artist, so if the sketch isn’t for submission to a publication, I don’t spend much time on it. But it gets the idea across!
I also included the targeted measurements for my size. Before, I would need to look up standard guidelines for this bust size, but I’ve knit enough size M fitted sweaters now that I know most of these measurements off the top of my head. A few of them are specifically tailored to my preferences–I like a little bit of positive ease on the upper arm, for example, but I tend to like an inch or two of negative ease at the bust. I also tend to like slightly longer sweaters (probably because a large bust tends to make shorter sweaters ride up at the bottom!).
Next up, choosing yarn! Fun!
It was pretty easy in this case. I have this gorgeousness in my stash:
 This is Blue Moon Fiber Arts BFL Sport in the “Manly, yes, but I like it too!” colorway (great name, eh?). I purchased two giant skeins (about 1300 yds) at Rhinebeck last October. After checking Ravelry, this looks like plenty to knit this type of sweater in a 36″ bust size. The great thing about top-down, too, is I know I have the option of knitting shorter sleeves or a shorter body if it looks like I’m running low on yarn.
Swatch time! As I mentioned in this post, the recommended size on the label for this yarn is incorrect. After a quick check on the yarn’s Ravelry page, I started with US #4 (3.5 mm), and I liked the fabric I got after I wet-blocked the swatch:
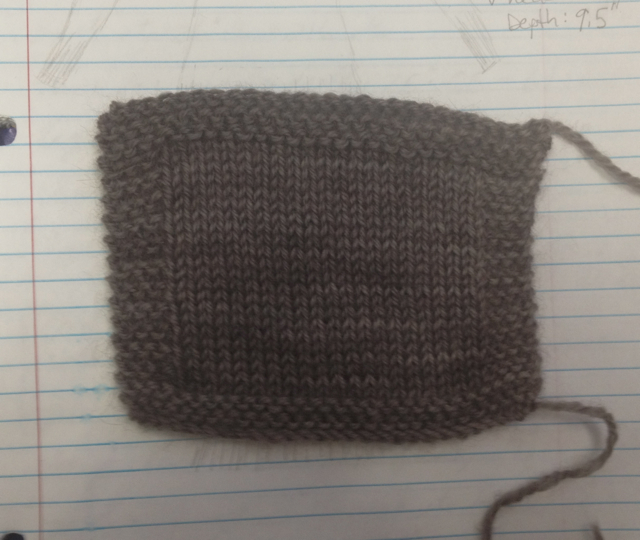
Pardon the craptacular phone picture.
My measured gauge after blocking is 6 sts/8.5 rows to the inch. A little thinner than I usually prefer (I’m generally a DK and up girl), but the yarn’s soft and nice to knit with. Due to some kind of distracting life stuff going on right now, a stockinette, finer gauge sweater is just what the doctor ordered!
If I were knitting a bottom-up sweater, this is the point where I’d usually do some quick, rough calculations and then dive right into the knitting.
BUT… this is going to be a top-down sweater. So that means I have to do a whole bunch of math before I know how many stitches to cast on.
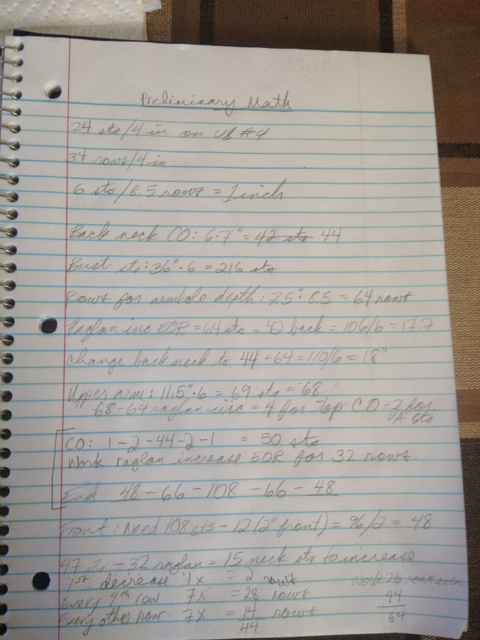 Yeah, that wasn’t too much fun. It took me two whole episodes of Supernatural!
Some designers prefer to grade the pattern for all the sizes before they start knitting the sample in their size. I confess, I’m not one of those. I work out the numbers for my size, tweaking them as I go, and then grade the pattern for the rest of the sizes when I’m finished with the prototype.
Next up: casting on! Woohoo!
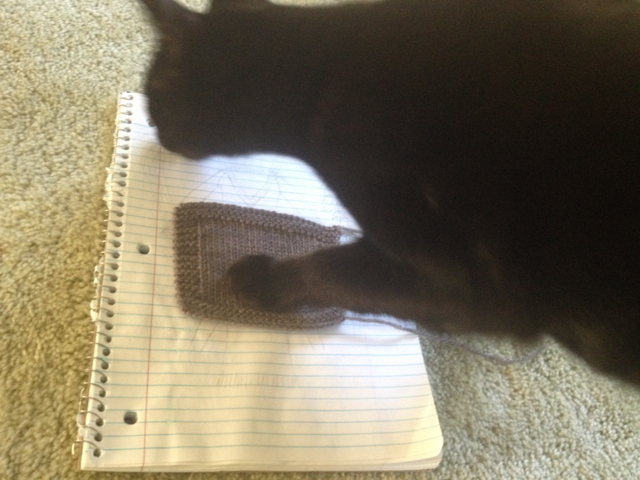
Bonus picture: one of the kitties “helping” me photograph the swatch.
Design Process Part 1: Inspiration
I got such a nice response to the post about my design process for Lavandula that I thought I’d try an experiment! A new design idea bit me hard a few days ago, so I thought it might be fun to do a series of posts detailing its creation, from first idea to pattern release. (Thanks to the lovely Becky of Sugar Tree Designs for the idea!)
First up: the inspiration.
The initial spark of an idea comes, more often than not, from some hole in my wardrobe.
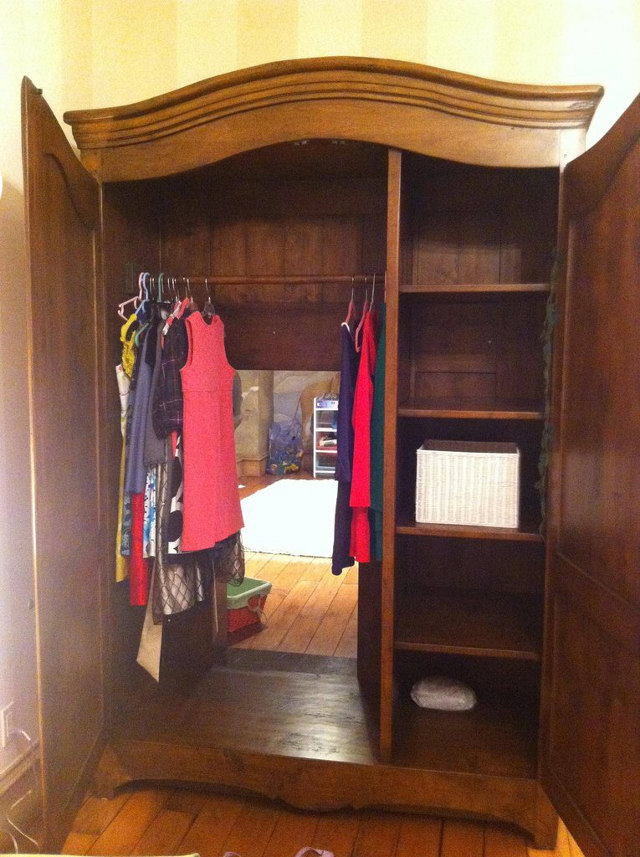
I only wish I meant this kind of hole.
I’m not doing much dressing up these days, so I’m feeling a lack of casual, comfy, cozy pullovers. You know, the kind you’d wear to curl up in a big chair in front of a fireplace.
So that’s the basic concept out of the way. But what about the details?
I save lots of pictures from catalogs, email mailings, and random internet searches for features I like. I also take pictures of sweaters A LOT. In clothing stores, out walking around, in lines at the grocery store… I know some designers prefer to look at fashion magazines or runway collections, but to me there’s nothing like seeing the way a collar drapes, color does/does not flatter, etc. in person.
I’ve perfected my “take a surreptitious picture with my iPhone, without freaking out the subject” technique.
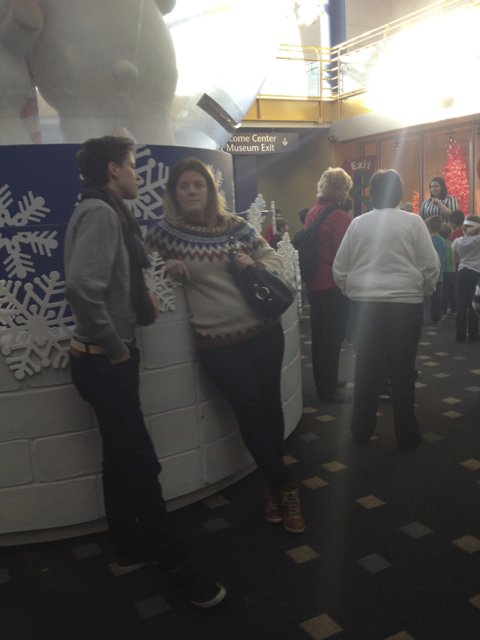
Well, almost perfected. I think this lady might have been on to me.
Every so often, I go through my photos and see if inspiration strikes.
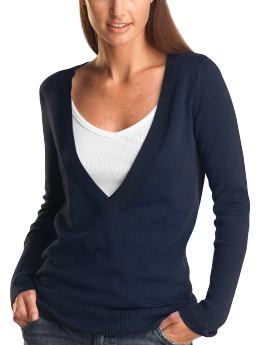
I saved this picture because I liked how far down the v-neck came (very flattering to larger busts):
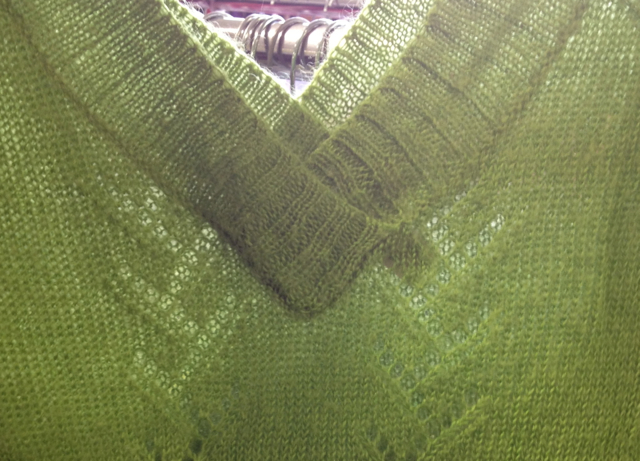
 I like the width of the ribbing on this next one (although I’m not really a fan of the lace pattern in the rest of the sweater or the airy-ness of the yarn used, and I don’t think I’d put a v-neck in the back as well as the front):
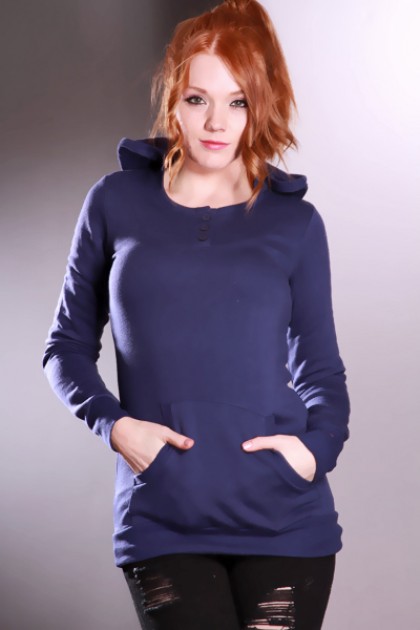
 Big, floppy collars just scream cozy to me–plus I like when it looks like there’s a hood from the front, but there’s not all the extra fabric of a full hood, just a rectangle of fabric partway down the back. Actually, I have no idea what to call this. Is it a shawl collar, just without the short-rows? I can’t find a picture of what I’m talking about by searching for shawl collar, so maybe not. Anyone know what its official name is?
I also like front pockets, and they’re definitely cozy… but I’m a little iffy on whether I want to include one in this design or not–it’s hard to pull off without making the sweater seem too casual. But I’m putting the decision off until later, when I have a better idea about yarn choices and the overall look of the piece.
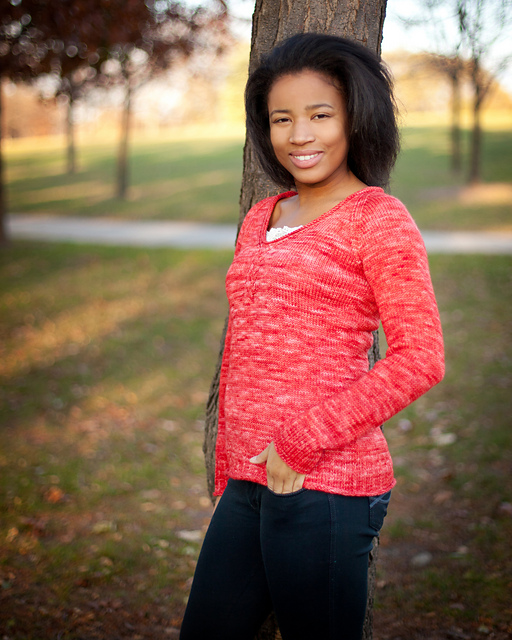
Cute sweater, but maybe a little too teenage for my tastes.
With those criteria in mind, I can start brainstorming in earnest. Next step: sketching!
FO Friday & New Pattern Release: Descanso
Thank you for all the nice comments on my Full Circle Cardigan! It made it to #6 on Ravelry’s Hot Right Now list the day after I released it, which made me extremely happy. I can’t wait to start seeing other people’s versions!
And today, I have another FO/pattern release for you. Lest you think I’m some sort of insane knitting machine, I should tell you this sweater was actually finished last summer. It just happened to come out a few weeks ago, hence the FO post.
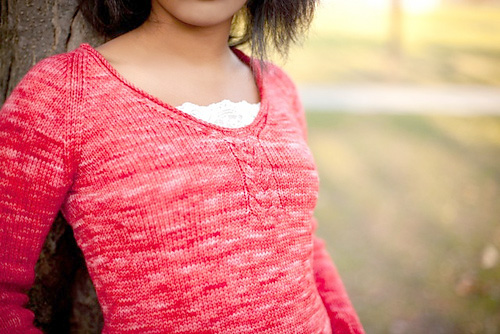
This is Descanso, a design I did for Dream in Color Yarn (all photos © Dream In Color Yarn):
 The specs:
Pattern: my own Descanso pattern. Available for purchase through Dream in Color Designs (Ravelry link).
Yarn: Dream in Color Everlasting DK in Tang.
I have to admit to a bit of skepticism when I saw the color yarn they’d sent me for the sample. Don’t get me wrong, it was beautiful–Dream in Color Yarns are always stunning–but this particular bright pinky-red isn’t one I could ever wear. When I saw the pictures, though, I was blown away. Doesn’t the model look amazing in that color? It’s like it was made for her!
I’m a teensy bit jealous.
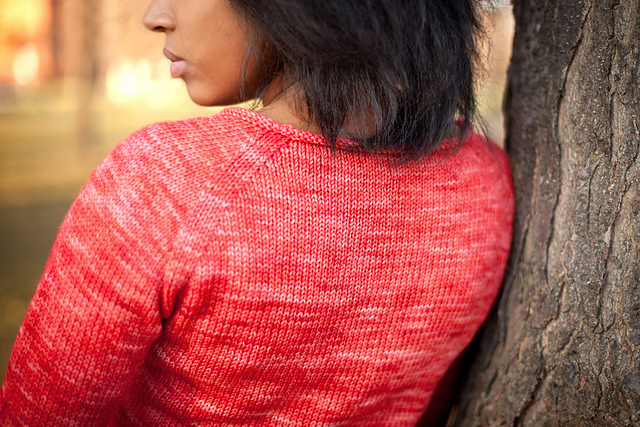
Notes: I’m going to have to knit myself one of these to keep, because I love the way this sweater turned out. I was going for an easy, slouchy look (while still keeping figure-flattering waist shaping and a flattering neckline). It’s a little hard to tell in the pictures, but there’s a slip-stitch rib around the hem and cuffs of the sweater–enough to keep the edge relatively flat, but still let it roll a little for a more casual look.
 The sweater is knit from the bottom-up in the round to the neck split/yoke joining, and then back and forth in rows (my favorite construction!). The little cable detail at the neck turned out really well. I love the way it adds interest without bulk:
 I named the pattern after one of my favorite botanical gardens. Descanso Gardens is only a few miles from where we used to live, and I’ve done photo shoots for several sweater patterns there. I thought it would be nice to remember the name by giving it to a comfy sweater pattern.
I hope you like this sweater as much as I do!
Patterns For Sale

- Concord Vest – $5.00

- Full Circle Cardigan – $6.00

- Dream a Little Dream – $6.00

- Lavandula – $7.00

- Blue Betty – $6.00

- Rosanna Wrap – $5.00

- Hipster Stripe – $5.99

- Bevin Pullover – $5.99

- Kari Baby Blanket – $5.00

- Daisy Cloche – $3.00

- Daisy Mittens – $3.00

- Europos Scarf – $4.00

- Morgandy Mittens – $4.00

- SoCal – $3.50

- Santa Slouch – $3.00

- Give ‘Em the Slip Hat – $3.50

- Give ‘Em the Slip Mitts – $3.50

- Put Together – $5.00

- Helix – $3.50

- Chandail – $6.00