
Blog Week Day 5: Something a Bit Different 5kcbwday5
You know what I’ve never done? A knitting photo tutorial. I use them all the time, and I love blogs that have them, but I’ve never taken the time to do a clear sequence of photos that show a technique.
Below is my first-ever knitting photo tutorial. It’s the Daisy Pattern I used in my Daisy Cloche and Daisy Mittens. It can be a little tricky to work, and I’ve had a few questions about it, so I thought it would be perfect for a tutorial.
Warning: photo heavy post ahead (but I bet you guessed that!).
DAISY STITCH TUTORIAL
Round 1: To begin, I cast on a number of stitches for a swatch and purled the first row as it states in the pattern (note: the Daisy Cloche and Mittens are worked in the round, but I worked my swatch flat. The technique is the same–just ignore the extra strands behind the swatch).
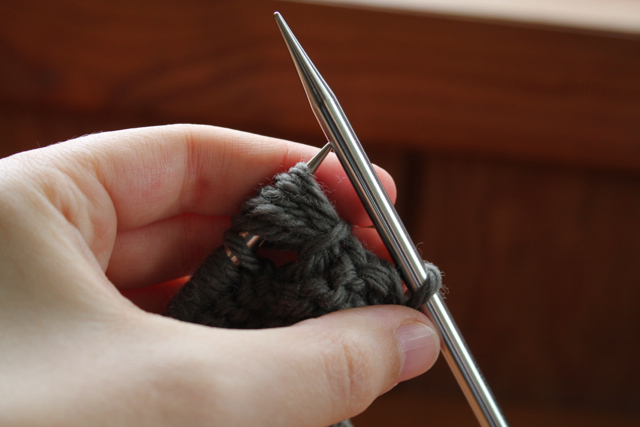
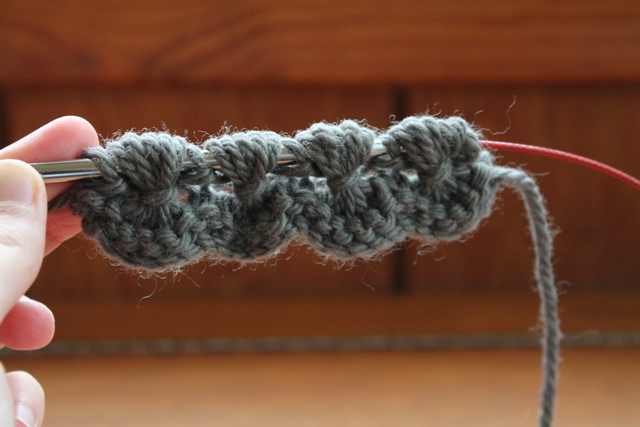
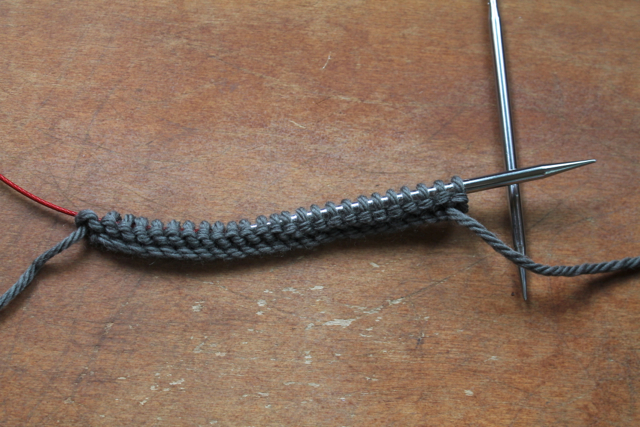 Round 2: The next step says to k1, then k the next stitch, wrapping yarn three times around the needle instead of one.
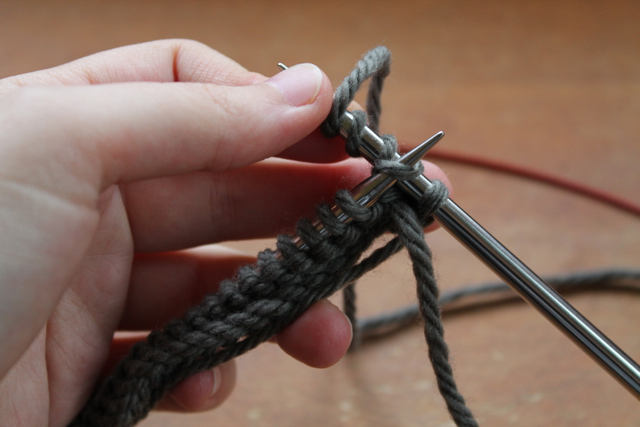

 See the three wraps around the right-hand needle where you would usually have only one? Don’t worry if it looks messy–that will be fixed later.
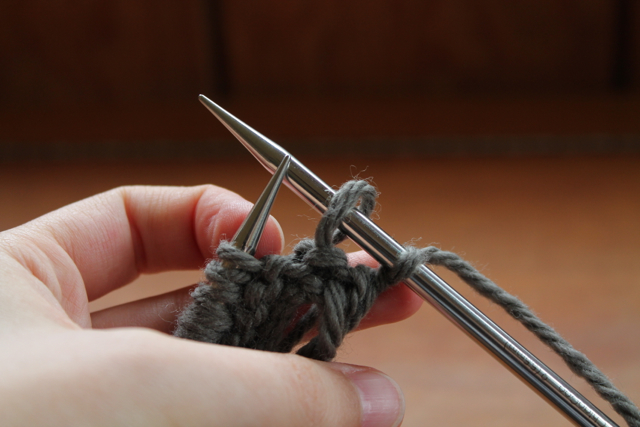
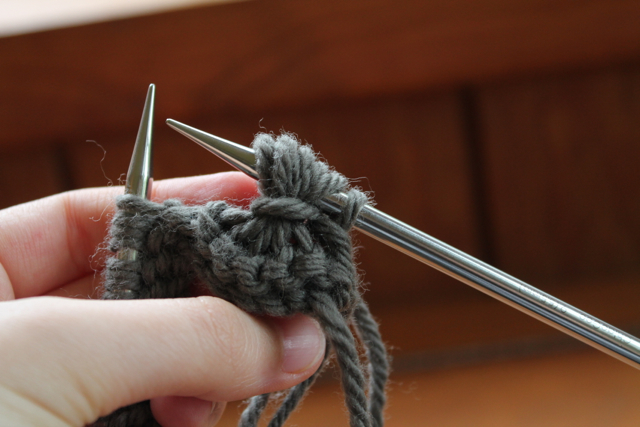
Work four more stitches like this: Continue along the rest of the stitches in this manner, working a knit stitch between each group of five triple-wrapped stitches. Here’s what it should look like when you’re done:
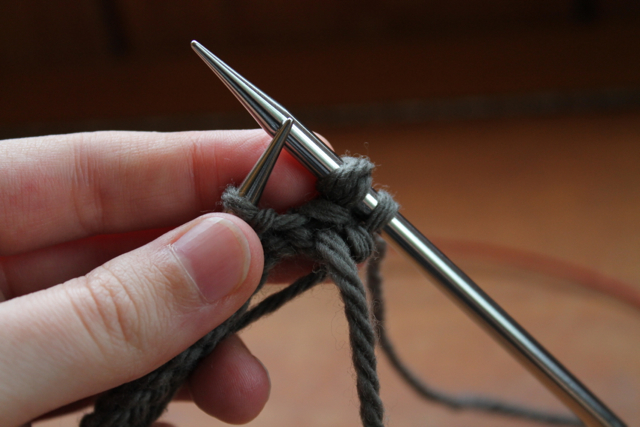
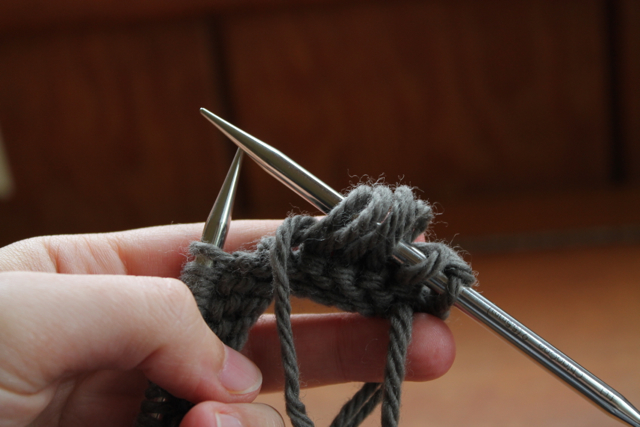
 Round 3: Now the fun begins! Start by purling the first stitch:
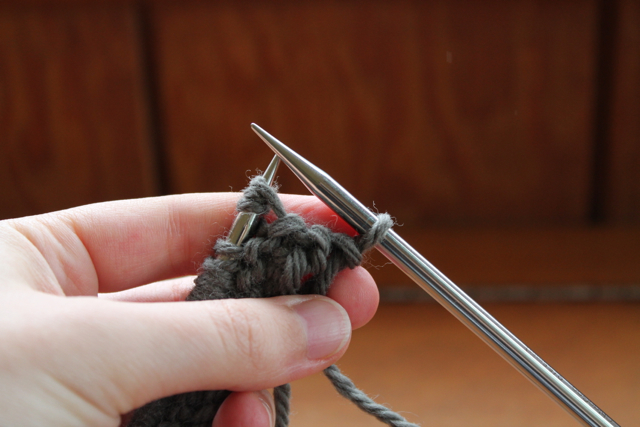 Now slip the first triple-wrapped stitch from the left hand needle to the right hand needle, letting the extra loops drop off so the stitch gets elongated. It should look like this:
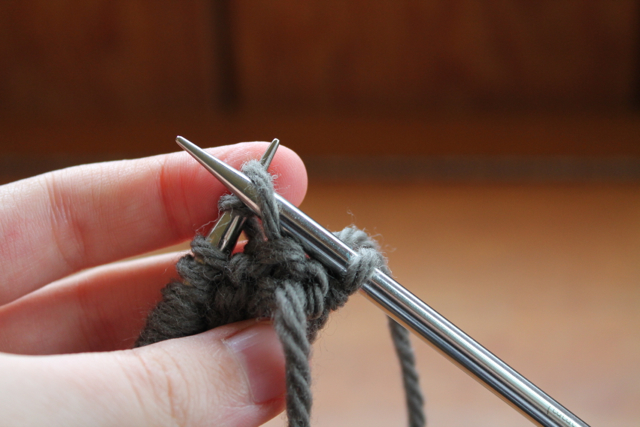
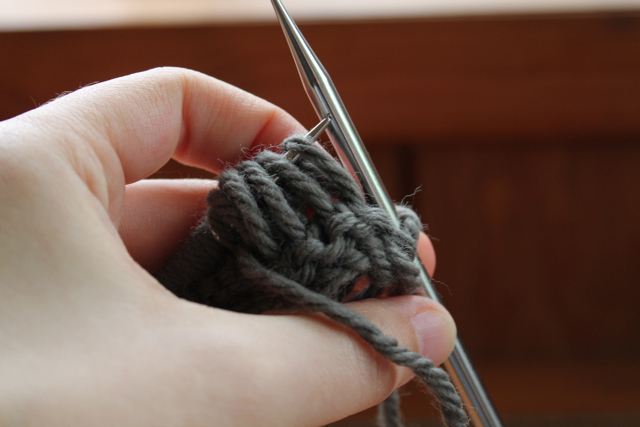
 Repeat for the next four stitches. Here’s what it should look like when you’re done with all five:
 Now we’re going to begin the wrap. First, take the working yarn and move it behind the elongated stitches, through the middle of the needles:
 Then slip the five elongated stitches back to the left hand needle, bringing the yarn around the front and through the middle of the two needles again:
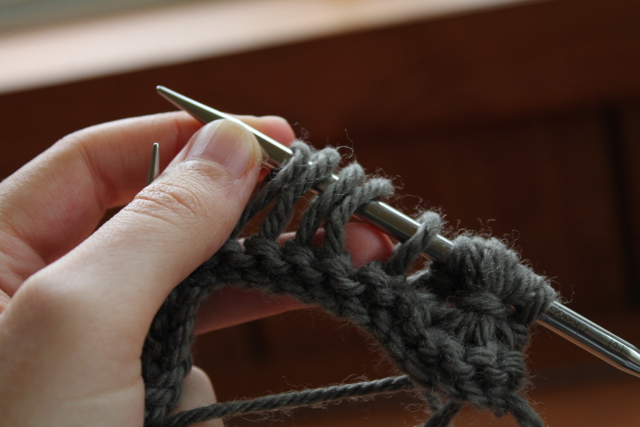
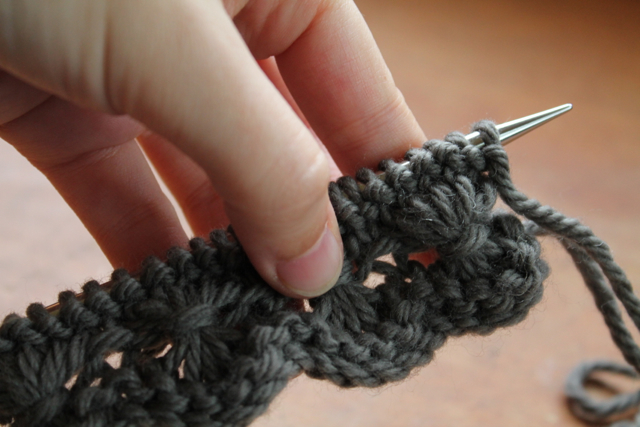
 Repeat these steps by slipping the yarn back to the right hand needle, wrapping the yarn around a second time, and slipping them back to the left hand needle again. When you’re done, you should have two wraps of yarn around the bundle of elongated stitches and it should look like this (pull the wraps snugly so they cinch the sts together):
 Repeat these steps (including the purl stitch between bundles) the whole way across your stitches.
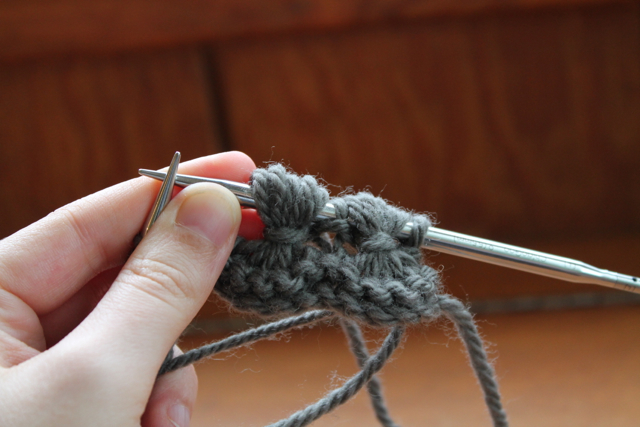
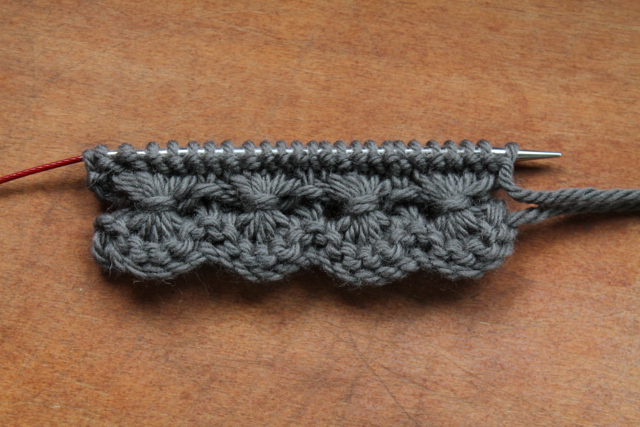
Here’s what the row should look like when you’re done. See how the pattern creates the nice scalloped edge?
 Rounds 4 and 5: These are simple enough: knit one round, then purl one round. Here’s what it looks like when you’re done:
 Notice that the wraps are a little off-center. That’s okay–all you have to do is push them up with your finger (they’ll stay where you put them):
 Voilà: the finished Daisy Pattern!


My, this is so cute ! I have to try that someday ! Your photos are amazingly good too, I never manage to get good photos of my knitting…
Great tutorial, and what a great stitch! I’ve never seen that one before. I’ll now be on the lookout for an opportunity to use it in something.
Lovely clear photo instructions and text. Beautiful stitch too
That’s a great edging – thank you for the tutorial!
Loving the tutorial, thanks for explaining so clearly!